I have made so many of these and I have had numerous requests about how to make one so Merry Christmas!
What you need:
1 yd cotton for the backing of the blanket (sometimes I get just a little over a yard, so I have room to square it up after I line up the flannel and sew it)
Four 1 yard cuts of flannel (you can use different colors or all the same)
A roll of masking or painters tape (you will only be using a few feet)
I have found that my favorite color combination is using 2 colors of flannel. The Chenille is two of the same with a different one in the middle. The middle color is also the one closest to the focus (bck) fabric.
For example layer like this:
Focus (back) cotton fabric, face down,
(^spray baste) then flannel A,
(NO SPRAY BASTE HERE) flannel B,
(^spray baste) flannel A
(^spray baste) flannel B.
Another way to say this:
1st layer is cotton face down
2nd layer is 1st flannel
NO SPRAY BASTE BETWEEN THESE 2 LAYERS
3rd layer is 2nd flannel
4th layer is 3rd flannel
5th layer is the final 4th flannel.
Make sure your flannel is colored all the way through, Cozy solids from JAF are great for this!
½ yd cotton fabric for the binding
Press all fabric before starting but do NOT pre-wash!! I can't stress this enough.
DO NOT PRE-WASH YOUR FABRICS
DO NOT PRE-WASH YOUR FABRICS
***I'm going to edit this right here**
I no longer baste the layers with needle and thread.
I use spray baste.
Lay the focus fabric face down on a flat surface and spray with basting spray.
Lay the first flannel on top and smooth into place.
It is helpful to have someone assist you with this.
When you put the next flannel DO NOT USE THE SPRAY BASTE ON THIS LAYER.
WHY? Because this is the layer you will need to cut to.
Now you will spray baste and add the third piece of flannel.
Smooth into place.
Spray baste after placing the third flannel piece into place.
Add the fourth and last flannel layer and smooth into place.
If you want to baste with needle and thread follow the directions in the next paragraph.
Lay the backing fabric on a large surface face down.
Layer the flannel on top of the backing, right side up.
Smooth each layer before adding the next.
Once all 5 layers are smooth place a long piece of tape diagonally across the quilt.
Using a basting needle and thread baste the layers together.
Baste using a big and then a little stitch and stitch about 3 inches from your last line of basting following the tape line.
(In this picture the blanket is upside down, it's best to put your cotton on the bottom and
layer up the flannel.
I don't have another photo to put here but trust me put your cotton on the bottom and
then the flannels.
You want to be sewing with the cotton closest to the feed dogs)

Now for the fun.
Using your walking foot with the stitch guide attached, stitch along one side of your tape line, then you can remove the tape.
Using your stitch guide to help you continue stitching, on the diagonal 5/8 of an inch from your previously stitched line until the entire quilt has been stitched.

It should look like this when all the lines are stitched.

Using chenille cutting scissors (or a chenille cutter), cut through the top 3 layers.
DO NOT CUT INTO THE 4TH LAVER OF FLANNEL!!
Once all your lines are cut you will need to square up your quilt.
Do NOT square it up until you are done cutting your channels!!
(ask me how I know this, LOL)


Here is how it looks when you are done before you square it up.

To square up the blanket I fold it in half and use the fold line as my straight line guide.
I then trim off each side.
I then fold it in the other direction and do the same thing.
Once that is done, I fold to make sure all the corners line up with each other
and that it really is "square".
I then trim off each side.
I then fold it in the other direction and do the same thing.
Once that is done, I fold to make sure all the corners line up with each other
and that it really is "square".

Now you need to make your binding. I make it using a cotton fabric (not a flannel). I cut 2.5" strips, join strips to make one long strip,fold in half and press.
Attach to the flannel side of the quilt using your sewing machine.
I turn and hand stitch to the back (the cotton side), or machine stitch the binding in place.
I have begun to put labels in my quilts by putting it into the binding or I use a stamp I had made.
Attach to the flannel side of the quilt using your sewing machine.
I turn and hand stitch to the back (the cotton side), or machine stitch the binding in place.
I have begun to put labels in my quilts by putting it into the binding or I use a stamp I had made.


Now is where the fun begins! Wash and dry your blanket to make it "fluff" and ENJOY!!
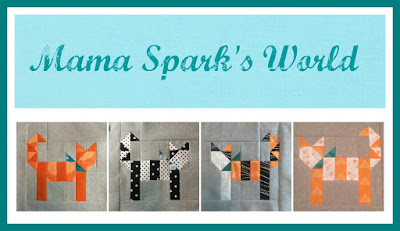
Your finished blanket should look like these:


If you have questions I would love to help you, BUT you need to leave your email address.
You may email me directly if that's easier too.
My email is mamaspark@gmail.com
If you happen to make one I would love to see it.
Please upload it to my Flickr group! I would love to see your creations.
I hope you have enjoyed this tutorial! ~XOP~
Please upload it to my Flickr group! I would love to see your creations.
I hope you have enjoyed this tutorial! ~XOP~

Great idea to NOT cut the layer of flannel that's next to the cotton backing fabric. I made one of these blankets and cut all BUT the backing fabric and the overall effect was just a bit thin, all fluff. Can you imagine it? It was ok but it just wasn't quite right. This fixes it, for next time, that is. Thanks!
ReplyDeleteYes, that's what the instructions say to do!
DeleteShe sees that. She made the comment to show she learned not to cut too many. Unknown
DeleteI have been quilting for many years and just discovered 'rag quilts' - the colors and textures are wonderful. I love your variation and plan to give one a try very soon!
ReplyDeleteGreat tutorial! Thank you...
ReplyDeleteI LOVE your OINK A DOODLE MOO chenille baby blanket with the blocks on the front, so much that I have been searching and grabbing any and all of the prints (hard to find) to have my granddaughter help make one. I don't quilt so off the top of your head do you know what size blocks you cut for it? Help...LOL
ReplyDeleteAlmost all my rag quilt blocks are cut to 8.5 I wouldn't suggest going smaller but then again I dont like the cutting but I have gone bigger up to 10.5
Delete@msbarnlady, you are a no-reply blogger. I sent you a message in your gmail (Google hangouts) about it. I also found some of the fabric you are looking for, in a FB group. 7 FQ for $25 Check your chat in your gmail for details or email me at mamaspark@gmail.com
ReplyDeleteHow do i make this bigger since the fabric is only so big im new to quilting
ReplyDeleteHow do i make this bigger??im new to quilting...
ReplyDeleteEvery weekend i used to go to see this web site, for the reason that i want enjoyment, since this this website conations trly nice funny data too.
ReplyDeleteI think this is the best blog I have been through all this day.
ReplyDeleteThrow Blankets
Ashley Mazer, I am not certain how you can make this bigger. I suppose you would have to sew the fabrics together and lay it out as one gigantic piece of fabric.
ReplyDeleteWhat are chenille-cutting scissors? Are they like regular sewing scissors? If not, where do I get them?
ReplyDeleteErin Stacey, Since this is not a rag quilt things are different. I used a charm pack so the squares are 5". You can do any size of square for the back of the blanket, as long as you are using quilting cottons. Hope that is helpful!
ReplyDeleteUnknown, chenille scissors are different from regular scissors. They are blunt tipped and bent. I bought mine at Joann Fabrics.
ReplyDeleteGoing to ask a stupid question, I’m new to quilting so hang with me. Going through the tutorial why do you cut the flannels as shown in the picture above? Is there a reason?
ReplyDeleteThe cut fabric fluffs up after washing to make a fuzzy chenille effect.
DeleteHere’s a stupid question, just started quilting but why do you cut the flannels a shown in the photo above? Is there a reason?
ReplyDeleteAre the scissors the same as 'pinking'
ReplyDeleteShears?? (Not sure of spelling sorry)
No. Chenille scissors have a blunt tip so it slides into the seen channels without snagging on the fabric.
DeleteWhat are the dimensions of these quilts please ...and...is it possible to make larger??
ReplyDeleteLOVE your post...THANK YOU!!!
This looks like so much fun, I will definitely make one. I had not heard of Chenille scissors but as a nurse I am thinking bandage scissors would be perfect.Sound the same as described.
ReplyDeleteThey would work, but are probably smaller and would be hard on your hand. You could cut a bit every day, and sharpen often....
DeleteWhen you sew the lines, are you sewing them all in one direction, or do you alternate? Do you sew one side of the middle tape first, then the other? Or, do you sew both sides of the middle tape at the same time? I guess I am trying to determine if one method or the other makes the quilt more square. Thanks!
ReplyDeleteMischy, by cutting on the 45 degree angle it helps the flannel to fray to make the chenille.
ReplyDeleteThe scissors are not like pinking shears, more like bandage or bent scissors. the dimensions are whatever you cut the blanket to after you sew it. Since you start with a yard and the width of the fabric is ~42" I would say somewhere at 34 x 40" ISH? sometimes you cut a little more off to square it up and sometimes you don't have to.
ReplyDeleteAs for sewing the lines. I sew down one side of the tape, remove the tape and using my walking foot with the guide set to 5/8" continue to sew lines guiding off that first line. I sew from the middle to one side then middle to the other side. This reduces the bulk within the throat of the machine, as what you stitch on is continually getting less and less (hope that makes sense)
Since you are all anonymous and did not leave your email, i hope you return here to see these answers.
Please leave your email addresses so I can respond to your comments directly. My email is mamaspark@gmail.com
Thank you for the tutorial. I now have anotherquick idea quilt. I'm involved with my church making support quilts for out county's foster kids. My email is gammangel@yahoo.com. take care...Donna
DeleteI don't understand the cutting? either. What do you cut for? Do these layers create the fluff between the others?
ReplyDeleteYes, they do.
DeleteDuh
DeleteThanks for sharing. Great tutorial & quilt!.👍👍
ReplyDeleteKimberly, You are a no reply blogger and didn't leave your email so I will reply here. You cut the channels you have sewn to open up the fabric and this is what makes the chenille. Once you wash and dry the blanket the flat flannel you have cut fuzzes up, thus creating the "chenille" or fuzzy look of the blanket. Please email me if you have any additional questions. mamaspark@gmail.com
ReplyDeleteHey. When you cut the channels do you cut in so far or from one side to the other ?
ReplyDeleteAnonymous: You cut from one side to the other opening up each channel.
ReplyDeleteNancy Louise: Not sure who you are responding to but I did state that the fabric fluff up when it is washed. You are correct that the Chenille scissors have blunt tips but they are also bent at an angle to help with hand fatigue. The bandage scissors are also blunt tipped but not sure if they are bent. Chenille cutters also work well.
ReplyDeleteThis looks great. A video tutorial would be great.
ReplyDeleteThank you for sharing!
ReplyDeleteThank you very much for sharing!!!! I will definitely try making one for my granddaughter!
ReplyDeleteThanks for the pattern and instructions. Mine turned out great.
ReplyDeleteSince I often have scraps left of the flannel, is it possible to lay these together to make one of the layers? If so, should they be stitched together with maybe a zig zag stitch or just butted up to each other? Thanks for the great tutorials. Love making the chenille blankets!!
ReplyDeleteRebecca, you are a no-reply person so I will answer here and hope you read this. I would not suggest using your scraps for this. They might cause the blanket to come apart in a way you do not intend. Maybe save them and make a flannel rag quilt with them. I have used scraps as small as 4" for that. Or maybe piece together a crazy quilt or bib.
ReplyDeleteI love your quilts and tutorial! This will be my very first quilt project. I understood your directions and am so excited to make this. Thank you for sharing your expertise. Unfortunately, my time is limited, but when I complete this project I will share. B.sliger@hotmail.com
ReplyDeleteI love your quilts and tutorial. This will be my first quilt project. Your tutorial was easy to understand and I am excited to make this one of my future projects and will by happy to share pictures when completed. Thank you for sharing your talents.
ReplyDeleteI thought this technique starting about 25 years ago all over the country. We invented tools called Chinese it easy to use for cutting the channels so you can use a rotary cutter which is much easier on your hands and so much faster. Glad to see that someone is still doing the chenille technique. I was teaching how to make vests, jackets, quilts and more with the Chene lie technique..
ReplyDeleteWe are gone for 5 months so I can't try this right away but it will be at the top of my list when we get home. Thanks for sharing. It's a great tutorial.
ReplyDeleteIf you use Printed flannel, you lay the cotton panel right side down and the first layer of flannel right side up. then my question is the next 3 flannel pieces would be put on top of each other - right side up or down?
ReplyDeleteIf you use Printed flannel, you lay the cotton panel right side down and the first layer of flannel right side up. then my question is the next 3 flannel pieces would be put on top of each other - right side up or down?
ReplyDelete1stladyhawk@gmail.com
Hi,
ReplyDeleteThank you for this lovely tutorial. I have a grandbaby boy arriving in either December or January and I would love to have a go at one of these for him. I will let you know how I go if it happens.