Pages

Friday, June 28, 2019

Friday Musings

Can you believe I have not sewn at all this week?? 
 I am feeling pretty anxious with all I need to do and no time to do it. 
I started working 4 10 hour days so I could have Fridays off.  
It puts me home SO much later that by the time dinner is done it's practically time for bed!  
UGH.  
Thank goodness it is staying light longer.

I have some cat pics to share today.  Those crazy boys have been providing some good photo ops.

I caught this as Finny was trying to help himself to some breakfast!


Then it was off to the couch for a snooze.


 I love when Cole gets all long when he is just waking up.  
Zoom in on those talons he has on his front feet!  
He was curling them up and opening them while purring when I snapped this.


When I am gone a lot they both take any opportunity they can to get close to me when I finally settle on the couch.


Well that's all I have for right now.  
We are in the midst of getting ready to go camping this weekend so
I should have more to write about soon.  
We are trying a new campground too.  This one is in Omer, MI . 
Anyone near there? 
Give me a shout out and let me know if there are any quilt shops nearby or if you want to meet up!

~XOP~


Thursday, June 27, 2019

Another Minky Quilt

See, I told you I have been busy, LOL.  
I just have not been able to post anything I have been doing.

A co-worker and his wife had a baby and they needed a quilt for their baby.  
He has been very ill having been born with the inability to digest proteins.  
My friend that let me use her scraps and I work together so when were were brainstorming I said I would use the second quilt I have cut out if she would quilt and bind it.  
I was going to squeeze it in before I left for NC.  
Because, we all know, I had nothing else to do before I left, right??

I did manage to sew it together in one night and bring it to work the day before I was leaving.  
Robin not only quilted and bound it, but she also made an adorable label for the back.

This is the front.  All made of Minky!


She used some of this flannel for the back and bound it in flannel.


Here is the label.


I am totally out of Minky scraps now.  Send more!  5" squares and 9" squares please, all accepted! 
 It was so nice to have such a fun little quilt all cut and ready to sew when the need arose!  

I am currently saving my flannel scraps and cutting them to usable sizes too.  
I see a scrappy flannel baby quilt in my future too.  
You can feel free to send 5" -12" scraps of those too!  LMK if you need my address! = )

What do you do with your Minky scraps or flannel scraps?

~XOP~


Tuesday, June 25, 2019

Minky Baby Quilts

Awhile ago, last summer, I decided I wanted to make a Minky quilt from scraps.  
I asked my friend if she would let me take from her scraps and combined with my own.  
I designed a little quilt and cut out LOADS of Minky.  
I cut out 3 of these quilts!  
I kept 2 and I gave one to my friend who gave me her scrap Minky to play with.  
I thought that a fuzzy front would be so fun AND decided to use a satin for the back!!!  
Talk about sensory overload! 
My niece was expecting at the beginning of June so this one was for her new baby.  
They knew they were having a girl.  
Of the 3 quilts I cut out 1 was def girly and the other 2 were more unisex.

I thought it was so cute.  Not that much to look at but I love it.  
This was before it was quilted.  


 I had my friend that has a long arm do the quilting.


I was going to try to fold the back around for the binding but the quilting went off the edge.
That made it really difficult so I opted to just machine bind it and 
used a wavy stitch to hold the binding in place.


You can see the whole top all quilted up in his photo.


I wanted a special label so decided to embroider a Caticorn.


I used a fusible I could sew to the front, and sewed all the way around.  
I cut an X in the web and turned it right side to, then pressed it to the quilt back. 
I decided to blanket stitch all the way around to secure it to the back. 
 I LOVE how this came out too!!!


Simply purrrrfect!  I think little miss Zoey seems to like it too.


~XOP~


Monday, June 24, 2019

Knights and Dragons

I'm back!  
I have a few things to catch you all up on and one of them is the knight and dragon quilt
 I made for a sweet little boy named Warner.  
His mama is a good friend of my daughter's.  
You may recall the fish quilt I made for their first little boy. 
 It is still one of my favorites that I ever made.

I wanted something a little quicker as 
I have been much busier this year so opted for the knight and dragon quilt.  
The original quilt was just for the strips of fabric to be sewn together, but that seemed so plain. 
 I inserted a paper pieced dragon into the quilt and hung some pennants/flags like you would see around a castle and viola, my version of the knight and dragon quilt!


 I used matching Minky on the back.


I just love how this turned out. 
 So much so that I should buy more of this fabric line!  
Or I guess there are always knight and dragon fabrics out there right?


 I think he liked it too!


This is destined to become a go to baby quilt!

I made a similar one for my great nephew but used a different dragon pattern.

I guess I have used multiple dragon/knight fabric lines to make these!

~XOP~


Thursday, June 20, 2019

Pillow Covers

I showed the pillow covers in the previous post but thought 
I would talk a little about them and show some close up photos too.

I was struggling with what exactly to make.  
I happened to find some amazing trim that was in the clearance section of JAF and thought it would be fun to use that on a gray background.  
I happened to have some sparkly linen that was the perfect background for this!


I did stitching in-between each row of trim and just stitched the trim down.  
Pretty basic.

The next one I found this amazing sheer, rosette fabric.  
I knew as soon as I saw it that it would make a great pillow cover, again without a lot of work.  
I did put it on a lining of plain gray fabric prior to making the pillow cover.  
I used fabric for the back that said "Made with love". 
 I really like how it turned out.


I bought half a yard of the rosette fabric and it was actually enough to get 2 pillow covers out of.  
I have not made the second one yet, but plan to do that and keep it for myself!


This gives you an idea of the size.  If I remember this one was 20".


The other one (that she is holding upside down) is 24"


Then I new that I had to make some that were a little more complex.  
I was thinking that they wanted me to stick with their gray and white theme but she kept showing me pillow covers with lots of teal so I determined that I would add some teal to the next one.  
I love the circle of geese pattern and since I have been honing my FPP skills, 
this pattern now goes MUCH more quickly.

 I didn't think to take process photos so this is the closest I come to those.  
I wanted the geese to be in a gradient and I think it is pretty well a gradient look.


It needed something additional to make it over the top.  
I decided to get some pearl cotton and hand quilt around the geese and then around the whole thing.  
I am not a fast hand quilter.  
This little pillow took me over 3 hours!  
That was using these chunky stitches too.


I have to say that I love the look of it though.  
This is the sandwiched top when I was finished quilting it, before I pressed it.


Here is the whole pillow cover all finished and ready to be stuffed.  This finished at 18".


I had been working on an embroidery for some time off and on.  
I was not sure what I would actually do with it once done except knew it would go to my daughter, the fisheries biologist.  
I scrambled to get it finished and make it into a pillow cover. 
 This is the finished embroidery prior to doing anything else with it.  
I LOVE this so much!!


Next up was to find some fabric to border the embroidery with.  
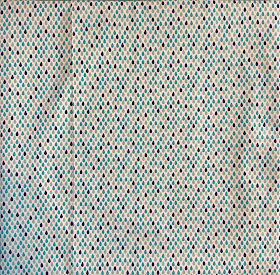
I had this cool raindrop fabric in my stash and it was perfect.  
This is actually the back of the cover too (in this photo)


I struggled to decide how to quilt the top but settled on circles.  
It's like when a drop falls into water it makes rings.  
I decided I would use that theme for the pillow cover too.  
I then added some hand quilting around the embroidery to help it stand out.  
I used a variegated floss for this.  


This is a photo of the finished  pillow cover front.


It was my favorite of all 4 of the pillows.  This also finished at 18".


Side by side finished covers.


I think she loved this.  Look at her friend, Amy's face in this photo.  I love that girl too.


They seemed pretty pleased with these.


Now I flew down to NC so how to get the pillow forms there?  
I was not certain I could buy the sizes I wanted while there so I went on the JAF website and ordered the sizes I needed and had them sent to her house with my name on the box.  
I told her not to open the box.  
When I arrived I put the covers on the pillows.

I had bought some blue fish fabric and wanted to make one more cover, but feared I was out of time.  As it turned out, I packed more quickly than I thought I would and had a bit of time. 
 I decided to whip up the last cover (the night before I was flying out), 
sadly it would not have a pillow form.

I used a light gray stripe for front and back then the fish fabric for the bow.  
I have to send a form there this week so they can fill the cover with a pillow.


All and all I am super happy with how all of these came out.  
I might do a few things differently in the future of pillow cover making but I really like all of these.

~XOP~


Wednesday, June 19, 2019

NC Trip Part 2: Bridal Shower

We went into Brevard and walked around as the shower was not until 5pm.  
I got a good photo of the kids with Nick's nana before we left for the shower.
We stayed with her while we were in Brevard.


The shower was held at a friend of Nick's moms farm.  
They had build a barn for a wedding reception for their son and 
told Julie (Nick's mom) they could use it for the shower.  
Nick's mom had LOTS of wonderful friends that helped her put on the shower.  
The venue was perfect and so was the weather.  
This is a 360 of the venue.


Bride to be and groom to be


Gift table


 Dessert table


The fresh flowers were to die for!


Chicken from Zaxbys


Did I mention we had live blue grass music for the beginning of the shower!?!
Friends of Julie's.
They did an amazing job and it was so fun having live music!


Kelsey with her matron on honor.
Notice her belt?
I made that 2 nights before the shower.
I sat at her kitchen table sewing by hand.
It looked amazing with her dress, like it came with the dress.


A quick smooch.


Gift time.  Here are 2 of the pillows I made for them.  I will share more of these later.


Here are 2 more that I made for them.


The cows were VERY interested in the photos.


Amy did an amazing job on the bow "bouquet"  She will be carrying this at the rehearsal.


I think Nick looks like a model in this photo!


Packing up to go.


After the party we went to the local brewery, Oskar Blue, for a drink.  


It was the BEST day.
I was so grateful to Nick's family for showering them so generously!

Thanks for everything Julie and Rick (and friends).
Can't wait for the wedding!

~XOP~