
The day you have all been waiting for (or at least some of you).
I am posting Cheddar Jack and the step out photos of how to make the block.
I hope you love him as much as I do. If you use him please link back to this page and give credit.
This pattern is for personal use only.
Copyright to myself and Kim Hamilton.
If you make something using the block please use the #CheddarJackCat
This pattern is for personal use only.
Copyright to myself and Kim Hamilton.
If you make something using the block please use the #CheddarJackCat
If this comes out too small (I can't get Blogger to let me resize with out bleeding into my borders) here is a link that should take you to the pattern too,
CHEDDAR JACK

(Edited to change the width and length headers)
I hope this is clear! I am now going to show you how to assemble your block.
The thick black lines in the photo above show how to assemble the units also.
This is very photo heavy!
Cut out all your pieces and lay them out.

I make all my HSTs first.
Draw a line down the center on one side of each pair and sew 1/4" on either side of that line.

Cut your HST apart on the drawn line.
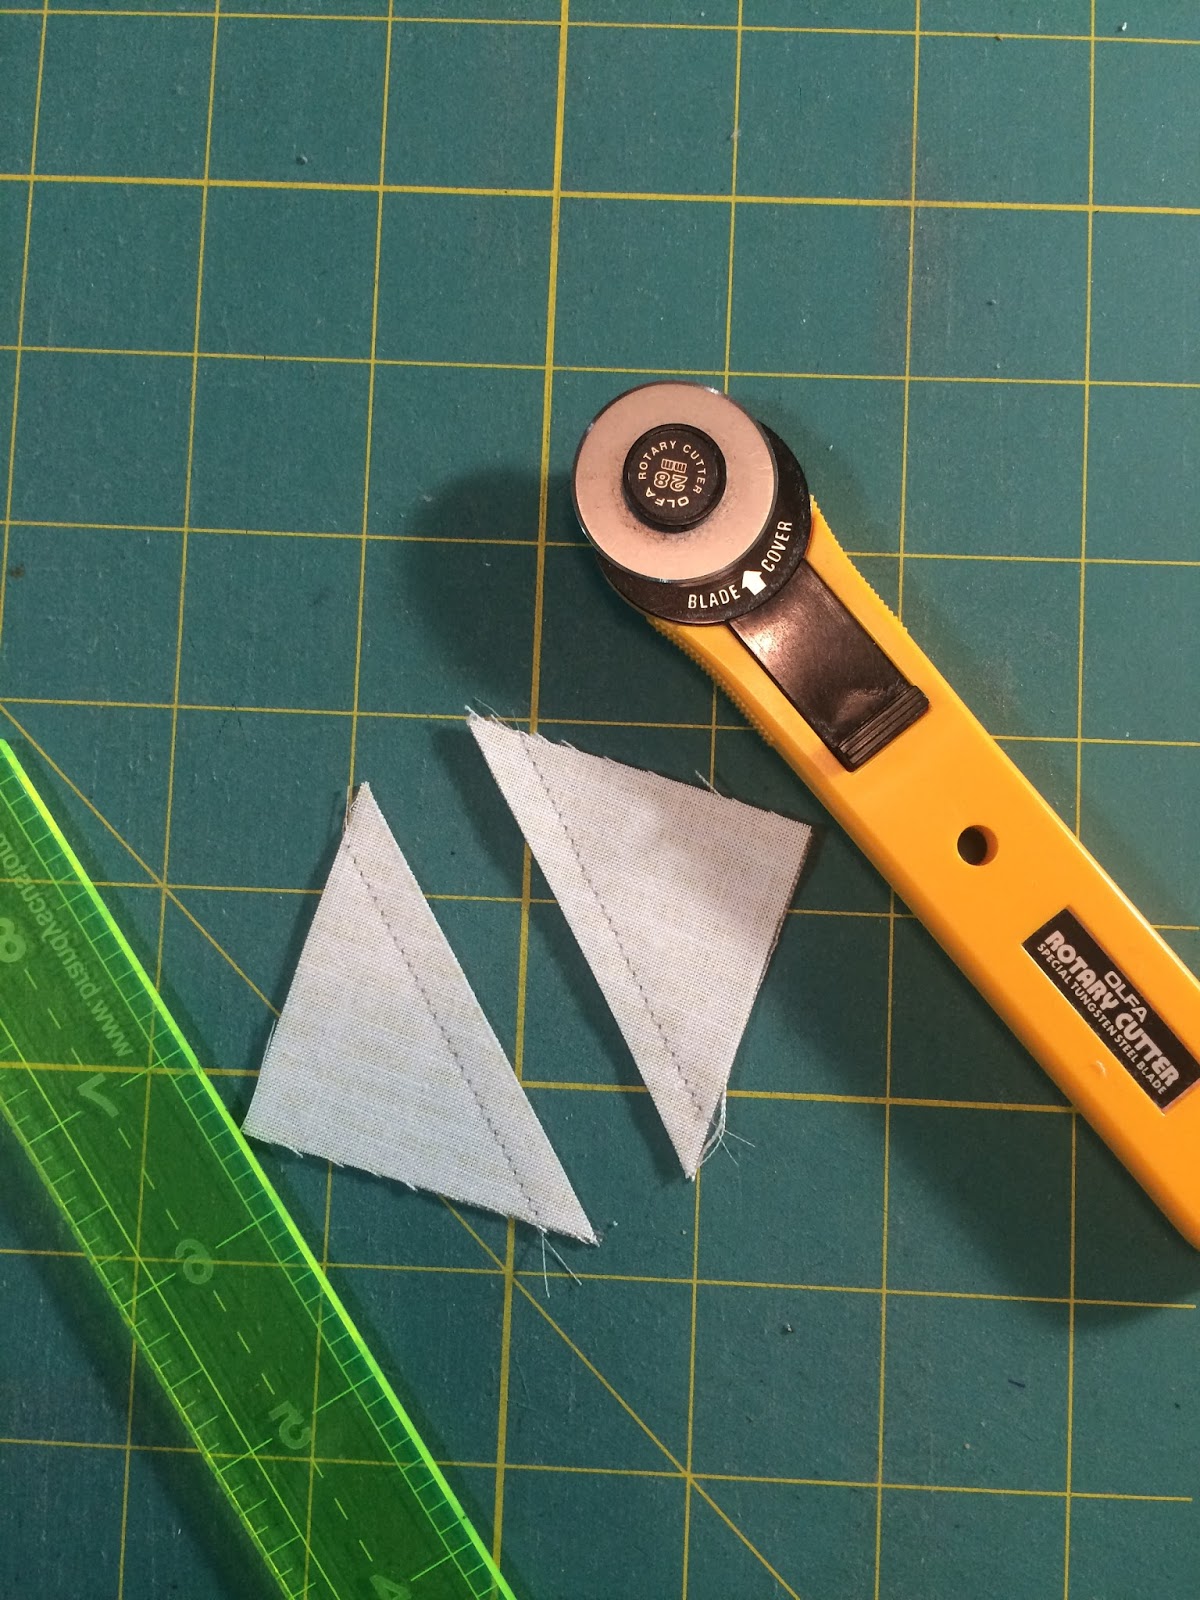
Press your HST units.
I found that I ended up repressing a few in order to nest the seams during assembly but don't worry about that, it's easy enough to do when you get there.

Trim all the HST units to 1.5" square.
You will have some extra units that we will not use in this block.

Here are my units all trimmed and ready for assembling the block

I like to lay out each section of the block.
This is the head section.
**Please note that I changed the pattern so the 2 gray pieces on the right top
and middle are now one unit.**

This is the body section.
**Please note that I changed the pattern again (after I made this)
and the bottom gray 2 pieces are now one piece.**

This is the tail section. Hurrah no changes!

Here is the entire block laid out prior to my sewing him together.

For the head section, sew your HST pairs together and sew unit L to Unit F.

I pressed the seams open for the rest of the entire block to reduce the bulk.

Sew your HST to each other to form the head, then sew unit E to the head

Sew the head unit to the front leg unit.

The head section is now finished!

For the middle section sew G to the HST bow section.
Sew I to M and then to the other I unit in the center of the body.
Sew the top to unit to the striped body and then to F to form the center portion of the block.

Sew the middle to section to the head section then sew D to this.

It will look like this.

For the tail section, sew your HST tip of the tail units together,
sew this to C to form the top of the tail.
For the center of the tail, sew your HST units to each other and then to C.
Sew these two sections together to form the upper part of the tail section.
For the bottom sew the remaining HST to E then sew this unit to K.

Now sew the top and bottom halves together to form the back end of Jack.

Sew the back end of Jack to the body you have already sewn to complete the cat.

It should look like this.

Sew unit B to the bottom of the block.

Sew unit A to the side. You have completed your Cheddar Jack block!!! He is so cute!!

Kim and I want to thank you all for your patience while she drafted the pattern
and while I did the step outs for photos.
She based cheddar Jack off of an antique block and we wanted to make sure you all knew it was in the public domain, which is why we decided to share this for free.

Please link back to this page and give credit though if you do use our directions for assembly!
Enjoy our free pattern.
If you are on Instagram pop over to visit Kim @Canfieldlady and thank her
I actually got to meet her, in real life, this past week.
I am linking up to Finish It Up Friday as we finally finished this pattern!
I am linking up to Finish It Up Friday as we finally finished this pattern!
If you have any questions please let me know.
~XOP~


19 comments:
Thanks a bunch Pam.
YAY!! I can't wait to make a bunch of these
This is so cute! Thanks for sharing with us!
Masterfully done! Thank you! XO
Oh my goodness how cute. I want to make one!
I would love to try this one! Thanks!
LOVE this pattern. I made some today. I made sure they knew to find the pattern/tutorial here. You can read about it here.
http://new2quilting.blogspot.com/2017/01/rsc17-cheddar-jack-cats-from-mama.html
The directions are clear, but the cutting sizes are blurred and unreadable. Can you show them more clearly? They could be tiny, if legible....
Thank you ... :) Pat
Thank you so much for this adorable pattern.
Thank you sooo much for kitty block pattern! I really appreciate your generosity!!!
How cute! I love cats but have yet to do a quilt block of one. How do I go about enlarging the image? I find it difficult to read.
https://nimbleneedles.blogspot.com/
Val I can't seem to find an email address for you! If you click on the image it should enlarge and then you may be able to increase the size on your computer. Hope that helps. Also, you should put your email when you comment, or list it on your blog or change it so that when you comment your email comes from you not "no reply blogger" so others can email you directly. ~Pamx
Hello, again! I've tried opening it and still can't get it large enough to see it... I've included my email this time. :)
Val your email is not showing up, you still appear as a no-reply blogger. Please send me an email directly and I will attach the pattern for you = )
Thank you again for your adorable pattern. I completed my first Cheddar Jack square today. He's not purrfect, but he sure is cute! :)
https://nimbleneedles.blogspot.com/
Can't figure out where H goes???
Figured it out. Just had to refer to the chart. Not having H mentioned in the instructions on sewing together threw me for a sec. Very cute block.
Post a Comment
Your comments make my day so much more special. Please, I invite you to share what you think. ~Happy Stitching~