Friday, January 25, 2019

CTC Sew-a-Long Link Up

I managed to eek out one more of the Countdown to Christmas blocks last night. 
 It went together pretty quickly.  

I am using fabric called Nordic Holiday. 
 It is an older line but oh so pretty. 
The white is my FAVORITE, Lizzy House Pearl Bracelets.

All of the blocks may be found on the Moda Bake Shop website.  
You should go to their search and put in Countdown to Christmas.
 The blocks are done as individual posts so you will find them listed that way. 
 I didn't look for a post with them all combined but that may be there too.

This is block number 3.


I had a helper last night too.


So I am going to put up a link and you can link up your finished blocks for the month of January 
right here!

I will leave this link open until midnight EST on January 31, 2019.

Spread the word!
Be sure when you do that you link back to this post to help spread the word too, please!

~XOP~


Inlinkz Link Party

Wednesday, January 23, 2019

Want to Join Me?

I discovered the Countdown To Christmas BOM on the Moda Bake Shop too late for 2018.
I love the idea and loved the blocks so I approached some friends to see if they would be interested to do this with me by making 2-3 blocks per month. 
We could have our quilt done by Christmas 2019.  
They said YES!  
So we are choosing fabric and starting to make our blocks.  
You can find the blocks on the Moda Bake Shop website.  

You can find the start of the blocks here.  
I am making mine in aquas and whites.  

Here are the first two blocks.  


I did not have any trouble with this block.  It was pretty straight forward.


You can find block 2 here.  This block was a little challenging.  There are Y seams involved.


We are using the #mamasparkCTCsewalong on social media, if you want to post your blocks.

I would LOVE to have you join in the fun!

There are 6" and 12" blocks in the patterns.
I am making the 12" blocks for now.
I will probably want to add a few more to make the quilt larger.
There was a CDTC 2017 that has some cute blocks so I may be adding some of those too.

I hope you can join us. 
Wouldn't it be fun to have a quilt for yourself or a friend by Christmas this year?
If you sew along with us you should be able to do that!

I will set up a link up and you can post your blocks in that next month.

~XOP~


Tuesday, January 22, 2019

Sewing, Sewing Sewing

I decided that I needed to get my bee blocks for January finished so worked on those this weekend.
I really enjoyed making these blocks and found that the pattern went together very easily.


I love the meandering black fabric.  
It is an old Denise Schmidt fabric. 
It looks really cool in this block.  
These were paper pieced from a free pattern at Whole Circle Studio
These will be the last of my bee blocks for awhile.
I am stepping away from the bee for the time being.
I am working on some blocks "bee style" with my friends at work.
More on that later.


I have been steadily sewing baby burp cloths using up left over flannel from quilt backs.  
I finally had enough of them to list them in my ETSY shop.  
If you need some for gifts please go take a look.  
There are LOADS to choose from.  
I will be making more as I have more flannel available.

Here are a few examples:  

Some have rick rack around them and some are plain.


I loved these fighter jets!


I had them all stacked up on my coffee table when little Sir decided he needed to "claim" them!


I hope you will find something you love if you go and check them out.  
They make wonderful shower gifts and 
there are different ones in addition to the ones you see here too.

Have a wonderful day!

~XOP~


Friday, January 18, 2019

My Continued Adventures With Pea Fowl

My eldest daughter raises pea fowl.  She has been working toward getting a specific color for a long time and finally got that one elusive bird this spring in Artemis.  
I hope I get this correct, she is a purple, black shoulder pied female pea hen. 
 PHEW!  
She was being picked on in the barn and got ill so daughter took her to the peacock vet 
(yes there is such a thing)
They fixed her up but while being treated she had to stay in the house.  
Now it is COLD in MI and Artemis has not been outside long enough to develop her winter feathers so she will be staying inside for the winter.  
As you can imagine this presents some issues, especially bathroom issues.  
So...mom and her diaper making skills to the rescue!  
This is not my first time either.

I have made them for Gizmo, Beep and Stan in the past.  
Gizmo and Beep have passed and Stan lives in the barn.  
I know she really misses Gizmo and Beep so I won't be surprised if she keeps Artemis in the house.  She cleaned out Beep's bedroom so things are trending toward that.  
She has not been able to make herself clean out that room since we lost Beep.  
You can read about that here if you are interested. 
 If you want to read about Gizmo you can do so here.  
There are many stories about them in addition to these if you search my blog. 
I digress.  

Last night she came over and brought Artemis.  
She is a beautiful bird and very well behaved (unlike Beep).  
She doesn't try to peck you in the eye or eat your shiny bits and bobs.  
She even knows her name!


So the mission last night was to make a new diaper.  
My daughter chose a Philip Jacobs print and I set to work.  
(pretty proud that I centered those swirls on both sides)

I had a pattern I made last time I made a diaper for Beep so used that as a guide.  
Each bird is particular, like we are, so each diaper must be made to fit that bird.  
I made the pouch part pretty easily with a few adjustments then we had to try it on her to make sure where all the straps would connect.  
Artemis was a trooper with the on again off again nonsense.

This is the finished diaper.  
A plastic bag gets placed in the pouch and the pouch covers the cloaca to catch the waste.  
We started using velcro and that was MUCH easier then the safety pins she used to use with Gizmo.


This is my daughter putting it on her.


You can see the back part here.


The pouch connects to the back as does the harness that goes over her head and around her chest.
The harness is sewn to the back part, while the pouch straps connect with Velcro.


Everything fit well and they were ready to head home.


Exciting times at my house last night!  
I am hoping to settle down and work on my baby quilt commitments tonight or at least this weekend.

Do you have any exciting plans for the weekend?

~XOP~


Monday, January 14, 2019

How To Make A Crib Sheet

If you google this you will find LOTS of different ways to do this.  
My way was the easiest way for me and I thought I would share.  
I suspect once you make your own you will never buy one again!  
I used flannel for mine, but you certainly could use a woven.  

Materials needed for one crib sheet:

-2 yards of flannel
-80 Inches of 1/4" elastic
-Thread
-A ruler that can do an 8.5" square
-Rotary cutter and mat
-Iron and sewing machine

***Very important: Do NOT remove the selvage edge of your fabric!***

First things first, I like to even up the edges on both ends of the fabric.  
Just like you would if you were straightening them to cut for a quilt. 
 You may leave the fabric folded as it comes off the bolt (in half width wise).  
Then use your mat or a tape measure to make sure your length is ~68". 
 Once you have that done, fold the fabric length in half bringing the ends you just cut together.  
This is where you want them so you can cut all for corners at the same time.

You can see here how I am bringing the cut edges together with the width fold at the top 
and the selvages at the bottom.


Align the folds at the top, the cut edges t the side and the selvages at the bottom.  
Now place your ruler so you have an 8.5" square to cut.  
This will cut all for corners at the same time.  
Cut along both sides of the ruler to remove a 8.5" square.


 This shows one end of the entire sheet.  
I don't have a place big enough to show both ends but the other one looks just like this one.


Next up is sewing to make the corners.  
I like using French seams so that the raw edge is enclosed.
to do that you will bring the edges of the square you just cut 
(One corner at a time) 
wrong sides together.  

Yes you read that correctly, wrong sides together.  
Pin and sew 1/8" seam.  
I like to start in the corner and sew to the selvage edge.


 Once that is sewn on all 4 corners, turn so right sides are together and give each line a press.  


   Sew 1/4" seam (thus encasing the seam you sewed first) for each corner.


 I usually give it a press when I open it up.


Voila!  Your 4 corners are all made and you have no raw edges exposed!  The inside will look something like this.


The outside corners should look like this.


The last bits are super easy. 
You will be making the casing for the elastic now.   
Fold and press, a scant 1/4" edge all the way around the raw (selvage) edge of the sheet.  


 Try to make sure the seams from the corners all go in the same direction.  
This will make the elastic insertion easier later on.


Next you will fold over and press, a scant 1/2" to finish forming the casing.


It's now time to sew your casing.  
You will need to leave a little bit of space open to insert the elastic. 
 I put pins to know where I will start and stop.


 I will begin sewing right along the edge just before my first pin 
(which I remove so I don't sew over it)


You can see here how close to the folded edge I sew this.
Like when you topstitch.


Continue to sew all the way around paying attention the the direction the corner seams are.  
Make sure they all go the same way!  
I like mine to have the edges (rather than the fold) go into the needle first.  

Measure out ~80" of your 1/4" elastic.


Attach a safety pin to one end of your elastic and close the pin.


This is where the direction your corner seams go will make a difference.  
As I said I had the loose part of the corner seam going toward the needle as I was pressing the casing and then sewing the casing. 
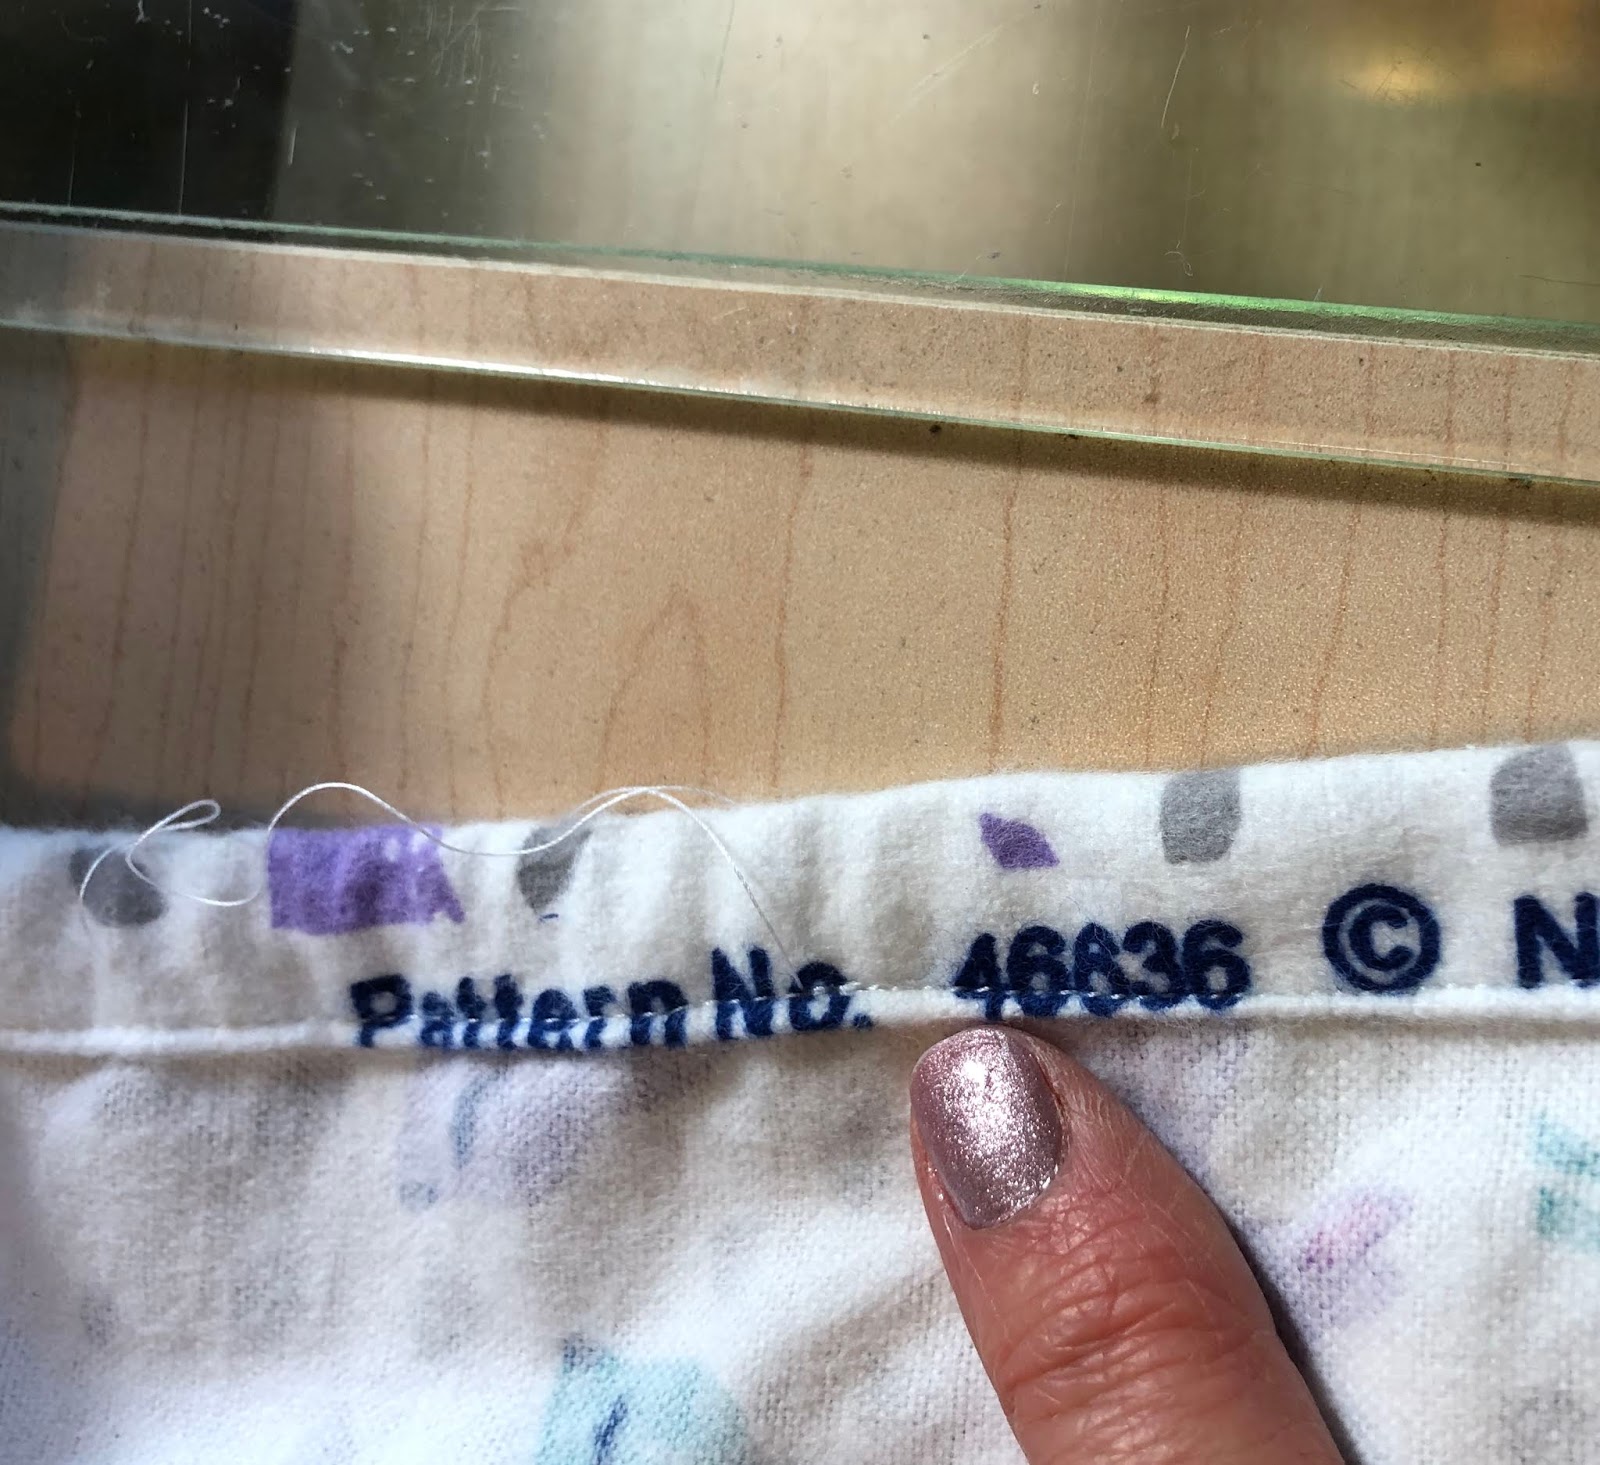
 I am right handed so I find inserting the elastic as shown in the photo and 
moving the pin to my left works the best for me.  
As you can see in the photo below (by my finger) the pin will pass over the corner seam.  
If I had pressed it the other way the pin would head directly into the seam and get stuck! 
 You *can* work it through but it is much tougher on your hands to do that.  
So, if you set it up this way you won't have to worry about it!  
If you thread your elastic the other direction then you would do the seams the opposite way.  

Next you work the elastic all the way around the sheet.  
Be sure to pin the elastic tail to the sheet 
so as you work the gathers around you don't end up pulling the elastic into your sheet!  


The goal is to have the two ends of the elastic meet 
so you can sew them together and complete the circle.  
You can see I have my tow ends at the opening and ready to sew together.


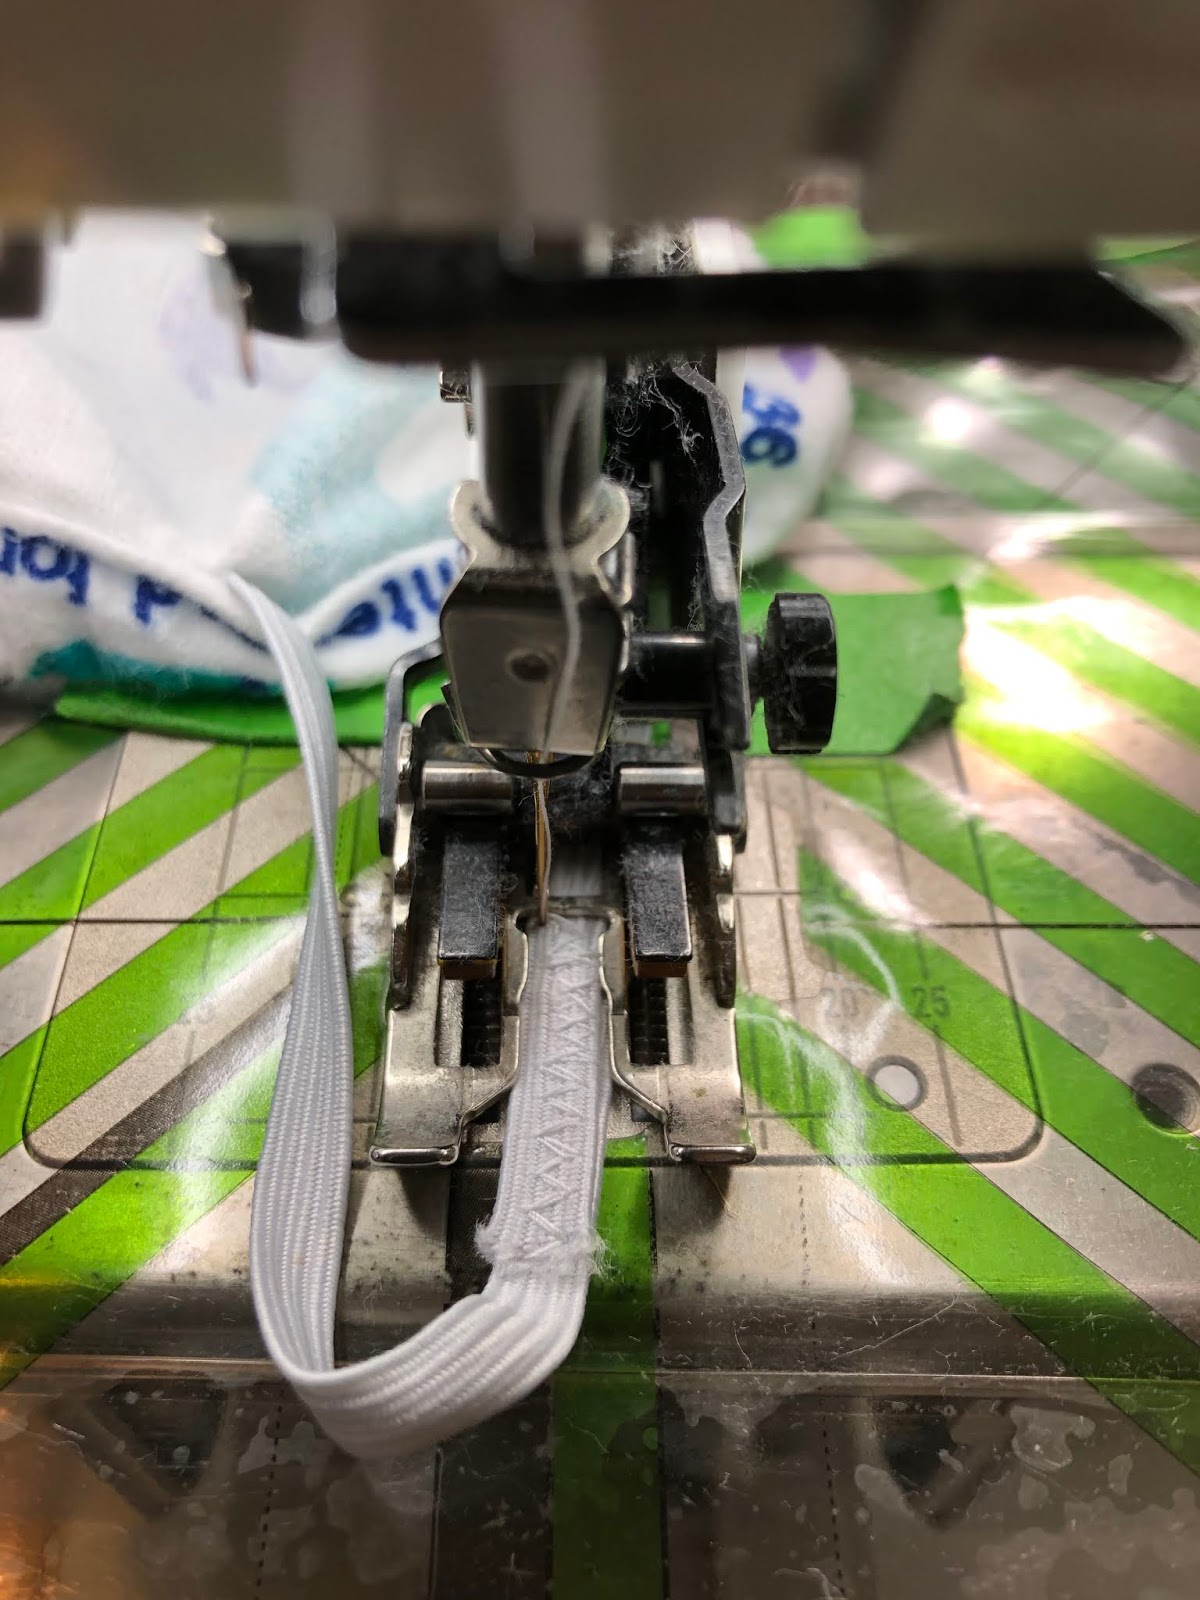
I sew the two ends together using a zig zag stitch, with about a half inch overlap.  
I go over this 3-4 times so the elastic won't come apart in the wash.  
Almost finished now!


After sewing the elastic ends together let them slip into the casing and sew the casing shut. 
This completes the casing.
Now just redistribute the gathers and guess what?


YOU, my friend, just made your very first crib sheet!!! 
 TA-DA!!!  
You are amazing!  
Friends and family will be so impressed.  
The flannels you can get for this are so much cuter than the ones you can buy pre-made.


I hope you have enjoyed my tutorial for making a crib sheet. 
 I tried to make my directions clear. 
If you have any questions at all, please email me at mamaspark@gmail.com 
I will do my best to answer them.

ENJOY ~XOP~


Friday, January 11, 2019

Sparty On

I wanted to make a Sparty quilt for our camper. 
 I thought it would be so cool to have one for fall camping when we are watching the games. 
 I had a vision of making a patchwork background with a giant Sparty head on the top of it. 
That's where it stalled out.  
I needed a giant Spartan helmet.  
My friend, Carol, supplied the pattern for one she traced off her flag/banner. 
PERFECT.  

I set to work making my patchwork blocks while we were camping this year
 then put the helmet on later. 

 I gave it to my friend Liz, to quilt for me.  
I found an amazing quilting pattern that said 
"Sparty On" and on the O was the crest of the Spartan helmet! 
I wanted the helmet outlined though and guess what?  
She did that for me too!!!

I am so very happy with how it turned out. 
 I backed it in Spartan flannel that has a dark gray background and it is perfect!


Look at that helmet quilting!  Amazing!!!


You can see the Sparty On quilting in this one.


I can't wait to use this quilt in the fall.  
Just another way to add to the Spartan theme we have going in our camper! 
 My SIL had an amazing floor mat for outside that she gifted me that looks a lot like this quilt, 
without the patchwork, that we put out when we camp (when it's allowed).

Have a great weekend everyone! 
 I will be finishing putting away the last of my Christmas decorations and cleaning the house.  
Woo hoo!!

~XOP~