Wednesday, October 19, 2016

WIPS With Friends

So I have soooo much to say but not much time this morning. 
 I want to tell you all about my trip to the Finger Lakes in NY 
but that is going to have to wait for a few days.  Today is for WIPs With Friends day, YAY!

I have to say that I am making a snail's amount of progress on the Hallowedding things 
(including the quilt).  
I have made some progress on other parts of the Hallowedding prep.

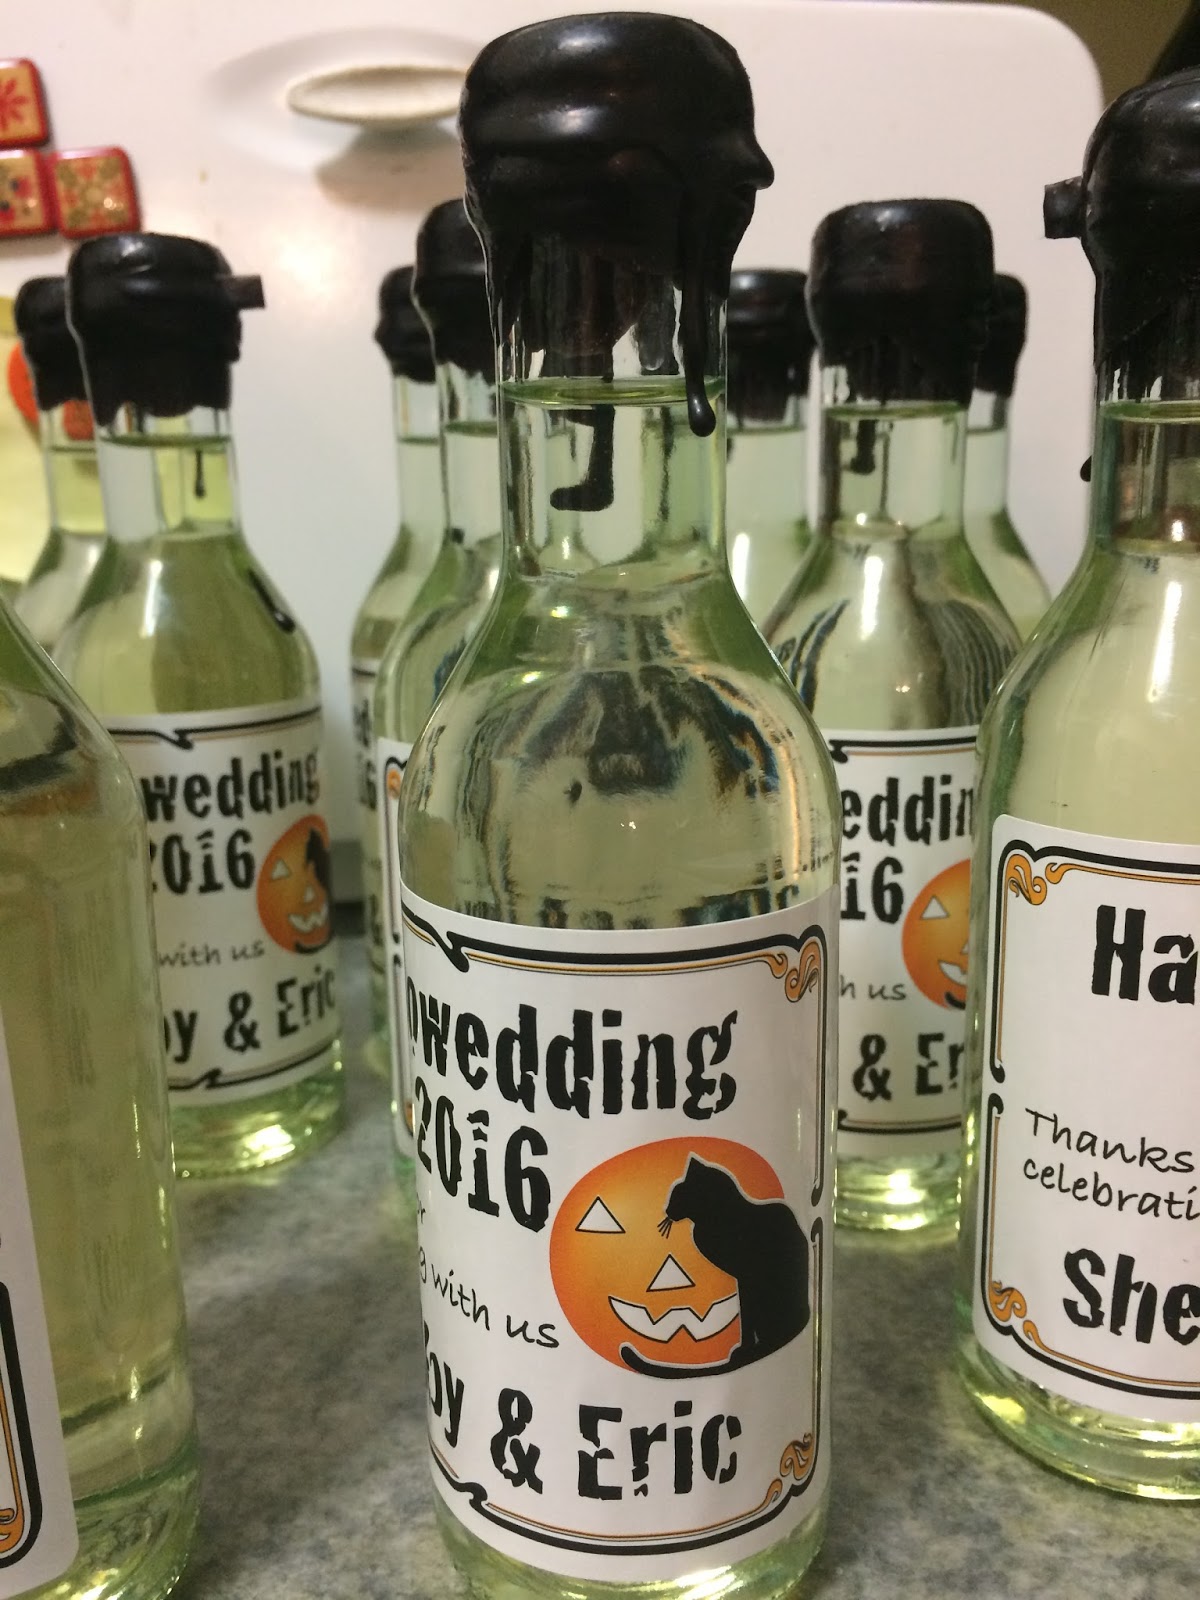
We are using wine in mini bottles as wedding favors.  
My friend, Robin, designed the labels for the bottles.  
That meant I had to soak the labels off of 100 bottles of wine, sigh. 
 I re-labeled some of the bottles and
figured out that I hated the blue cap with the new, very chic, Hallowedding wine labels.


What to do, what to do?  I wanted them black.  Paint? Nooooo wax!!  How do I do that??  
How will people open the bottles? Google to the rescue.  
I found out that I needed 1/4" strapping tape 
to wrap around the cap prior to dipping the caps into wax. 
 I found and ordered the tape and the black wax pellets before I left for NY.  
You can see the tape around the tops in the picture above.

Last night I decided was the night to try my little craft project. 
 I did not want to ruin a pan so I bought a pot pie pan. 
 I poured some of the pellets into the pan and put in in a pot of water 
(like a homemade double boiler)
 and melted the wax.

This is what the pellets looked like before melting.


And here they are in the disposable pan all melted. 
 I used a wooden chopstick that I had to stir the pellets until they all melted.  
It was a little tricky as my wax pan was smaller than the water pan. 
 If I pushed too hard the wax pan could dip and water get into the wax.  
I used the chopstick to scoot it so the lip of the wax pan was over the water pan on the side closest to me and then stirred.  


Now came the fun part, dipping the caps! 
 I did just that.  
Inverted the bottle and pushed the top into the wax and turned it until the cap was covered 
(I had to pay attention to the direction so the tape tab got covered too).  
Then I tipped the bottle to let the excess drip off the tape, 
thus ensuring that the tape was covered in wax too.  
It only took a few seconds for the wax to set enough that it was not a drippy mess and I put the bottle upright on waxed paper (JIC).  
There was a little dripping down the bottle on some but 
I kinda thought that added to the effect I was going for. 
 I dipped 100 bottles last night and it took me a about 1 1/2 hours.  
I know you are dying to see what they looked like finished right?


I thought they turned out so great!!  Here is an entire case all finished.


Lest you think I have forgotten the Hallowedding quilt, I have not. 
 I did finish another block.  
I wanted to take the original art work of Michele Warner, who did the costumed Raven for the wedding invitation and make it into one of the blocks for the quilt. 
 It was not quite as easy as you might have imagined (or maybe I am not as talented as all that).

Here is what I came up with. 
 I enlarged the bird and then traced his body using my light box, onto fusible.


I then fused him onto my background 
(I chose spider webs because on the upper left of the invite there is a big ole spider web.)  
Then I drew some tail spines with a Frixion pen and went to town stitching feathers. 
 I also stitched his crown using thread and fm scribbling,


The eyes of the feathers were a little trickier. 
 I wanted a clean look so I appliqued these onto the feathers and then 
stitched around each of the three fabrics using free motion stitching.  


I wish this showed up a little better but I scribble stitched the raven incorporating blue threads to give that typical blue black sheen you see in these birds.  
First I just free motion stitched the eye but you couldn't really see it so I appliqued a piece of gray fabric and they stitched to fill it in a little.  
At least this way you can tell he *has* an eye!  
The crown is free motion stitched as well.  

Straight stitch and then a circular scribble to fill in the circles on top.


The bad part is that the feathers really, REALLY scrunched the fabric up. 
Also, very tempting to iron but then all your drawn lines would disappear, cuz Frixion pen.
 When I did the names I found this to happen so used interfacing, 
but it really did not help as much as I had hoped.
  I think maybe heavier interfacing may have been a better idea, but live and learn.  
After all that hard work, I was determined to make this work. 
So I pressed the he** out of it using steam and spray starch, LOL. 
 It was a little wonky but I was able to trim it . 
 I was smart enough to make the length long enough to get the final length I needed 
but I goofed up on the width.  
I will have to see where this fits in the quilt and adjust from there with "coping strips".  
I only needed 1/2" more to make the whole thing 12.5" x 12.5"
 so may end up cutting it down to 9.5" x 12.5".  

Whew that is a lot! 
 I will link up with Let's Bee Social but I want you to link up here and 
tell us all what YOU have been working on too!  
You should know the drill by now.  
Click on the blue "inlinkz" button to add your link.  
If you are only on Instagram use the #wipswithfriends.

~XOP~


Now it's your turn to link up your finishes here. 
 Remember that if you do post in the link up here
 you should post a link back to this post on your own blog too.

So now it's your turn to share what you are working on.  
Please use the linky to link up and share that you linked up to WIPs With Friends on your blog too.  If using Instagram please use the hashtag
#wipswithfriends.  
We can't wait to see what you are working on!
Use the blue Inllinkz button to link up and spread the word by linking back to this post!




Monday, October 17, 2016

Cheddar Jack Block Pattern Release

The day you have all been waiting for (or at least some of you). 
 I am posting Cheddar Jack and the step out photos of how to make the block. 
 I hope you love him as much as I do.  If you use him please link back to this page and give credit.
This pattern is for personal use only.
Copyright to myself and Kim Hamilton.

If you make something using the block please use the #CheddarJackCat

If this comes out too small (I can't get Blogger to let me resize with out bleeding into my borders) here is a link that should take you to the pattern too, 

CHEDDAR JACK

(Edited to change the width and length headers)

I hope this is clear!  I am now going to show you how to assemble your block.  
The thick black lines in the photo above show how to assemble the units also.  

This is very photo heavy!  

Cut out all your pieces and lay them out.


I make all my HSTs first.  
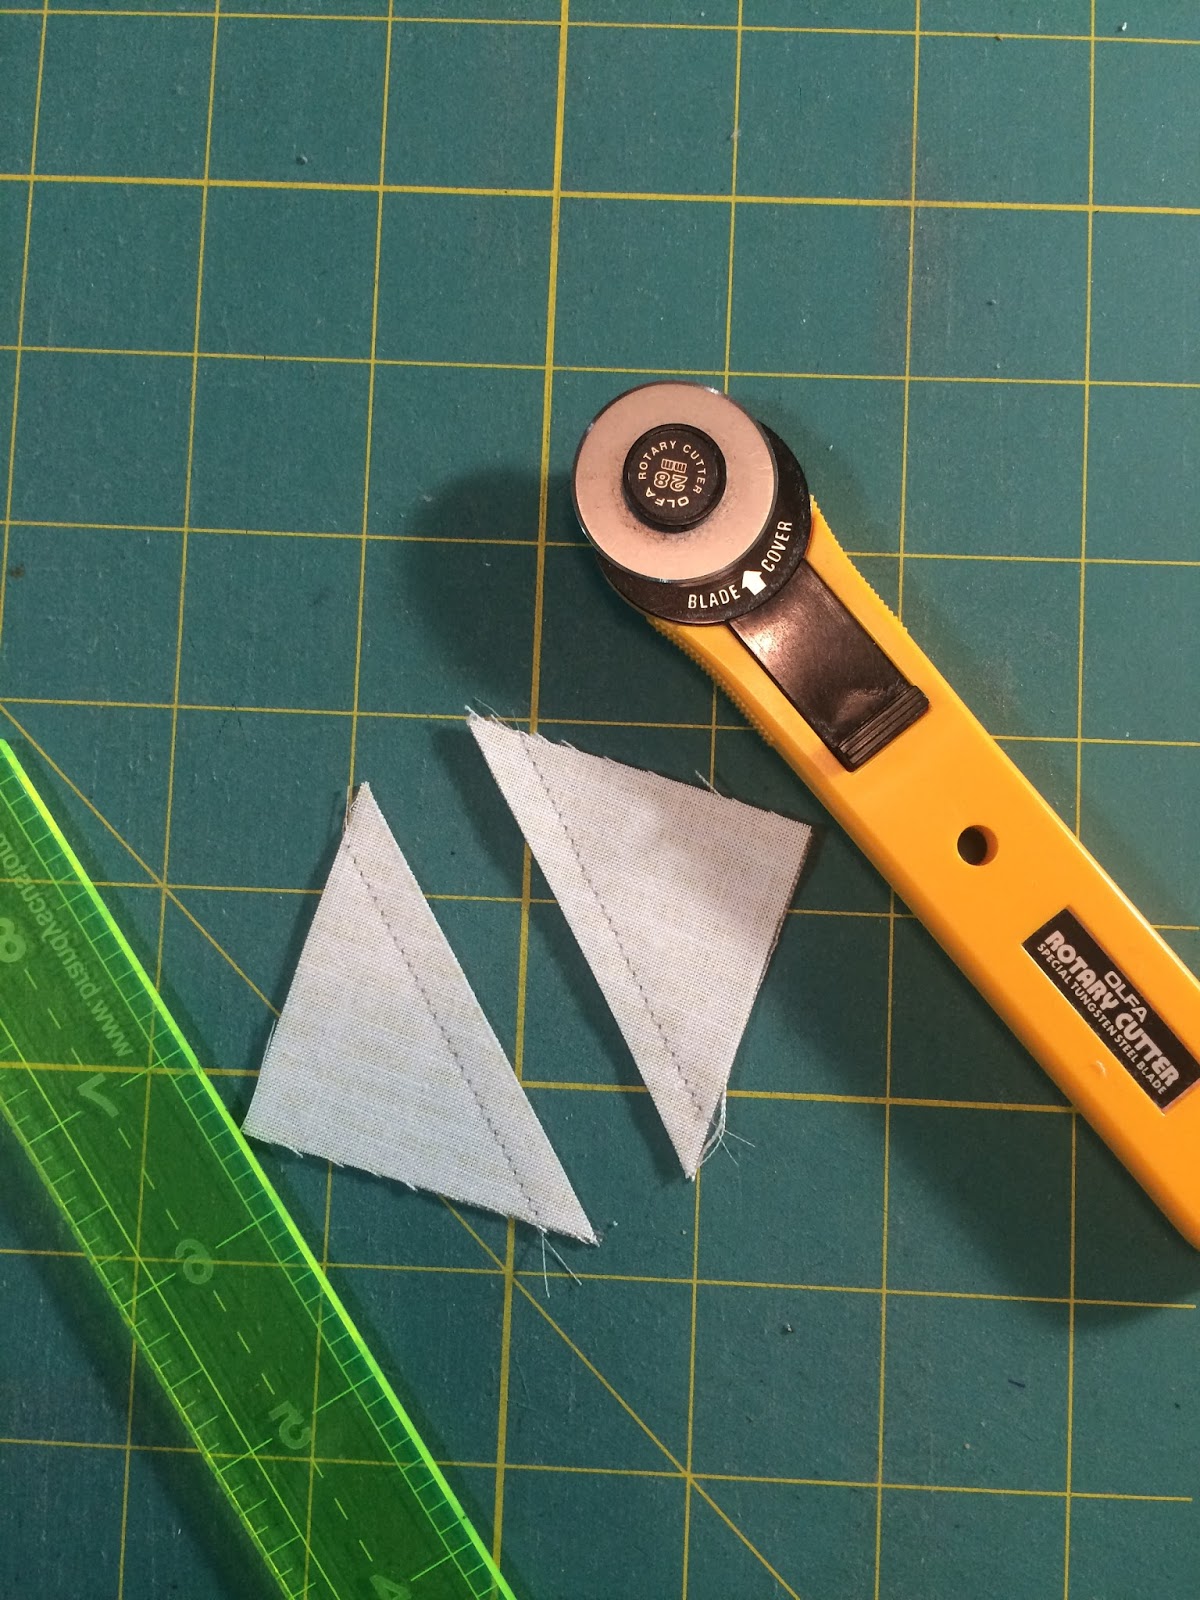
Draw a line down the center on one side of each pair and sew 1/4" on either side of that line.


Cut your HST apart on the drawn line.


Press your HST units.  
I found that I ended up repressing a few in order to nest the seams during assembly but don't worry about that, it's easy enough to do when you get there.


Trim all the HST units to 1.5" square.  
You will have some extra units that we will not use in this block.


Here are my units all trimmed and ready for assembling the block


I like to lay out each section of the block.  
This is the head section.  
**Please note that I changed the pattern so the 2 gray pieces on the right top 
and middle are now one unit.**


This is the body section.  
**Please note that I changed the pattern again (after I made this) 
and the bottom gray 2 pieces are now one piece.**


This is the tail section. Hurrah no changes!


Here is the entire block laid out prior to my sewing him together.


For the head section, sew your HST pairs together and sew unit L to Unit F.  


I pressed the seams open for the rest of the entire block to reduce the bulk.


Sew your HST to each other to form the head, then sew unit E to the head


Sew the head unit to the front leg unit.


The head section is now finished!


For the middle section sew G to the HST bow section.  
Sew I to M and then to the other I unit in the center of the body. 
 Sew the top to unit to the striped body and then to F to form the center portion of the block.


Sew the middle to section to the head section then sew D to this.


It will look like this.


For the tail section, sew your HST tip of the tail units together, 
sew this to C to form the top of the tail. 
 For the center of the tail, sew your HST units to each other and then to C.  
Sew these two sections together to form the upper part of the tail section.  
For the bottom sew the remaining HST to E then sew this unit to K.  


Now sew the top and bottom halves together to form the back end of Jack.


Sew the back end of Jack to the body you have already sewn to complete the cat.


It should look like this.


Sew unit B to the bottom of the block.


Sew unit A to the side.  You have completed your Cheddar Jack block!!!  He is so cute!!


Kim and I want to thank you all for your patience while she drafted the pattern 
and while I did the step outs for photos.  

She based cheddar Jack off of an antique block and we wanted to make sure you all knew it was in the public domain, which is why we decided to share this for free. 

 Please link back to this page and give credit though if you do use our directions for assembly!  

Enjoy our free pattern.
If you are on Instagram pop over to visit Kim @Canfieldlady and thank her

I actually got to meet her, in real life, this past week.

I am linking up to Finish It Up Friday as we finally finished this pattern!

If you have any questions please let me know.


~XOP~


Friday, October 07, 2016

Cheddar Jack

Hi friends.  
SO many of you have asked for the pattern for the cats on my header. 
 I am thrilled that you love them. 
 My friend Kim drafted the pattern from an antique quilt block so we felt that it was only fair to share this block with all of you for FREE!  


That being said, I am almost ready to do that but wanted to make some step out photos for you.  
I am out of town all of next week but will try to get the photos done this weekend.  
Realistically, with a week long vacation and the Hallowedding coming up it will probably get posted sometime during the week of my return.  
I appreciate your patience.
I also appreciate you not copying and backwards engineering it.

Can you guys hold on for another week, so I can have assembly photos?  

I really HATE my home computer (it's a PC) so it will most likely happen once I am back at work and can use my beloved Mac.

I hope you are all as excited to see it as we are to share it!  Please remember that if you share it to link back to the post with the pattern.

Much love to you my peeps and stay tuned!!

~XOP~


Wednesday, October 05, 2016

WIPs With Friends

I have not been working on much in the way of quilt things due to getting ready for the wedding. 
 As you know the shower was last weekend on Saturday so that took up most of the day.  
Then some friends from out of town wanted to buy my dad's snowmobile so we spent a good portion of our day at the farm getting it loaded and on it's way.  
Weekends are my "get stuff done" around the house time too.  
I did clean up a space near my sewing room and 
got rid of a bag of fabric I won't use so that was good.  
I managed to piece two witches for the quilt though and plan out the next few blocks.

When I was finished with them all I could think of was the song from White Christmas...


I like how they turned out but wonder if I should have made their dresses all black.  
What do you think?  
Not that I am going to change them anyway, just curious. 
 This witch pattern is available on Craftsy.  It was really easy to make too, so BONUS!


I need to take down the other things on my design wall and start putting these up there.  
It is fun to make the blocks but I need to see what I am missing.  

I will link up with Let's Bee Social over at Sew Fresh Quilts.

I know I talk about my cat Autumn a lot.  She is my constant companion in my sewing room and quite the pest most of the time when I am working. 
 She has decided that she *must* only drink water from my water bottle and only when it is full with both ice and water. 
 I think I got the video to upload.
If you turn up the sound you can hear her rough tongue scraping across the ice!


Now it's your turn to link up your finishes here. 
 Remember that if you do post in the link up here
 you should post a link back to this post on your own blog too.

So now it's your turn to share what you are working on.  
Please use the linky to link up and share that you linked up to WIPs With Friends on your blog too.  If using Instagram please use the hashtag
#wipswithfriends.  
We can't wait to see what you are working on!
Use the blue Inllinkz button to link up and spread the word by linking back to this post!


~XOP~


Tuesday, October 04, 2016

Hallowedding Bridal Shower

I bet you have all been waiting for the bridal shower post right?  
Sorry, my weekend was crazy and then so was my Monday!  HA!
  It seems to be a pattern at the moment.  
Is it November yet??  
LOL

The shower was at a beautiful room at the Hunt Club in Jackson, MI.  
My wonderful SIL and my niece were the two responsible for most of the planning. 
 My SIL, Mary, is one crazy, overachieving woman and I love her to death. 
 She and I have always had a special bond ever since I joined their crazy, big family. 
 OK on to the shower.

The theme was "stock the reception bar".  
Since my daughter has had her own house for awhile now 
she did not really want a traditional shower (shocker). 
 Nothing about her is "traditional".  
We all got there around noon and began the room set up.  


Those Jack-O-Lanterns lit up.  There were ravens and the cutest Hallowine glasses.


Aunt Mary and my daughter.  (Yes, Mary just had rotator cuff surgery a few days before the shower)


Mary's DIL, my niece, did the desert table.  Death By Chocolate!  She made everything from scratch.


These two!  They have been friends ever since Carla joined the family.


My friend Lisa, drove up from Indiana to attend.  My SIL made all the party gifts.  
These wooden pumpkins were adorable!


My beautiful SIL showing yet another fabulous pumpkin me amazing SIL Mary made for the gifts.


Obligatory photo at the fabulous desert table.


Shelby opening her gifts.  The hat on a headband was very popular, LOL.


My daughter with her soon to be SIL (on the left) and MIL (on the right).  
So happy these two joined us for the fun!


All in all the shower was a huge success.  
The pizza and breadsticks were some of the best I have had.  
The pizza crust tasted like breadsticks.  
Not sure how they did that but usually the crust is not my favorite part, great sauce too. 
 Shelby got a lot of great alcohol for the reception too.  
Our trunk was FULL and so were our hearts.  


Mary also filled these mugs with caramel corn and let Shelby take the Hallowine glasses with her too.


I can't thank Mary and Carla enough for throwing such an amazing shower for my daughter.  
It was exactly what she wanted.  
You guys are the BEST!

~XOP~