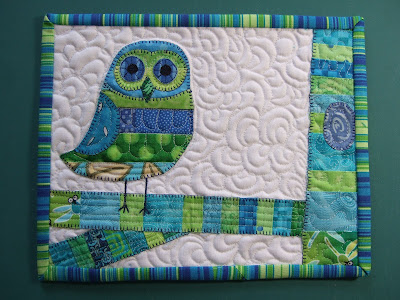
I was making my mug rugs and I thought, maybe you would like to see how I did that so I put this little guide together. Let me know if you find it useful.
I like to use fusible webbing, Steam-A-Seam II lite, to be exact. I have found it makes an amazing bond! Better than the other brands I have tried. I thought I would show you some of the tricks I have learned about doing fusible and the machine blanket stitch around the applique. So here we go, ready??
I usually begin with some kind of drawing like this one for my Valentine Birdies.

I then place the drawing on my light box (or you can use a sunny window) and trace my design onto the fusible. SAS II has the web bonded to one side and loose paper on the other. You want to draw on the paper that is bonded to the web as the loose paper side will get discarded, as you will see. Remember that you need to make your tracing in reverse to orient it correctly on the finished quilt. I usually do my drawing, and then turn it over, put it on the light box again and trace it on the back side. Then I lay the fusible on top of that and trace the design onto the fusible paper. I sure hope that makes sense! Now you can cut out your design. You should NOT cut on the line when doing this,just about a fourth of an inch or so away. The amount you leave around the line is not critical as it will be discarded, you just use more fusible and fabric if you leave more.
Here is where I used my scraps. I had a charm pack of Giddy that I actually cut into scraps since I didn't have anything suitable for strings for this project. I cut a few and sewed them into new "fabric" like this:

Once that was done and my applique shapes were roughly cut out I was ready to place them for fusing. Using SAS, I peeled off the loose paper and then was able to place the shapes as desired on my new fabric. One nice thing about SAS is that it is kind of sticky and will stay put on your fabric, which is nice when you need to build an applique (like add eyes or wings as I am going to do here).


When I was happy with the placement I followed the manufacturer's directions and fused it to the fabric. Now you are able to cut out your pieces on the line. I cut out my pieces, peeled the paper off and you are ready to place your applique on your background. I built my birdies and the strip below them and when I was happy I followed the SAS directions and fused them to the background.
(I forgot to take a photo of this with the birdies but you can see what I mean with the owl)

Next up is doing the blanket stitch around the applique. My machine has a blanket stitch on it which I find very convenient to use. You may need to check yours for size etc before beginning your project. I generally use the preset numbers on my Bernina when I do it unless I am doing something HUGE or really, really small. Having the needle down position is really helpful too for neat work.
When I begin, I like to stitch until I get far enough away that I can stop and look under my piece.

Here is what it looks like from underneath.

If you pull on the thread from the bottom the top thread will be pulled through via a loop. I use a pin to go through the loop and pull the top thread through to the underside.

Once you have both threads on the underside you can tie the threads together to make a knot.

Now you can continue stitching until your stitches meet back up.

At this point you can cut your threads and pull your top thread to the back side like you did with your starting thread and make a knot. You continue like this until you have all your pieces stitched around. For areas that are really teeny tiny, I sill start with a few straight stitches and then go into the blanket stitch or if they are amazing tiny, I will just straight stitch around them. I sometimes like that look better for the place like the eyes on my owl. I straight stitched around those. I also did a straight stitch on the birdies legs.


Lest you think I do all my stitching alone here are two of my helpers.


I chose to do the embroidery by hand on the birdy piece but I wanted the heart to show through on the back of the finished piece so I did not stitch around it until it was all quilted.


I hope this has been helpful! Come back on Friday. I will be having a giveaway of my Giddy scraps and my scraps from making the owl mug rug too. You will need to visit my Stash Manicure post on Friday first and then come here. You will need to comment BOTH places to be eligible. Have a wonderful day!!! XOP