Friday, July 15, 2022

Knit Crib Sheet Tutorial

 I finally got around to making a knit sheet and taking photos so I could share with you guys.  
I LOVE using the knit fabric to make crib sheets with but they are much wider
 than you actually need for the sheet.  
You can get good sales at JAF on the knit fabric if you watch and some of it is SO soft! 
 I use the left overs to make re-usable wipes (the corner cut outs are perfect for this) or one side of a burp cloth (with flannel on the other, just be sure to sew this using a walking foot!)
***WARNING photo heavy***

You will need 2 yards of a soft knit fabric and
80" of 1/4" elastic to make one sheet

I left the fabric folded as it came off the bolt, fold so my ruler fits and cut off the selvege.
Since it tends to roll and you have plenty of room to work this makes it easier.


Unfold so it is the full length but still folded in half, so your piece should be LONG.
Cut off one end to straighten.
Then, measure down  ~68" and put a pin.
This is where you cut off the excess length.
place your ruler along the fold and trim off excess so your sheet measures ~68"
I usually buy 2 yards so I have good room to trim.


Now you will be cutting off the excess width.
I measure 21" from the fold.
I have to use 2 rulers to get this measurement.


I use a Hera marker to mark the 21-22" down the length of the sheet.


The Hera marker leave a nice cutting line.
If you don't have a Hera marker you could use a disappearing marker.
You may want to invest in a Hera marker as they are nice for marking quilting lines too.


I move my rulers and continue to mark the length of the fabric.
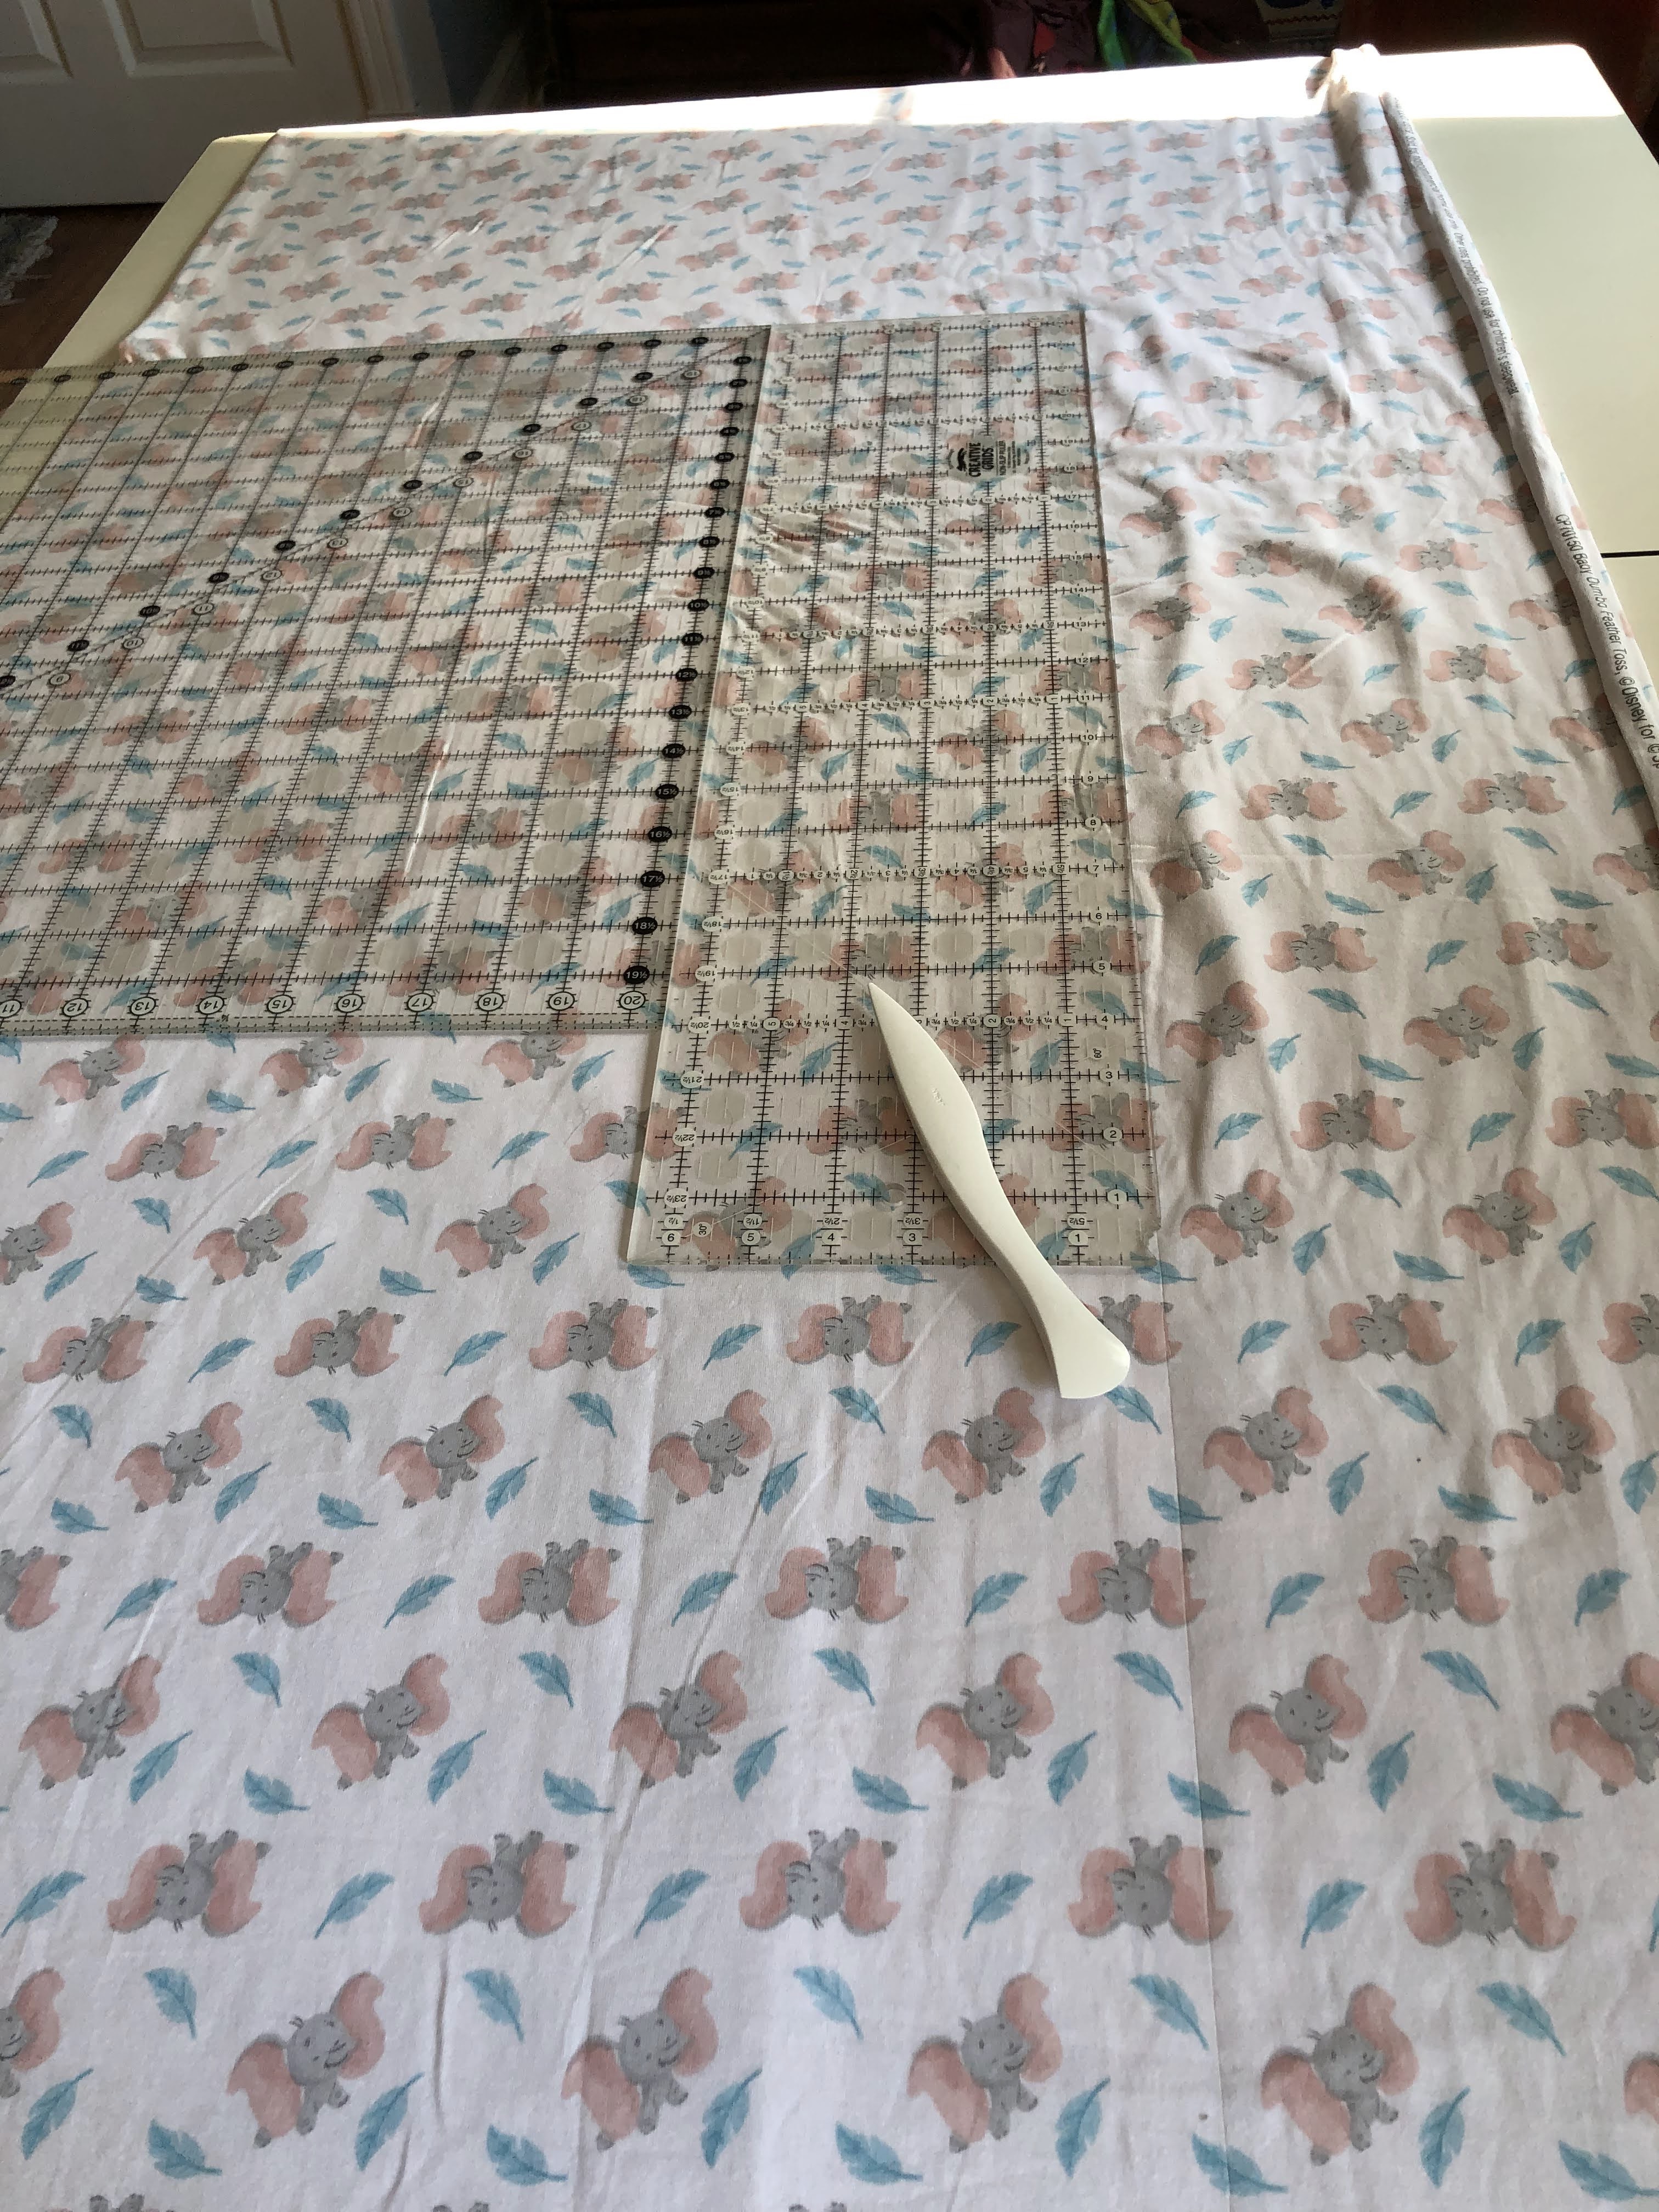

I used scissors to cut along the line I marked.


At this point you should have the correct length and width.
Time to cut out the corners.
I do 2 layers at a time.


Using your ruler along the CUT edge, cut out an 8.5" square.
I do 2 corners at a time.
TIP: These pieces can be sewn together to make great re-usable wipes!


Do this for all 4 corners.
As I said I do them 2 at a time.


Sewing time!
You will be making a French seam for your corners.
Doing 1 corner at a time, fold the short sides from your cut out WRONG SIDES together 
and sew a scant 1/4" seam.


This is what it should look like.


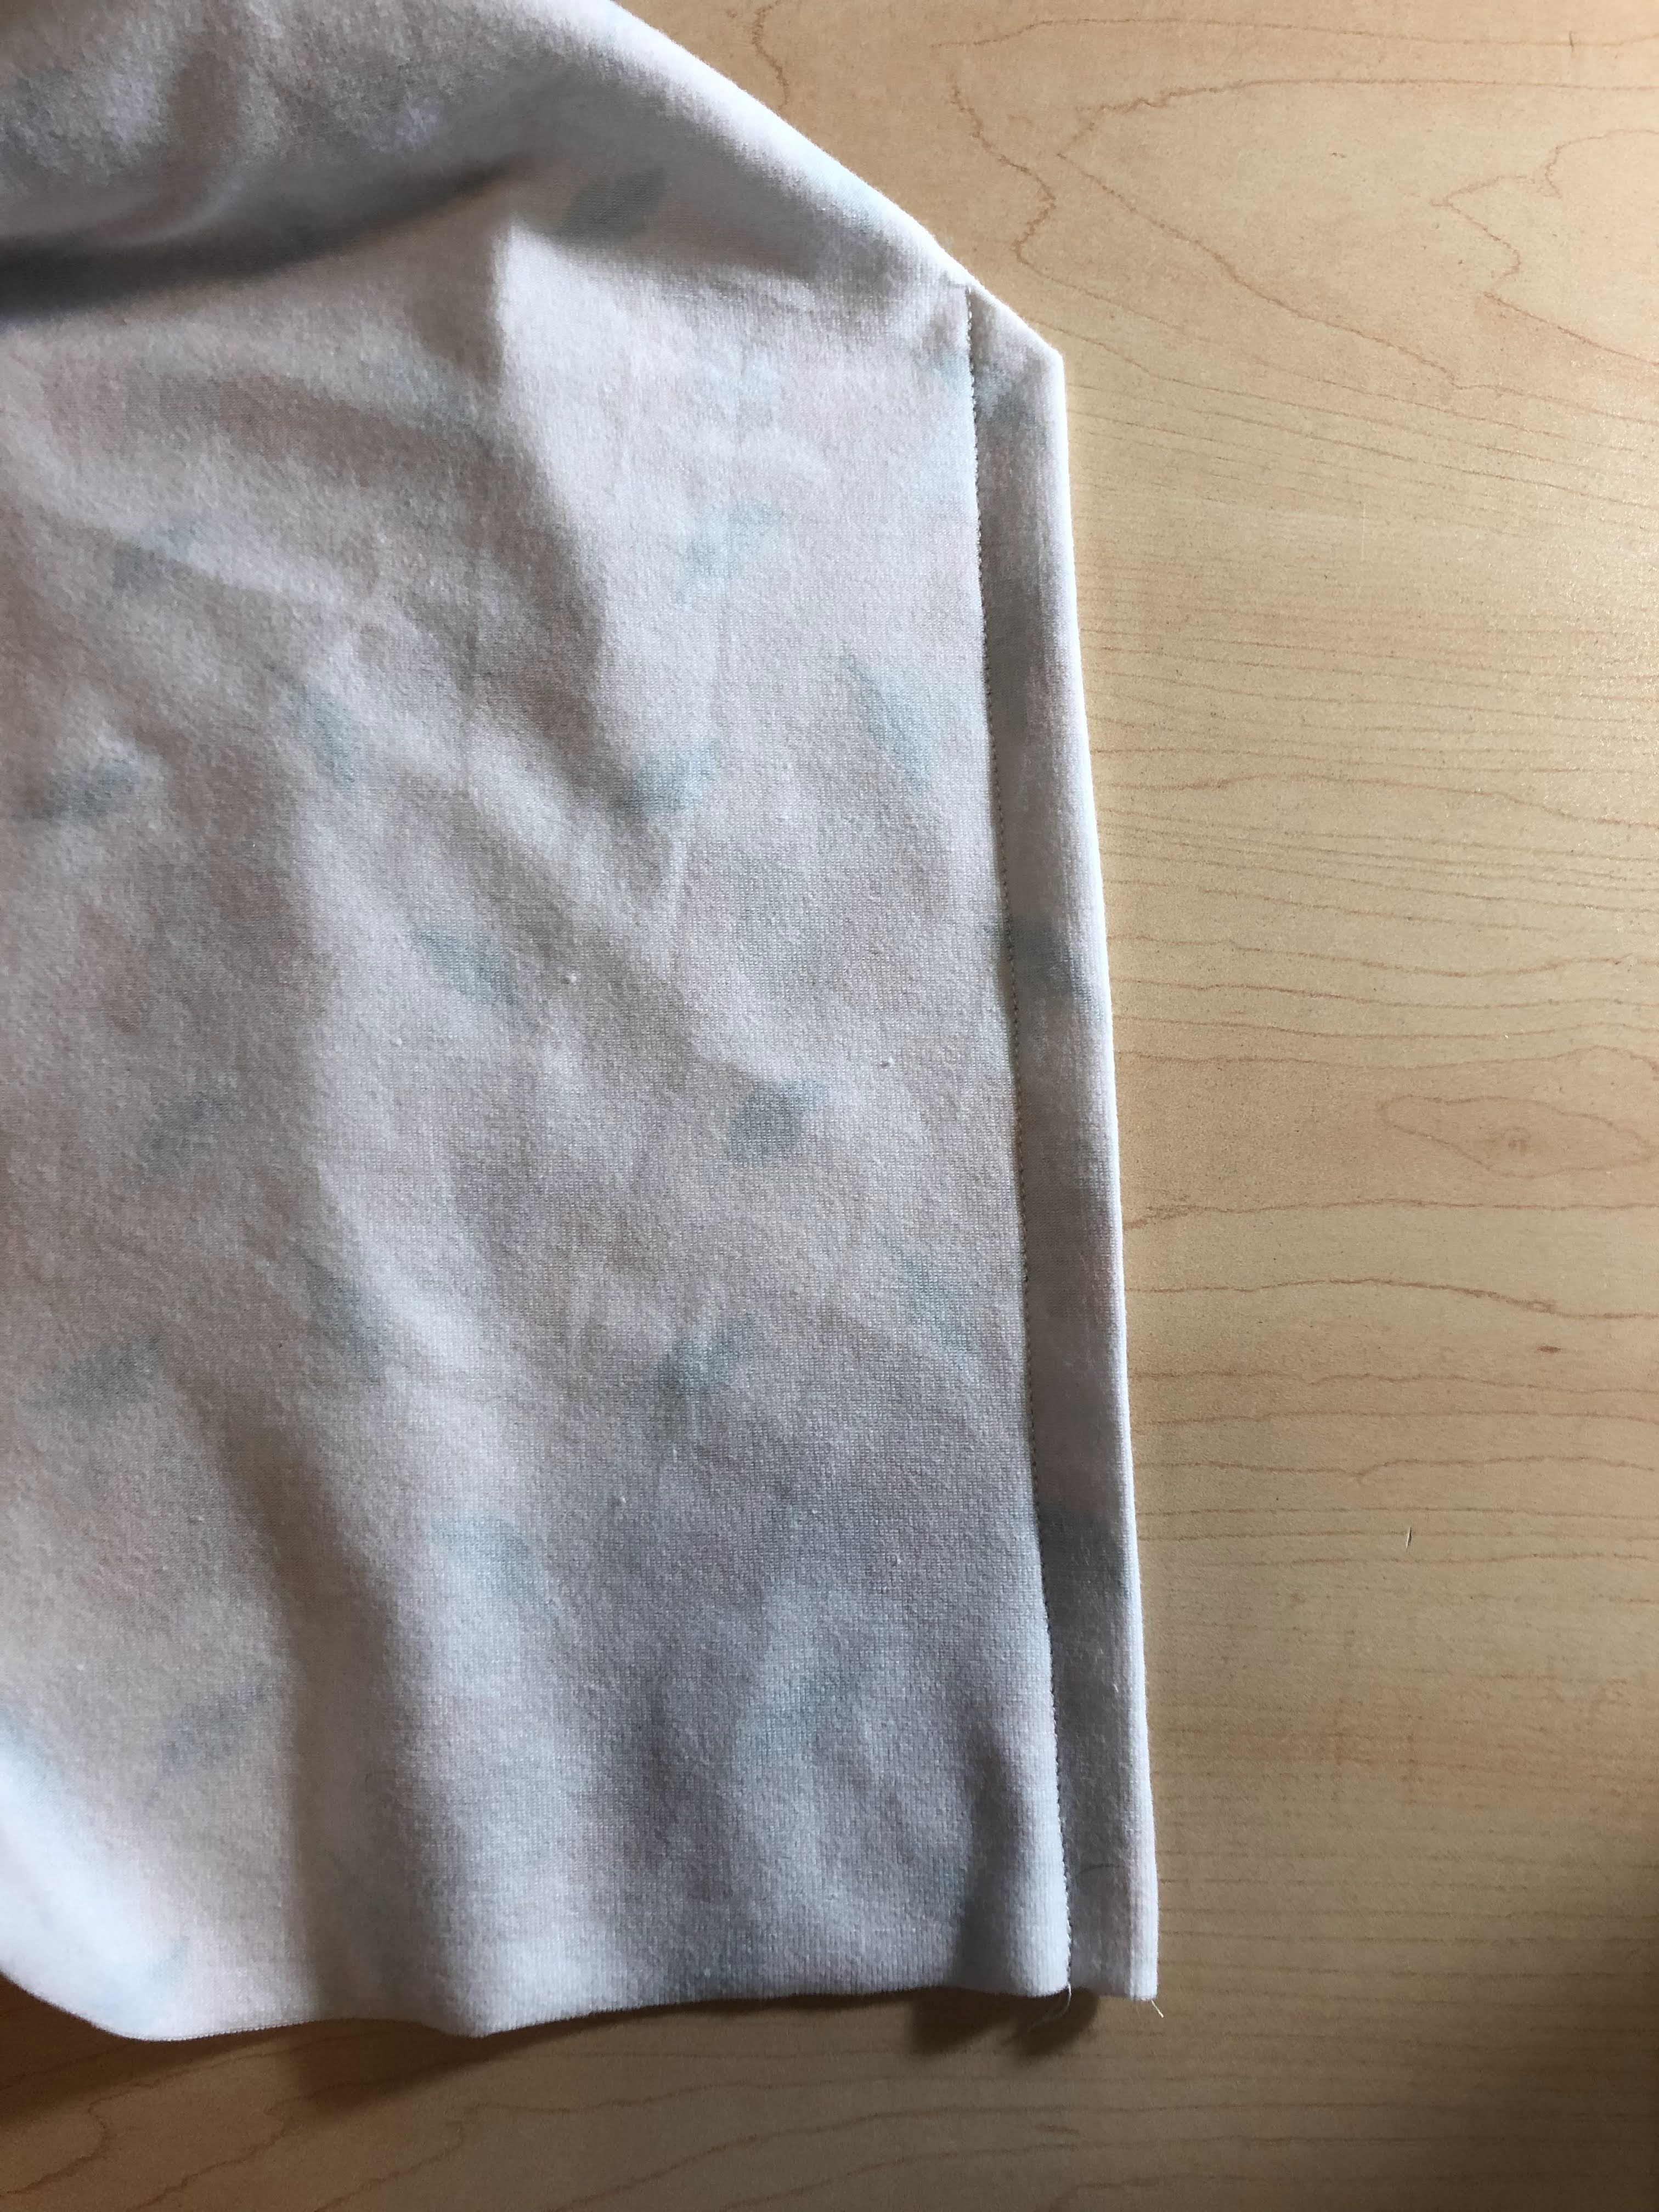
I then press it and continue by folding RST.
After you have it folded sew a scant 1/2" seam.
You are enclosing the first seam you sewed so your sheet will have no raw edges!


This is what it should look like.
Before proceeding, check the right side of the sheet where you sewed to be certain you totally enclosed the seam and no raw edges are showing.
If you can see a raw edge you can either try to trim it or go back and just take a little deeper seam.

Now you will be making a casing for your elastic.
Fold over a quarter to half inch.  
It is a bit tricky to do small bits with knit, or at least it was for me.
Do this the entire way around your sheet.


When you get to the seams you made in the corners be sure you press them all in the same direction.
I usually thread my elastic going toward the left.
I found it easier to fold my seams so the elastic doesn't catch in the fold.
If I fold the seam in the direction I feed my elastic.
This is worth paying attention to!
Fold the long edge over once again to create a casing.  
I usually just make sure it is about half an inch or big enough to encase the first fold.


At this point I switch to my walking foot.
I find pressing the fold is enough and don't pin the entire length.
I pin on both sides of the opening I need to remember to leave for elastic insertion.


You will now edge stitch all the way around the sheet, leaving an opening for elastic insertion!


It should look similar to this.
As I said, I insert the elastic going toward my left.
I pin a safety pin to one end to make the threading easier. 


You can see here that I am going OVER the fold with the elastic, rather than trying to not get it caught in the side by my thumb!  
Trust me, this will make your life much easier!
Once your elastic is all the way around you will have 2 ends to sew together at the opening you left.
You did remember to leave that opening, right?
Join your 2 ends and sew over them several times to join them securely.
Gently pull your sheet and the elastic should pop into the casing.
Then you can gently stretch the opening straight and sew it closed.
(sorry I forgot to get a photo of that)


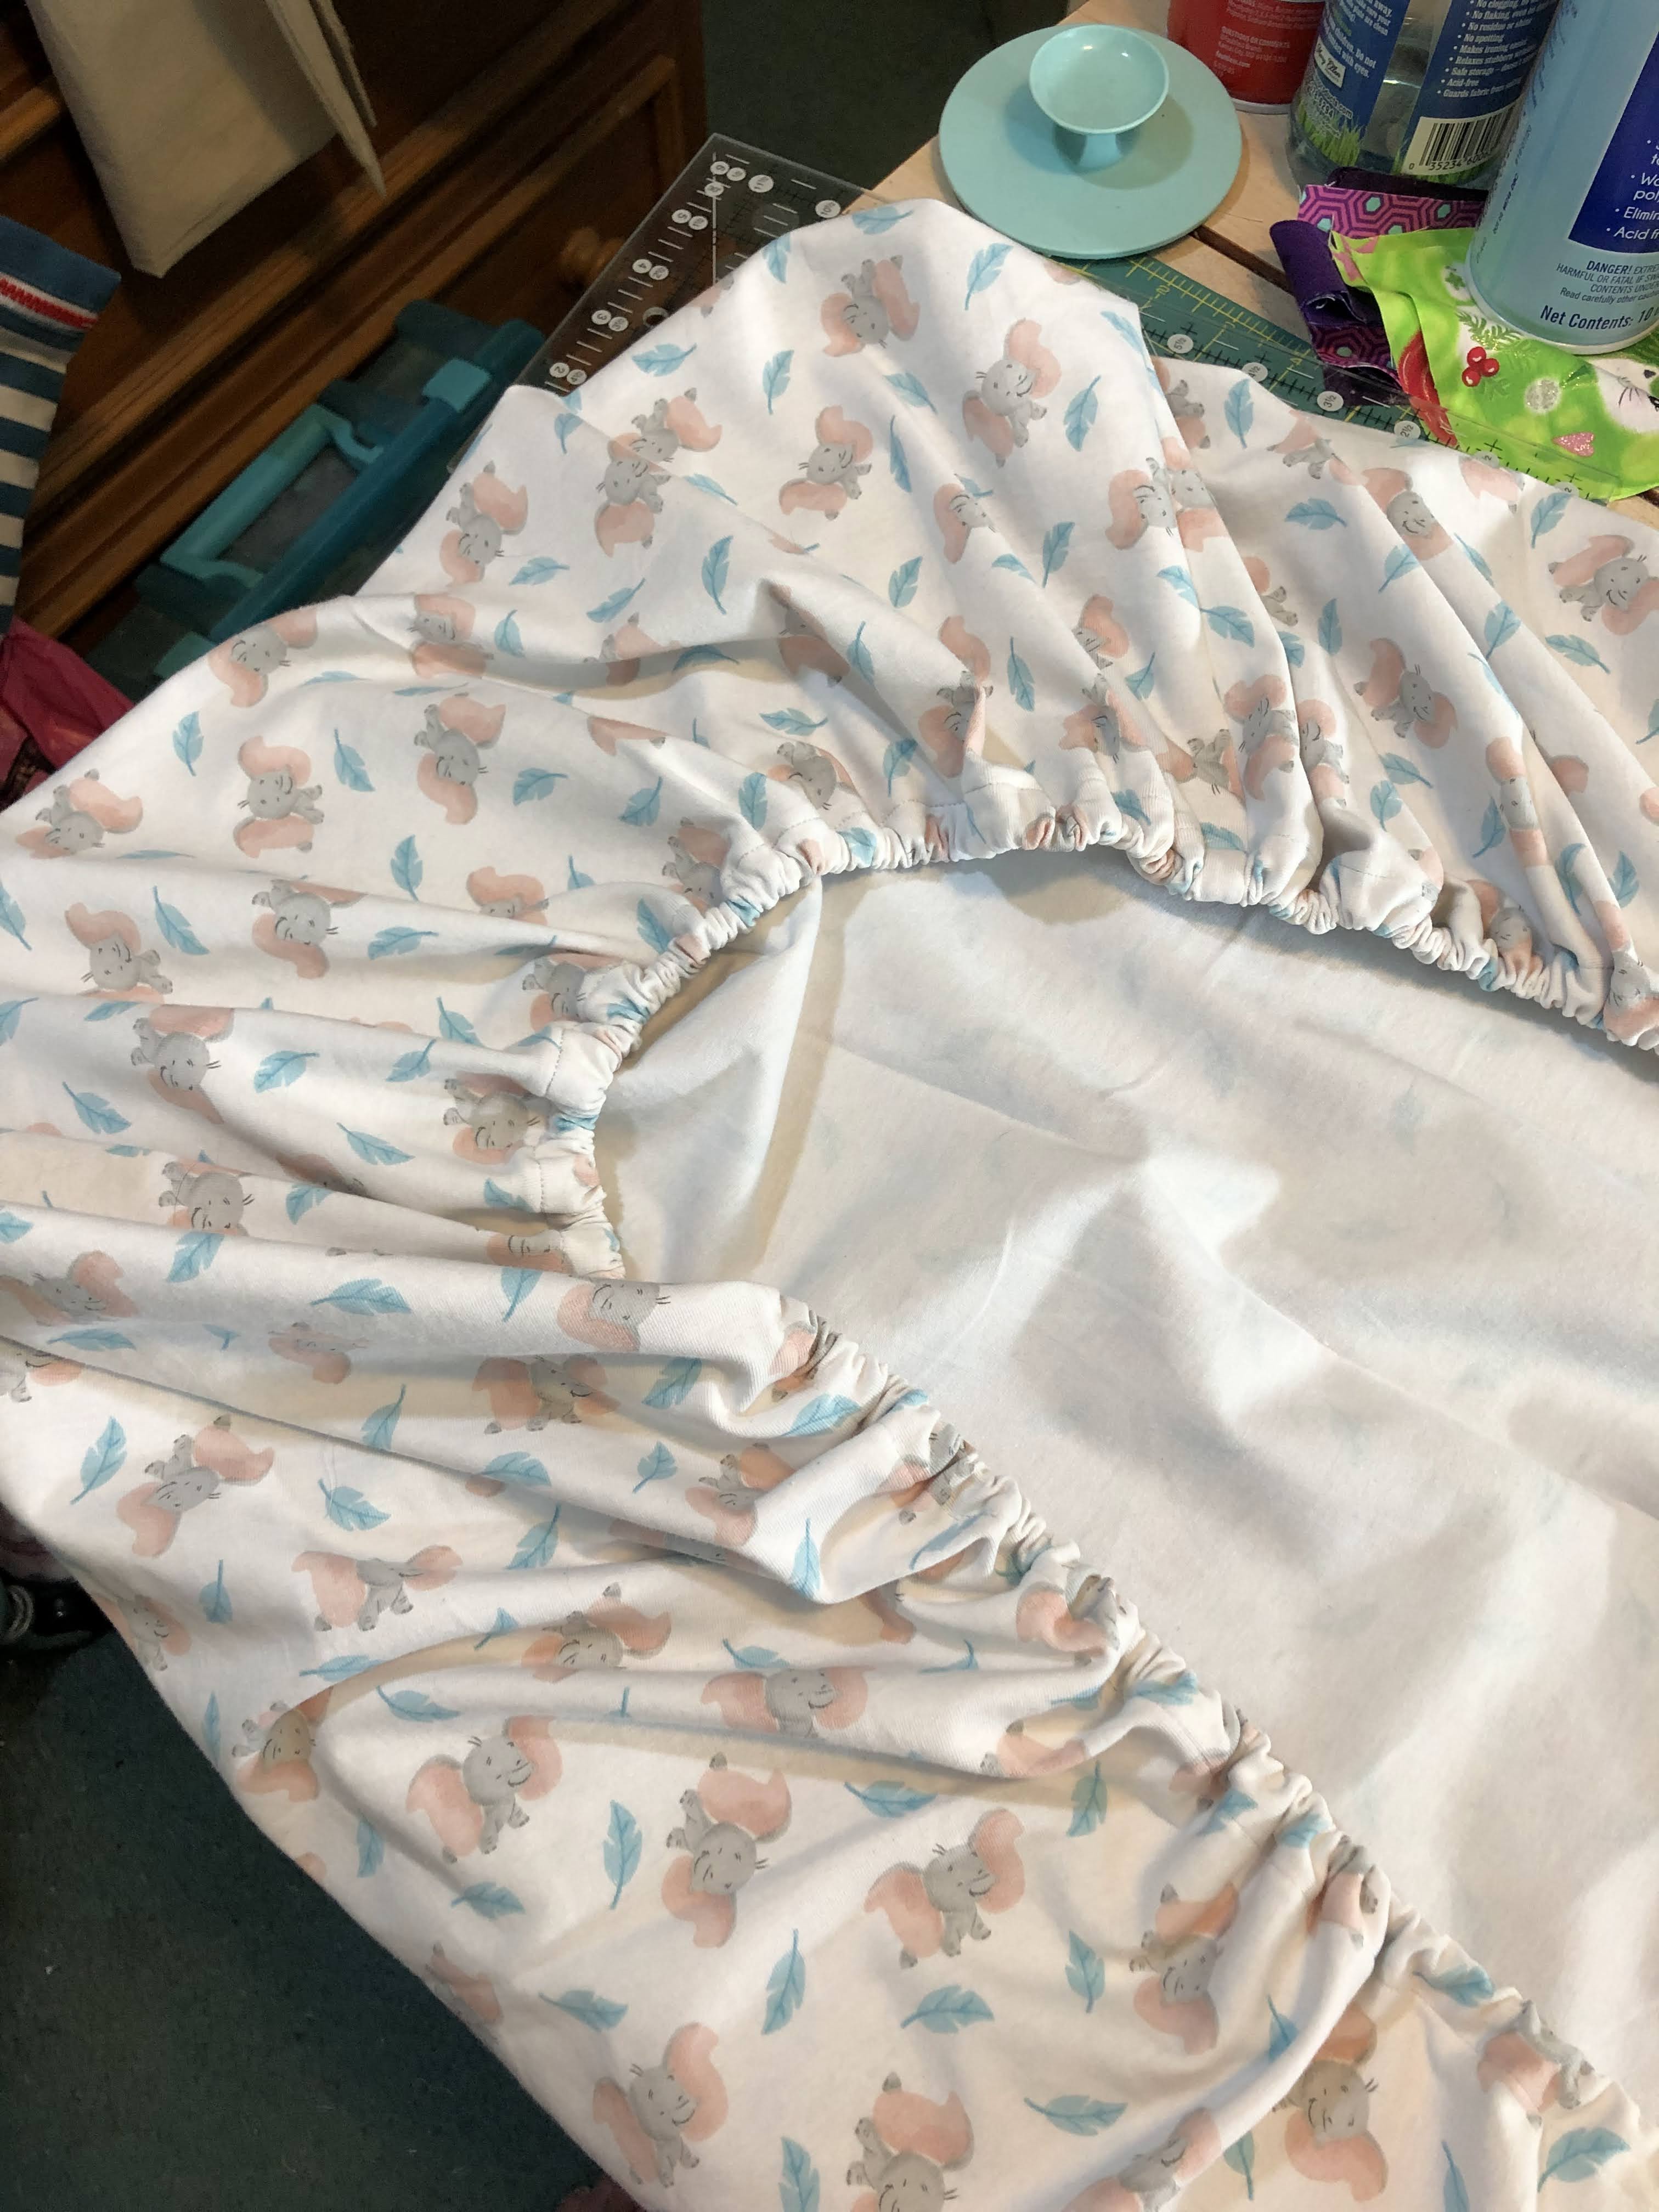
You can distribute your elastic evenly around the sheet by gently pulling on it.
Your sheet is now finished and ready for you to enjoy or gift!

I hope you found this helpful.
Please email me if you have any questions.
mamaspark@gmail.com

ENJOY!

~XOP~


Tuesday, June 21, 2022

Prismata

 My eldest daughter drew an incredible water dragon when she was in high school.  
At the time I told her that someday I would make him into a quilt for her. 
My skill level was not where I felt comfortable at that time.
I had just started quilting.


This is the original I was working from.


Over time I picked away at the project.
Always in between other things and with zero regularity.
I took it to a retreat a LONG time ago and the people there sort of made fun of the project.
I shoved it in a bag and it was literally YEARS before I took it out again.

I had taken the drawing and enlarged it.
(bite marks are from Finny)


I numbered all the areas on the drawing.


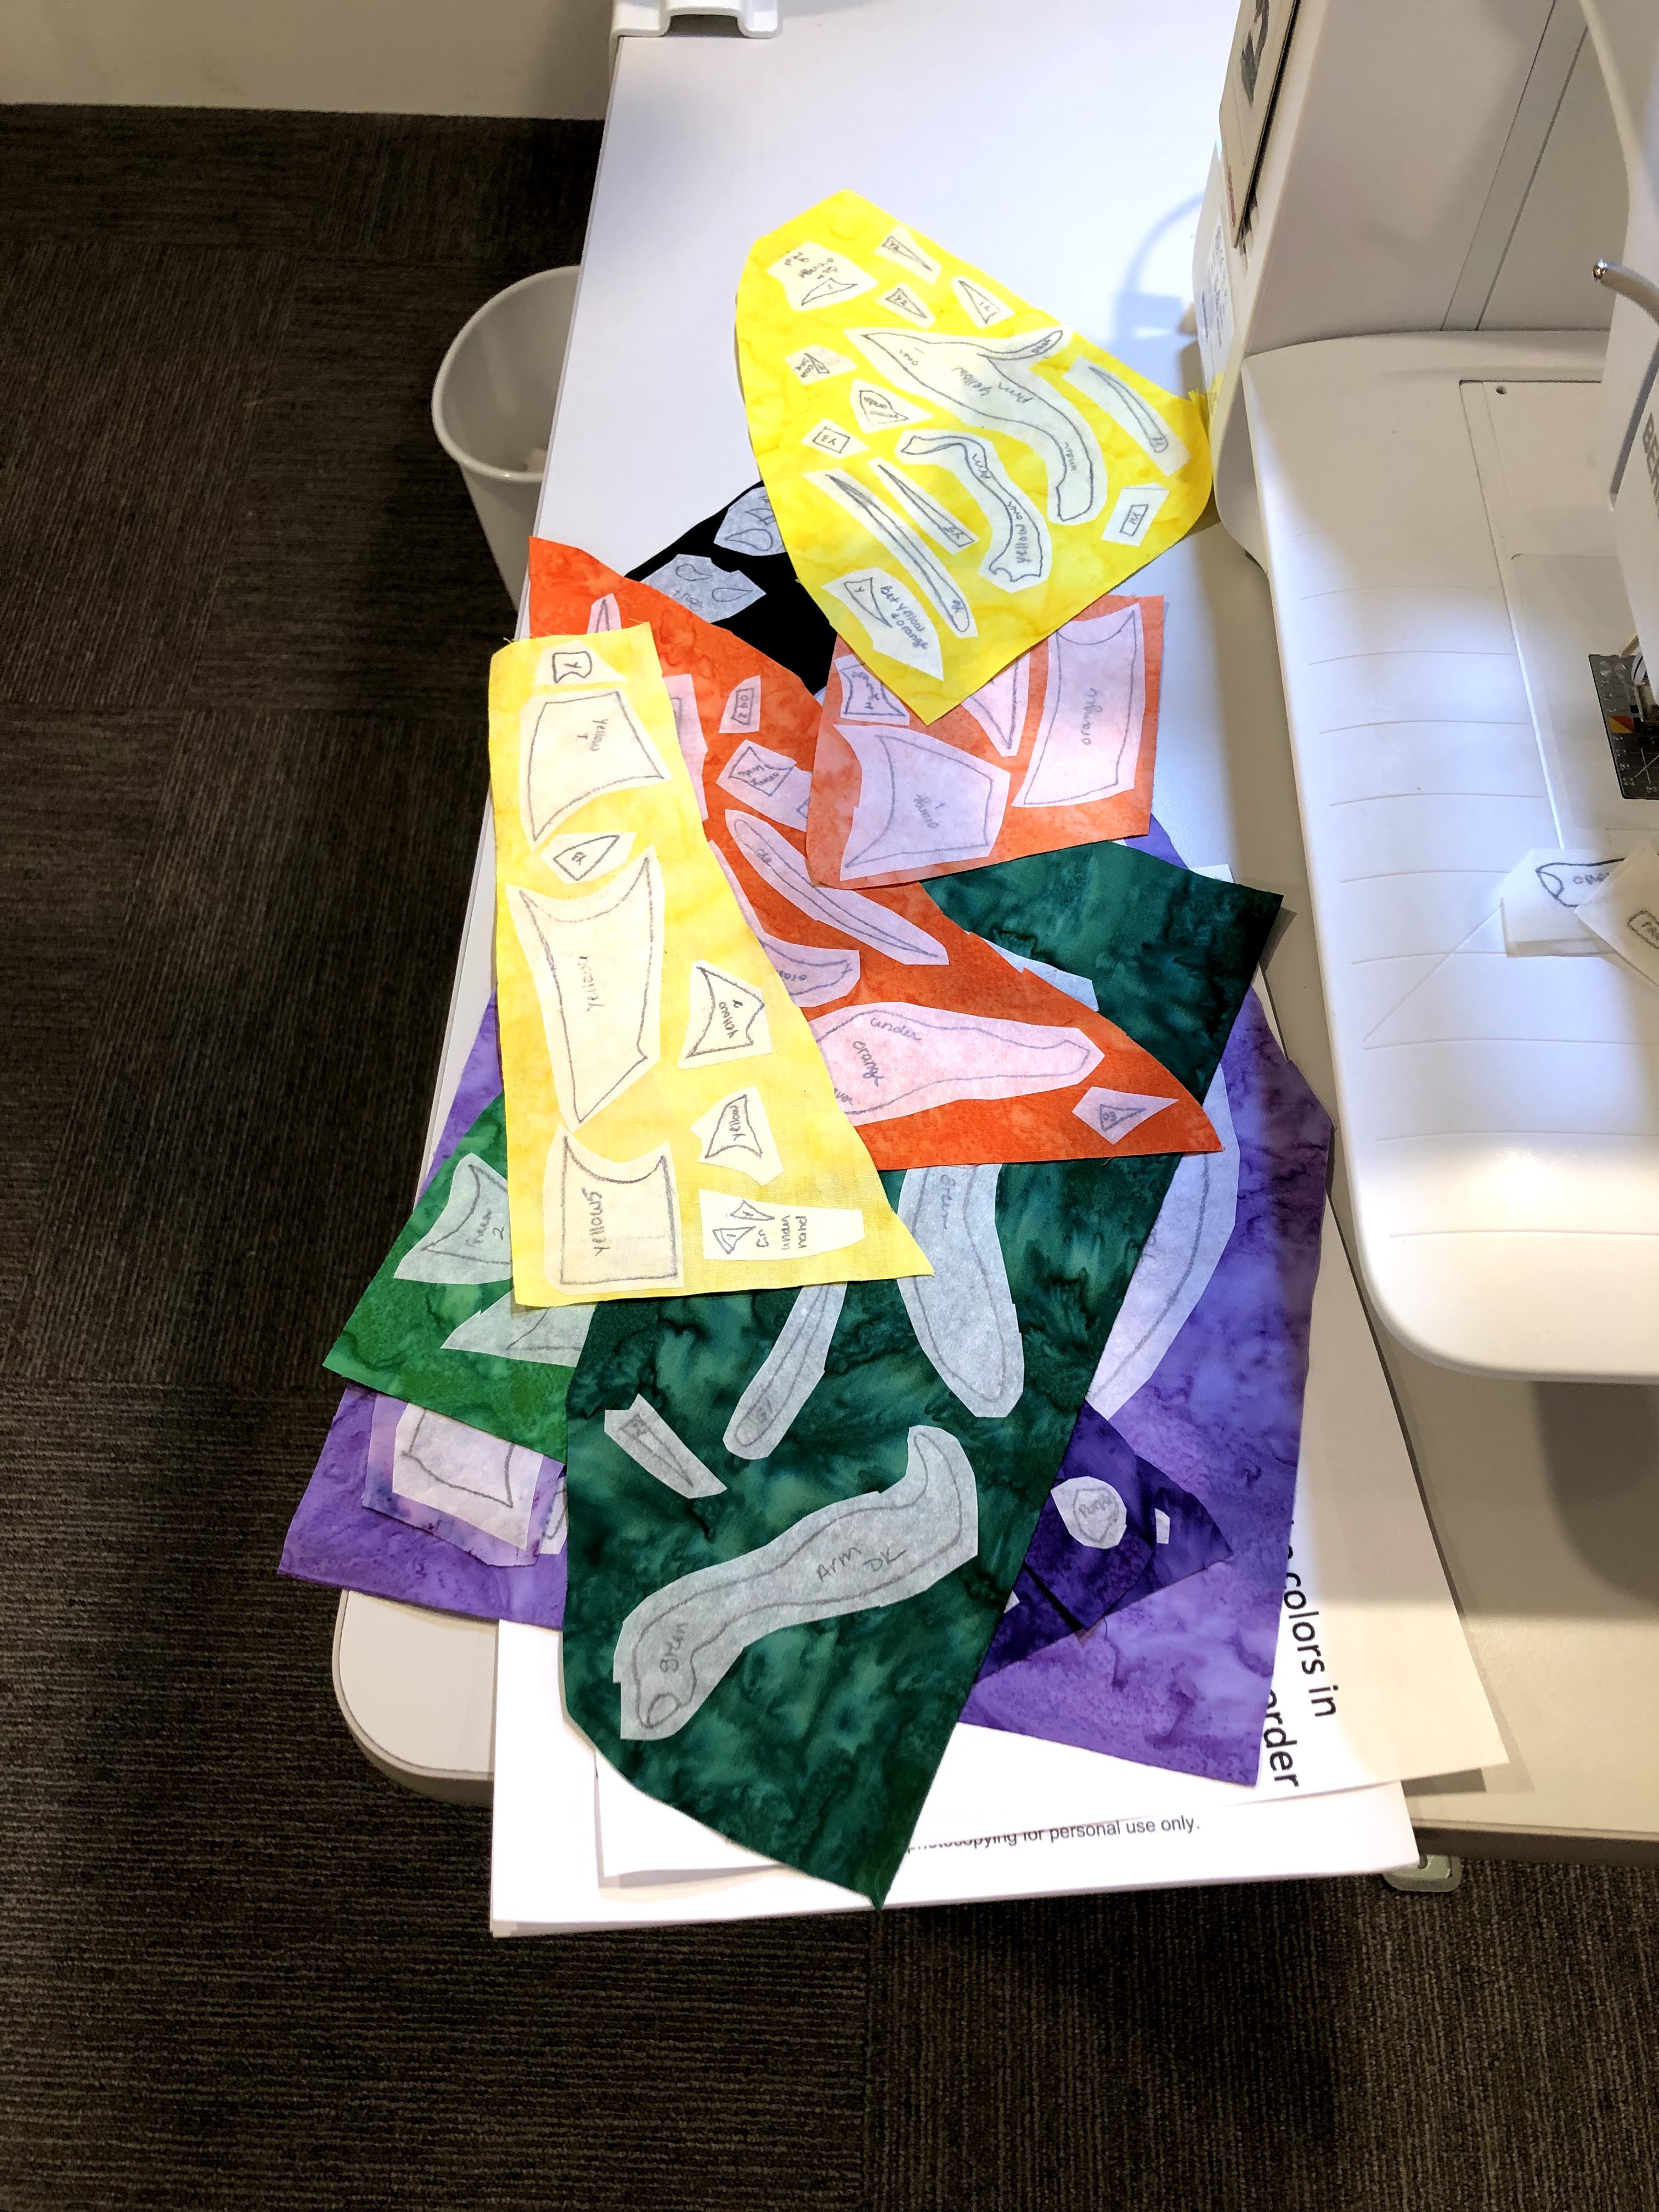
I traced all the pieced on to fusible.


I had chosen the fabrics and fused the pieces.
I brought everything with me to the Reject's Retreat.
I worked really hard on getting started on him.
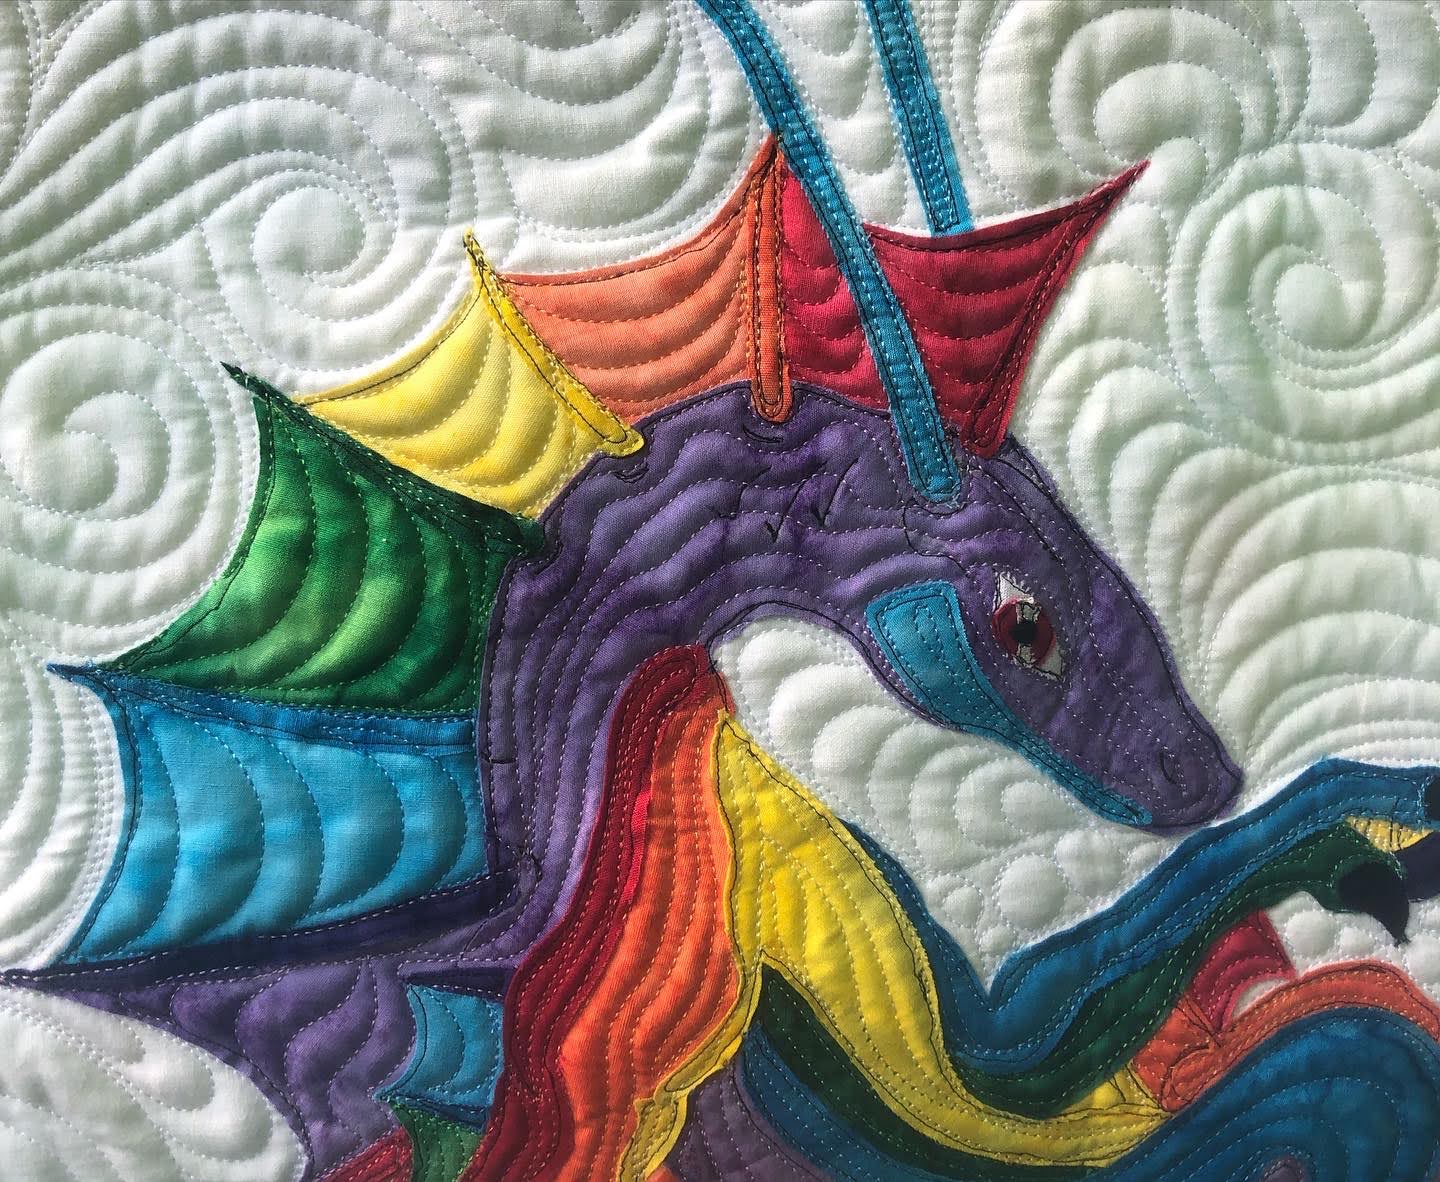
His name is Prismata.
He is a rainbow, water dragon.
I managed to get him all fused to the background. 
Then I brought him home.
Afraid once again to go any further.

I finally took him out and brought him to my local LQS to ask about interfacing and thread.
They had excellent suggestions.
I bought the sharps sewing machine needles.
I bought 100 weight thread to stitch around him.
I used tear away fusible on the back of the piece.

I stitched all around him and he was amazing.
BUT, he needed amazing quilting.
So he flew on a plane to Washington to Quilting is My Bliss.

Let me tell you, he turned out better than I could have imagined!!!


This is the backing I chose.  I even put a hanging sleeve on it!


Let me tell you, my daughter was so excited to finally have him in her hands!
I gifted it to her on her birthday too.


So now you think this is the end, right?
Well you would be wrong.
If you noticed in the original drawing, he has rainbow colors and bubbles coming off him.
I was nervous to do this on the quilt.

My idea was to possibly use Intense pencils to create the rainbow in the water.
I also considered using hot fix crystals for the bubbles.
Since BOTH are things I couldn't remove, I wanted to see what she thought.
Of course she loved BOTH of those things.
YIKES!
I have not picked him back up to finish, yet.
I need to quilt up a sample to practice with the pencils.
You can color with them and then use water over the top to blend them into the fabric.
I had placed some crystals over the quilted bubbles just to see what how it looked before I even made this as a suggestion.
I remembered to take a picture of those so here is what I put in place, it was not all, as I would fill all the bubbles but I just wanted to see if I even liked it.


She assured me I could not make it too "rainbowy".
I sure hope she's right!
She seems to be the child I make the most complex quilts for.
(Remember her Hallowedding quilt??)

So Prismata is with me for just a little bit longer.
Until I become brave enough to use the colored pencils and put in his bubbles.
He is already an very handsome boy.

I'd love to hear what you think of him.
I think he is gorgeous!

More to come.

~XOP~


Monday, June 20, 2022

Flannel Charm Quilts

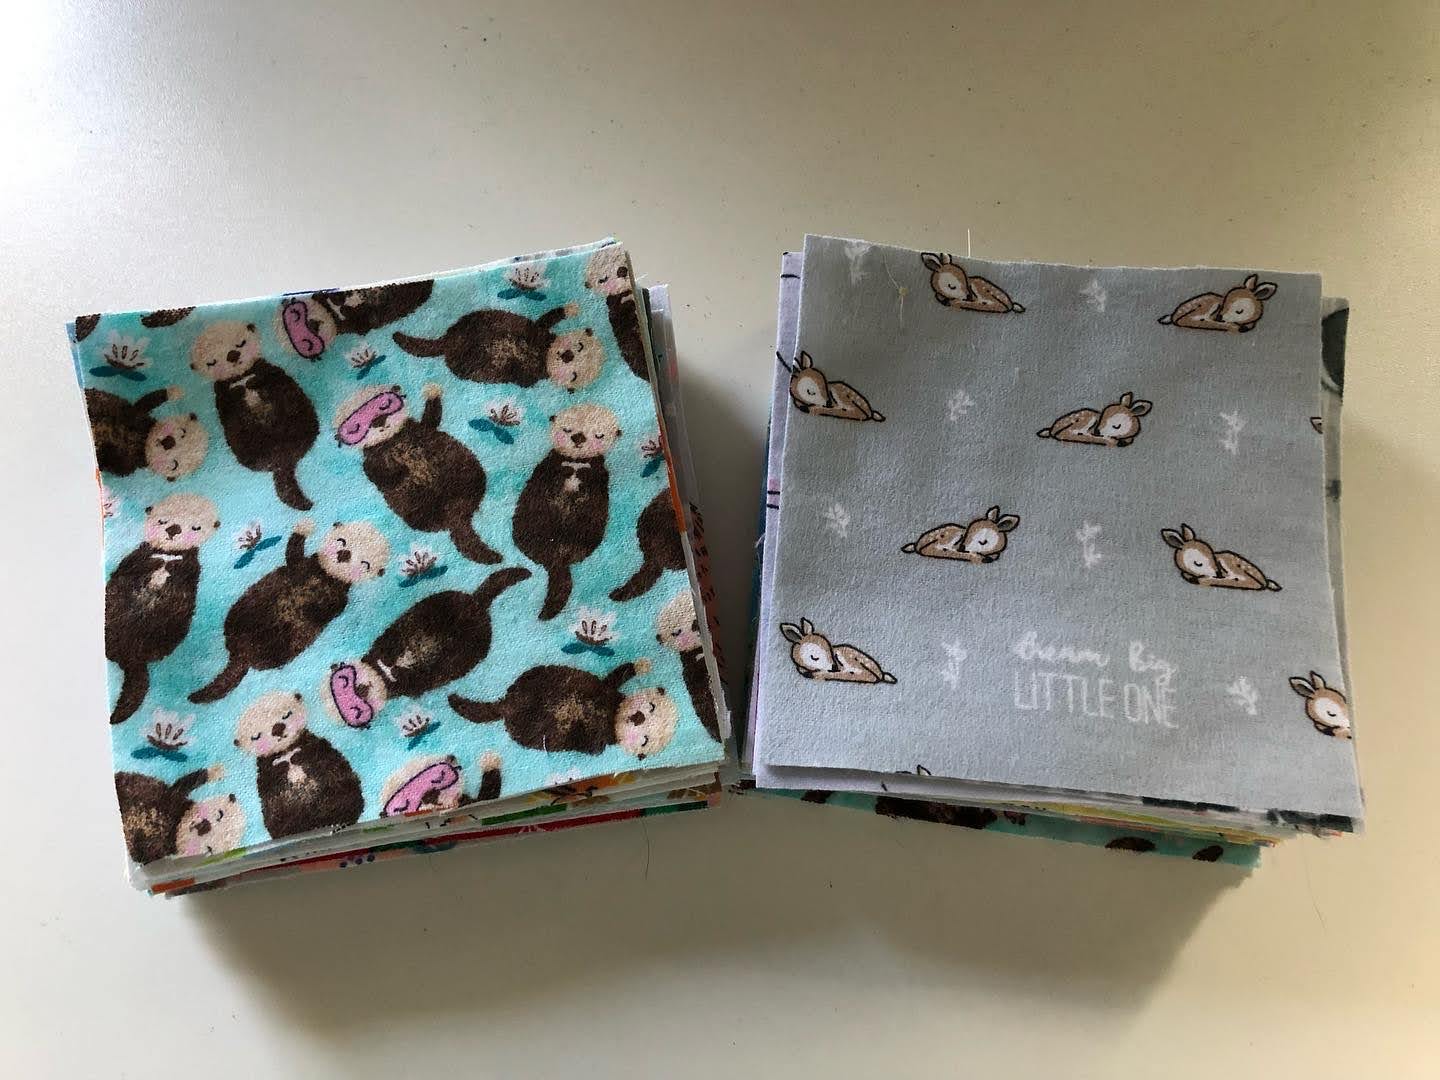
 I have been saving 5" charm squares for a long time.
I finally pulled them out and , as you could see in a previous post, I made some tops.
One is kind of boyish and one is more girlish.

I actually used flannel I had in my stash for the backs and left over batting.
I even quilted them myself!
Both quilts are listed in my ETSY shop.


This one has a brushed cotton on the back.


I love these little quilts so much!


I have sets of the 5" charms for sale.
There are 42 in each set.

These 5 are geared more toward little boys.


These are geared more toward little girls.


Although they do have many common squares.
None of the fabrics in the CP are repeats but there are some of the same prints in each pack.
I am asking $10/pack plus shipping,
If you are interested please email me with your paypal, zipcode and how many and whether boy or girl or no preference.

I'm sorry I have been MIA.
Getting Chris ready for his trip was exhausting, LOL.  
I spent the first 3 days cleaning up the mess.
Had 3 doctor appointments on Thursday.
My friend Kailie stayed with me on Wednesday and went home on Friday.
More about that coming up!

~XOP~


Friday, June 03, 2022

I Rang The Bell

 Yesterday was my last radiation treatment.  
A total of 15 treatments finished! 
 I believe I am now considered NED (no evidence of disease) 
 I brought cookies for my amazing radiation team. 
 They took great care of me and made my treatments easier. 
 I got a certificate and everything, LOL.


They invited me to come back and visit them, haha.  
Such sweet people.
They came out into the hall with me and cheered for me when I got to ring the bell too.


Chris took this video of me ringing the bell while my team cheered me on!


As you walk into the building for treatment there is a rock garden.
 People paint rocks with encouraging words, and sayings, memorials to loved ones, and things like you beat this, or we love you mom etc. 
As we were walking into the building on this day some of the workers were outside at a table painting rocks and invited us to join them on our way out.
I was so excited to have a rock there!
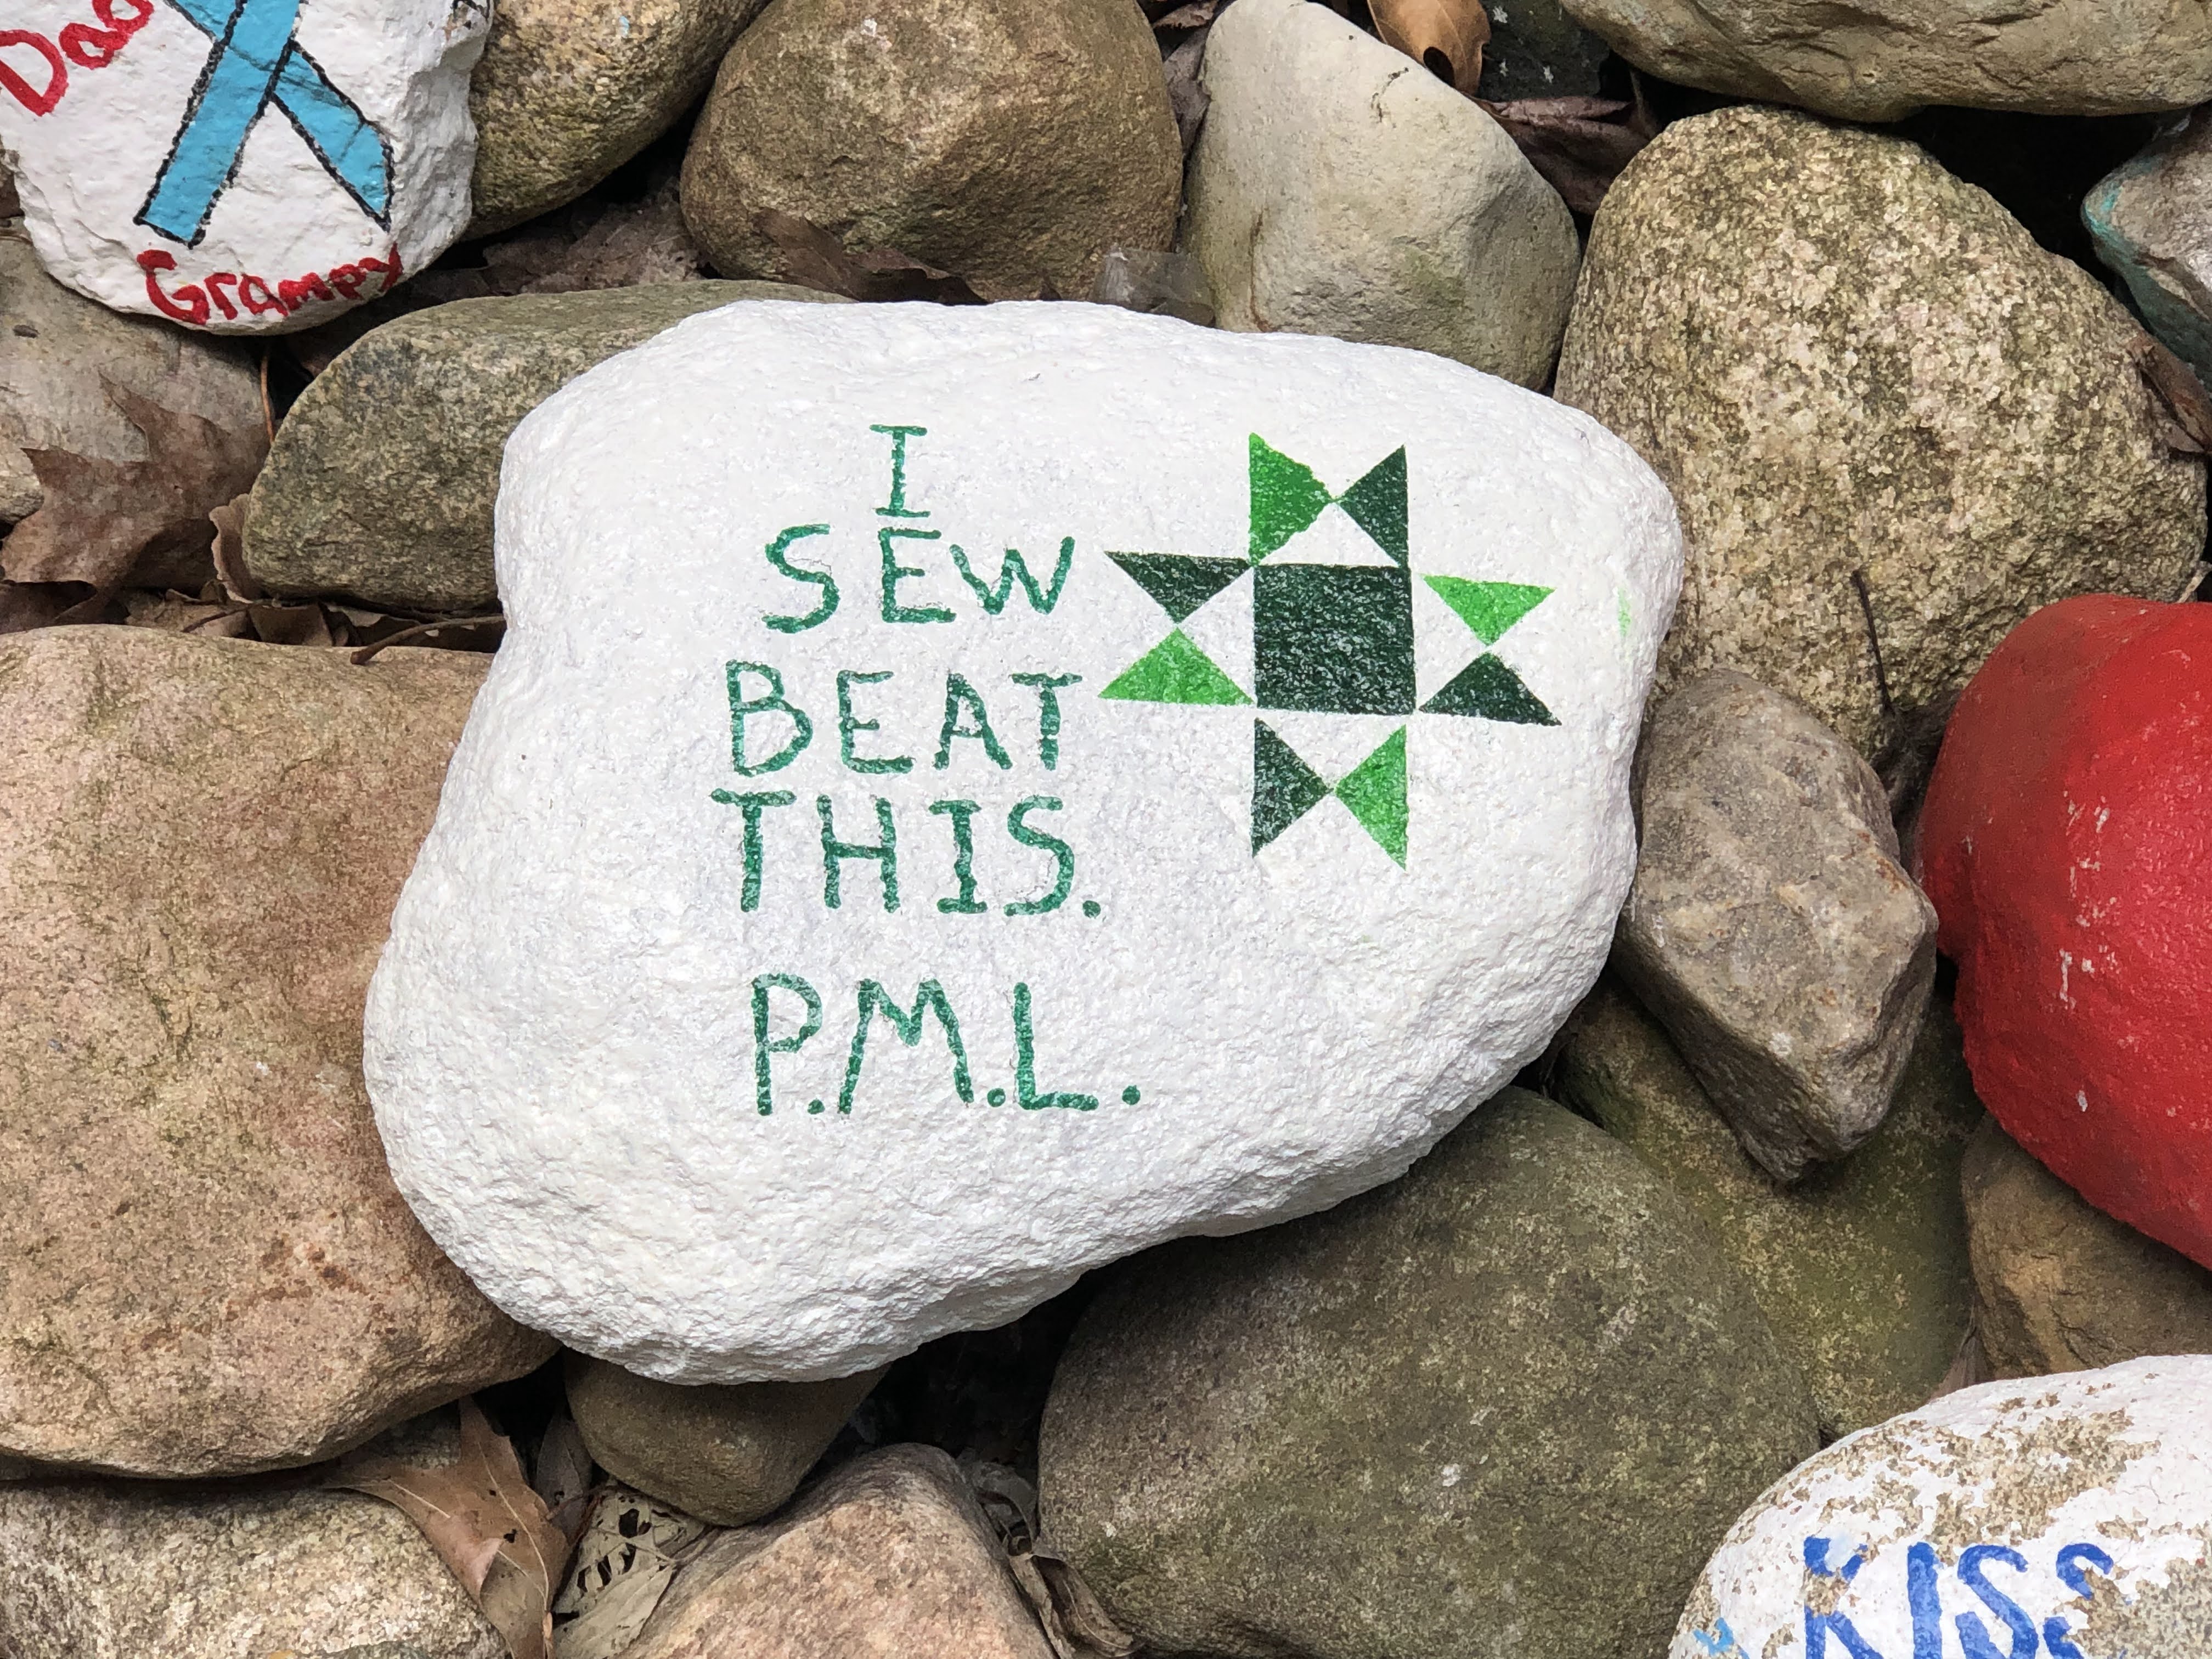
Imagine my surprise when I walked out and saw this in the garden.


Chris took a rock home and painted it for me!
I burst into tears and cried into his shoulder.
He teared up as we stood there, overwhelmed in the moment with how fortunate we were.
Fortunate that the BC was managable. 
Fortunate that the big treatments were over.
Fortunate that God loved me enough to save me.


Next week I will have a bone scan before I begin on an aromatase inhibitor.
I have 2 weeks before I begin that.
I'm not going to lie, that makes me really nervous.
It starves the body of Estrogen (which my cancer needs to grow).
No Estrogen?  No cancer growth.
I pray that God will continue to hold me in his arms and get us through this as well.
So far He has been SO good to me.

In the mean time.

I SEW BEAT THIS!


~XOP~