Showing posts with label Sliced Apples QAL. Show all posts

Friday, August 17, 2012

Sliced Apples is Finished

I have been unusually quiet lately but not because I have not been working (among other things). 
 I have the binding and labels done on two quilts.  
My friend Cori did the binding on Sliced Apples and it looks great!!  
Cori has an online shop and she is carrying one of my favorite blender lines at the moment called Running Stitches.  
I'll wait while you look. 
 It's great right?  
Her customer service is also GREAT!! 
 So I bet you want to see Sliced Apples now right?  
This is the binding and the label. 
 I'm loving it.  
Thank you so much, Cori, for doing the binding and for helping with the QAL.  
We will have to do it again sometime soon!! 


 I wanted to show you Liz's fantastic quilting too, using a hairy caterpillar pattern.  LOVE IT!


Just look at those caterpillars in all their hairy glory!

All Finished and ready for ETSY!


~XOP~


Saturday, July 07, 2012

Drum Roll Please...

And we have some winners!  
First though both Cori and I would like to thank you for playing along with our little QAL.
  Did you get your quilt finished?  
Mine just needs the binding to be turned.
Hey, it's on a list!


We would love to see your finished quilts too in the Sliced Apples Flickr group,
 when you get them done!


Now on to our winners!

The winner of the $25 gift certificate to Crazy Quilt Girl's online fabric shop is :  Stacey!!

The winner of the Clearly Perfect is:  Sara!!

The winner of the left over apple charms is:  Sharon!!!

So guys, please email me your mailing addresses so we can post your prizes to you.

Cori and I want to thank everyone that participated.
 I am planning another QAL soon, so I hope you will want to join in with that one too.

I am also going to be a stop on an upcoming book QAL too.


 Can you see the hairy caterpillars quilted into this??  They are soooo adorable!


Congratulations girls!!

Thanks everyone and I hope you stop back really soon.


Monday, July 02, 2012

Are You A Winner?

Well are you?  
Did you participate in the Sliced Apples QAL?  
You did?  
Well, make certain you post some photos in the Flickr group to be eligible for the prizes!
  What? 
 You didn't know there were prizes, you say? 
 There are some sweet prizes for participating!

We need you to upload a photo into the Flickr group 
because that is the pool we are going to draw from.  
Here are the fabulous prizes:

A $25 gift Certificate to Crazy Quilt Girl's online fabric shop!! 
 Best service on the Web!!

A Clearly Perfect, so you too can make perfect HST units with half your brain tied behind your back!


All the left over Little Apples and Moda Bella White charm squares
 I didn't use in my Sliced Apples quilt top.


This means there will be three winners!!!  
BUT...you can't win if you don't play!!!
So run right over to Flickr and post up a photo or two. 
 Cori and I will draw on Friday night so you have until then to post your photos!!!

We hope you enjoyed our Sliced Apples QAL and keep coming back for more. 
 Looks like I am going to be involved in a blog hop soon so stay tuned for that as well.

Happy quilting!!

~XOP~


Friday, June 08, 2012

Sliced Apples Borders and Finishing


We will be talking about the borders for your Sliced Apples quilt today.
 I gave you the cutting instructions in cutting directions post but will do so again here
JIC you forgot = )

I am assuming all fabric is unwashed and 1/4" seams are used throughout.

For your borders:

You should measure your center before you cut these.  I will give you the finished measurements of mine, but measure yours before you cut your white strips.

My center, all sewn, measured 40.5" X 52.5"

1st white border:

                             Cut 2 strips 2.5" X WOF (width of fabric) You will use this for the top and bottom
                             Cut 3 strips 2.5" X WOF ( sew all three together and press seams open)
                                                                          You will use these for the sides

From these you will cut using your measurements for the length of each strip.

I sewed the top and bottom borders first so I would not need to piece them.  My strips were

2.5" x 40.5"

I then added the side borders which were

2.5" x 56.5"

Pieced border:  Select 26 colored charm squares.  Cut them 2.5" x 4.5"

**TIP: If you are using directional fabric, cut some horizontally and some vertically.


You will need to sew 2 strips that use 14 of the 2.5" x 4.5" rectangles.  Sew them end to end, to make 2 long strips. Press seams in one direction.  I usually press so the open part of the seams face me as I sew them to the quilt top.   These will be sewn on to the sides of the quilt.

You will need to sew 2 strips that use 12 of the 2.5" x 4.5" rectangles.  Sew them end to end, to make two long strips. Press seams in one direction.  I usually press so the open part of the seams face me as I sew them to the quilt top.  These will be sewn to the top and bottom of the quilt.

Lay them out to make sure they fit your top.  Pin in place and attach to your quilt.  Sew side borders first then top and bottom.


I pressed mine to the colored fabric since I didn't want any color to show through on my white border.

2nd White Border:

Cut 7 strips 4.5" x WOF

From these you will cut using your measurements for the length of each strip.

     Sew two sets of 2 border strips.  Press seams open.  These will be for your sides.  Measure your top and cut to the appropriate length for your quilt.  My strips were 60.5" x 4.5"
**Your measurements may differ so make sure to measure before you cut!**

     Sew 3 strips together. Press seams open. These are for the top and bottom.  Measure your top and cut to the appropriate length for your quilt.  My strips were:  56.5" x 4.5"
 **Your measurements may differ so make sure to measure before you cut!**

Again you will sew the side borders first.

Your quilt should finish approximately 56.5" x 68.5"

 You should need no more than 4 yards of fabric for your backing, and less if you are making a horizontal back.  You might like to use your left over charms on the back too.

For binding, if you cut your unwashed fabric 2.5" wide by WOF, you would use exactly 1/2 yard.  I would get a smidge more to allow for straightening and certainly a little more if you plan on pre washing.

So there you have it. 
 I hope you have enjoyed our little QAL.  
I am considering doing a Christmas in July QAL if there is any interest.  
I already have a pattern chosen and permission to use it. 
 Anyone up for that?  
If there is enough interest I will do it so let me know what you think and I will go from there.

Please remember to add your photos of your progress and finished quilts to our Flickr group
 We LOVE seeing your finished quilts!!


~XOP~


Friday, May 25, 2012

Sliced Apples Sewing Center Directions

Cori and I talked and we decided to post today so those of you in the US that have a long weekend
could use it for sewing!!

This is the fun part. 
The sewing begins.  I used 1/4" seams for the entire project.  
An accurate 1/4" seam is important in this quilt.

Match up one white charm with one colored charm. 
 If you are using your Clearly Perfect it will look like this:


 If you don't use the CP or the Angler,
you can draw a line corner to corner and sew 1/4" away from either side of the line.

Your squares should look like this when you are finished sewing.


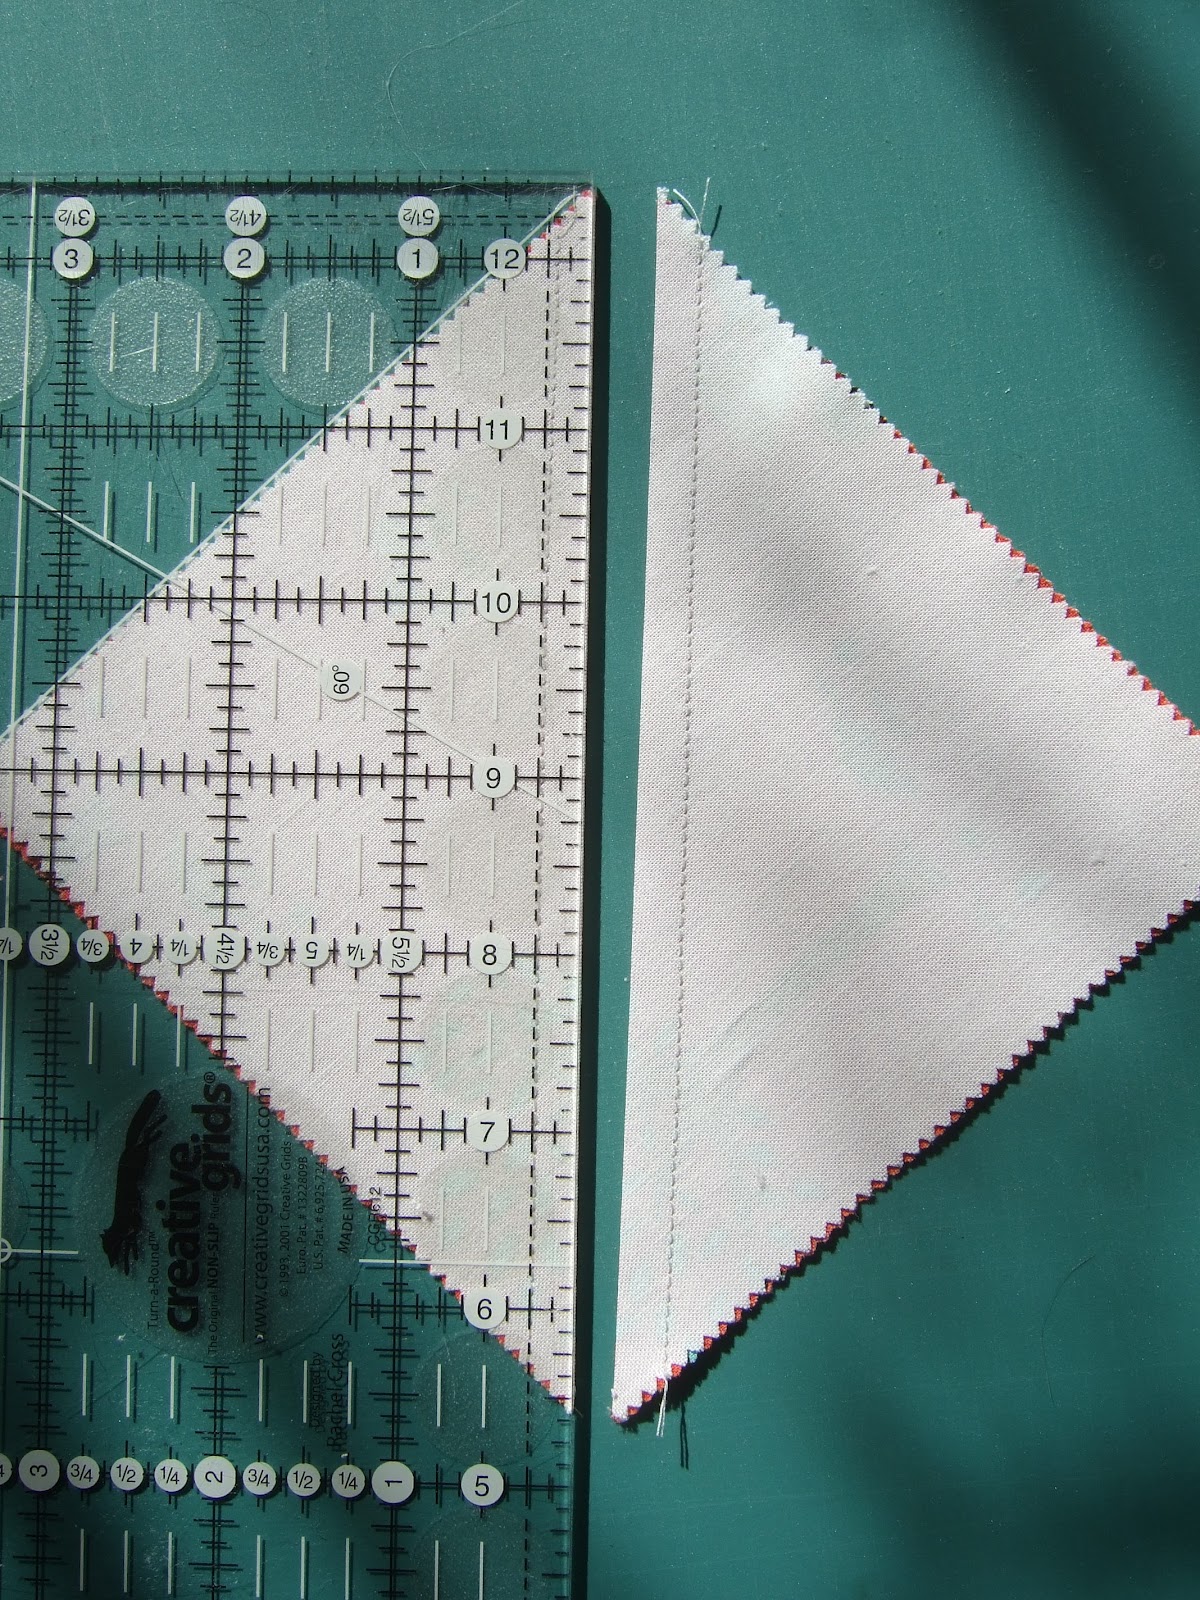
Use your ruler to cut the HST units apart like this


This will yield 2 HST units.  Press to the colored side.


You will need to trim the blocks to 4.5" square.
I use a 4.5" square ruler because that makes it easy.

Line the diagonal line on the ruler up with your sewing line and trim all 4 sides.
This is where having the turning mat makes your life a lot easier!


Wee lots of trimming!!


You will need to make 130 HST units!

Lay out your quilt center so that you are happy with the color placement.
You will need to lay it out 10 X 13 blocks.


Sewing the rows together can be a little tricky to keep track of them.
My method is as follows:
Starting on the left side stack up the HST blocks left to right,
with the left always going on top of the right.
I pin the entire row together, then stack the rows top to bottom.
 Now when you go to the sewing machine take the top pile.
 This will be the top row.
 Unpin one stack, and put that pin in the first square on the top, remove from the pile and
 pair it up with the square directly under it.
Sew these 2 together on the right side.


 Go back to your stack and put a pin in the top  HST block.
Repeat as you did with the first 2 until all 5 pairs are sewn.
You can chain piece this way and your row is all together!
Cut your first 2 pairs apart keeping your pins always aligned to the left.
This way you know how to sew them together.

It should be pin:no pin {sew together} pin:no pin.

Sew like that until you have the entire row sewn together.
Press seams in one direction for the even rows and the other direction for the odd rows.

 I like to lay my rows out as I go along to make sure I have sewn correctly.
My fancy design wall is an afghan over the couch behind my sewing machine!  


Since you have pressed your seams opposite as you went along
it will be much easier to sew your rows together as you go.
 Your seams should "nest" and you will be able to carefully position your pin point to point
as seen in this photo.
 This should help you to not cut off any of the points as you go along. 


 Once all your seams are pinned you can begin to sew your rows together.
Make sure you are using 1/4" seams!
 I sew right up to but not over my pins.
 

Once your rows are sewn they should look like this.

I like to turn my rows over and press on the back first.
It doesn't matter which direction you press these seams.
Then flip the rows over and press on the front.  

Continue to sew until you have all your rows sewn into a center for your quilt.
If you are lucky you may have your quilt inspector helping you too!


This is the most labor intensive part of the quilt.
The sewing directions for the borders will be posted on May 28th so please stop back for those.

Remember we would love you to post your progress in our Sliced Apples Flickr group.

 There will be prizes but you have to post photos of your progress to be eligible for them!


Tuesday, April 24, 2012

Sliced Apples Quilt-A-Long (QAL)

I finally did it. 
 I got together with my friend Cori (Crazyquiltgirl) and we came up with 
a QAL (Quilt-A-Long) that we think you will love!  
It's super easy and the quilt is stunning when finished. 
 Intrigued? 
 Well, here's the button you can copy and put on your blog if you are participating.
The code to copy and paste into your blog is in the right side bar.


 I have also made a Flickr group so you can post pictures of your progress. 
And I know you are wondering, so yes
there will be a prize.
It's a Crazyquiltgirl Fabric Shop $25 gift certificate!
You just need to post your progress in the Flickr group to be eligible.

Stop back over on May 1st for fabric requirements and a photo of the completed top!
Excited? 
I know I am!