Showing posts with label pillow cover. Show all posts

Saturday, April 09, 2022

Another One Bites The Dust

 I paper pieced this saying quite awhile ago.
I pattern tested for Pitcher's Boutique.
She has a whole series of designs for this theme.
Then I bought some backing fabric and promptly put it all away and forgot about it.
Until recently.
I was cleaning in my room and found it.
I am slowly unearthing old projects and putting them on my "to do" list.

I finished this today!

This is the front of the pillow cover.


This is the back.
I made it envelope style.
I looked for a form that would help me work out the dimensions I needed.
I ordered it from Amazon.


Overall I think it came out pretty well.  
I am beyond happy to have one more project complete and ready to gift.
This one will be going to a new home in the near future.

Happy Sewing!

~XOP~


Friday, January 07, 2022

Gnome Saying?

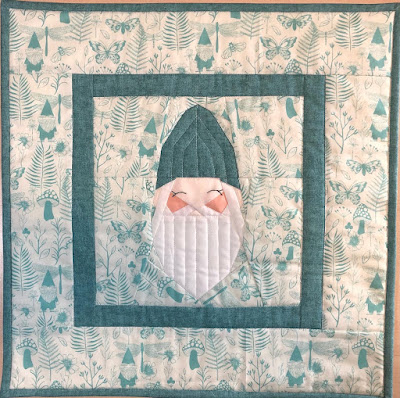
 I finished my gnome pillow cover and I could not be happier with how he turned out. 
 I used the Clarence the Gnome pattern by Moss and Lotus for the paper pieced gnome and then made my own pillow cover using the gnome for the center.


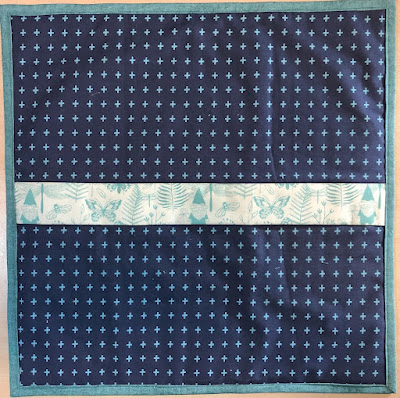
I didn't have enough of the low volume fabric or the blue from the front to use for the back.
I chose the navy with aqua accents for on the back.
I used the gnome fabric for an accent to cover the zipper.


I've been trying to do a few quick makes.
Will have more to share soon.

~XOP~


Thursday, November 18, 2021

A Few More Makes

 I have been sewing like crazy but most has been for gifts. 
 I will show a few things I have made that I can show.
  I don't think the people I made them for read my blog so I should be safe, LOL. 

I made another Nightingale quilt using the Dorothy's Journey fabric. 
 I just finished binding it!  
I have not taken a photo of the finished quilt yet though.  
Michigan weather has NOT been cooperating with my photo taking! 
 So just a sneak peek of this one.


Cole and I have been busy.  
I need to make 3 Christmas stockings.  
One for a friend and 2 for my sister-in-law.
I got started one of them the other day.  


I made stockings for this little one's parents when they got married. 
 Then I made them for their twins.  
Now it is time to make for the newest addition to their family. 
 You can see the front and the lining in this picture.


This is the back and still the lining.


Ta-Da!  The finished stocking all ready to mail out soon!


I had one block left over from the baby quilt so I decided rather than have an orphan block I would make it into a pillow cover for the baby.

This is the front of the cover, using the orphan block.


I had some fabric left over from making the quilt so I used it on the back.
If you look closely, you can see the zipper flap. 
 I was pretty excited to put a zipper in the back.
I will send it off with the quilt.  
They will just need to purchase a pillow form to make it into a pillow.


I have also been doing some test embroidery for Meags and Me.
This is one of the adorable parts of their Goodbye quilt pattern.  
I have finished all of the embroidery for the quilt, now I just need the actual quilt pattern to finish it.
They needed testers to use the format I use to check if the embroidery was alright, which it was.
Isn't it so adorable?


Hubby and I went out to pick up some things at Cabela's today for the basket raffle at our church.
We stopped in Dundee and shopped a bit.  Most of the shops have closed, sadly.
We walked by the river and I snapped this pic of us.


I have some more to share, but I need to take some photos.

So until then, happy stitching!
~XOP~


Thursday, June 20, 2019

Pillow Covers

I showed the pillow covers in the previous post but thought 
I would talk a little about them and show some close up photos too.

I was struggling with what exactly to make.  
I happened to find some amazing trim that was in the clearance section of JAF and thought it would be fun to use that on a gray background.  
I happened to have some sparkly linen that was the perfect background for this!


I did stitching in-between each row of trim and just stitched the trim down.  
Pretty basic.

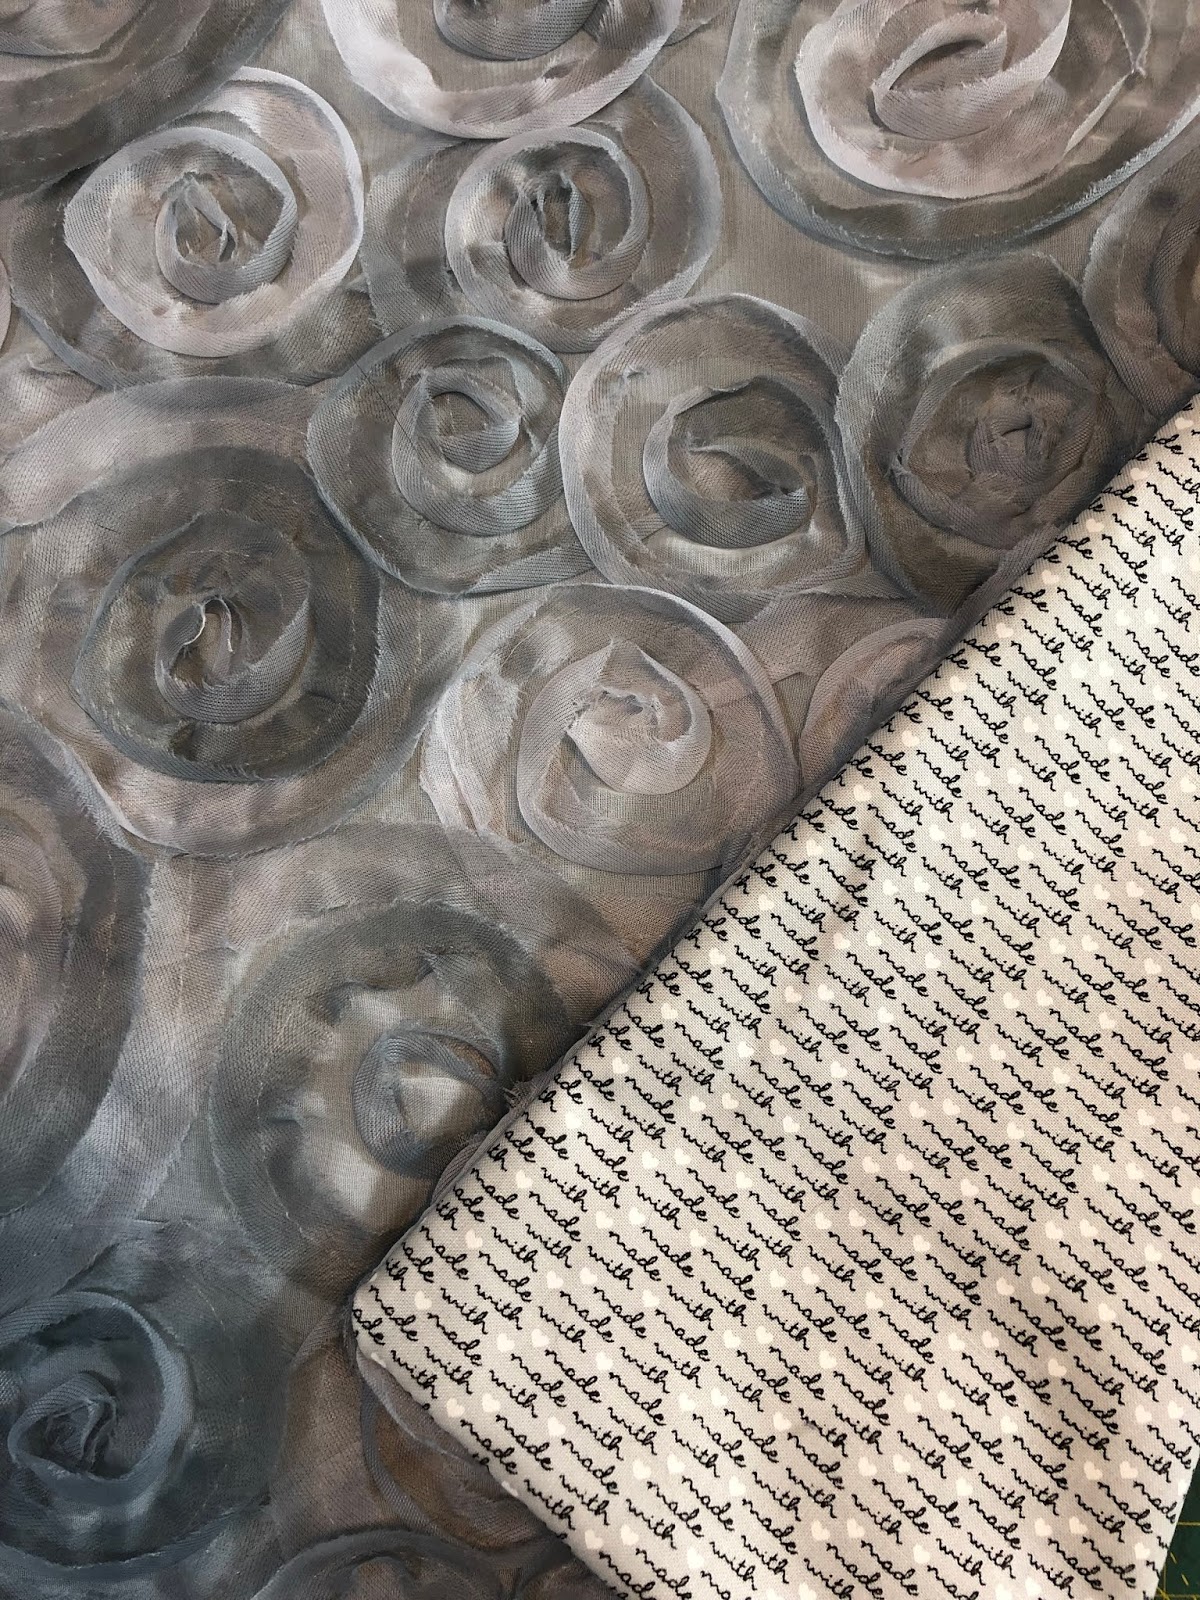
The next one I found this amazing sheer, rosette fabric.  
I knew as soon as I saw it that it would make a great pillow cover, again without a lot of work.  
I did put it on a lining of plain gray fabric prior to making the pillow cover.  
I used fabric for the back that said "Made with love". 
 I really like how it turned out.


I bought half a yard of the rosette fabric and it was actually enough to get 2 pillow covers out of.  
I have not made the second one yet, but plan to do that and keep it for myself!


This gives you an idea of the size.  If I remember this one was 20".


The other one (that she is holding upside down) is 24"


Then I new that I had to make some that were a little more complex.  
I was thinking that they wanted me to stick with their gray and white theme but she kept showing me pillow covers with lots of teal so I determined that I would add some teal to the next one.  
I love the circle of geese pattern and since I have been honing my FPP skills, 
this pattern now goes MUCH more quickly.

 I didn't think to take process photos so this is the closest I come to those.  
I wanted the geese to be in a gradient and I think it is pretty well a gradient look.


It needed something additional to make it over the top.  
I decided to get some pearl cotton and hand quilt around the geese and then around the whole thing.  
I am not a fast hand quilter.  
This little pillow took me over 3 hours!  
That was using these chunky stitches too.


I have to say that I love the look of it though.  
This is the sandwiched top when I was finished quilting it, before I pressed it.


Here is the whole pillow cover all finished and ready to be stuffed.  This finished at 18".


I had been working on an embroidery for some time off and on.  
I was not sure what I would actually do with it once done except knew it would go to my daughter, the fisheries biologist.  
I scrambled to get it finished and make it into a pillow cover. 
 This is the finished embroidery prior to doing anything else with it.  
I LOVE this so much!!


Next up was to find some fabric to border the embroidery with.  
I had this cool raindrop fabric in my stash and it was perfect.  
This is actually the back of the cover too (in this photo)


I struggled to decide how to quilt the top but settled on circles.  
It's like when a drop falls into water it makes rings.  
I decided I would use that theme for the pillow cover too.  
I then added some hand quilting around the embroidery to help it stand out.  
I used a variegated floss for this.  


This is a photo of the finished  pillow cover front.


It was my favorite of all 4 of the pillows.  This also finished at 18".


Side by side finished covers.


I think she loved this.  Look at her friend, Amy's face in this photo.  I love that girl too.


They seemed pretty pleased with these.


Now I flew down to NC so how to get the pillow forms there?  
I was not certain I could buy the sizes I wanted while there so I went on the JAF website and ordered the sizes I needed and had them sent to her house with my name on the box.  
I told her not to open the box.  
When I arrived I put the covers on the pillows.

I had bought some blue fish fabric and wanted to make one more cover, but feared I was out of time.  As it turned out, I packed more quickly than I thought I would and had a bit of time. 
 I decided to whip up the last cover (the night before I was flying out), 
sadly it would not have a pillow form.

I used a light gray stripe for front and back then the fish fabric for the bow.  
I have to send a form there this week so they can fill the cover with a pillow.


All and all I am super happy with how all of these came out.  
I might do a few things differently in the future of pillow cover making but I really like all of these.

~XOP~


Wednesday, September 05, 2018

Cocoa's Pillow Cover

My friend lost her chocolate lab recently.  
They had her for a long time and she became ill recently.  
They tried everything they could to determine what was wrong but 
none of the vets could diagnose the problem.  
She continued to decline and recently lost her battle.  
My friend was so distraught.  
It is never easy to lose a pet no matter how long they are part of your life.  
So, of course, I decided I needed to make something to commemorate her Cocoa.
I made this pillow cover!


I really liked that I could use the "love" fabric for the background.


I think this is the entire extent of my dark brown fabrics in my stash too!


 Of course Cole was modeling the backing which matches Cocoa's bandana.


Finn was under the table tormenting him.  LOL


I gifted it today and she loved it!

~XOP~


Friday, April 27, 2018

And The Prize Goes To...

Each month my friends at work and I make a goal list for the month 
using a common spreadsheet in Google.  
We change the color on the things we complete.  
The person that finishes all their tasks gets a chance to win a prize.  
You would not believe how this has motivated each of us to work hard to get our list completed.  
We are all, apparently, super competitive!  
The person that wins each month is not eligible for the prize the following month but must 
provide the prize for the next winner.  

It was my turn to provide the prize for April.  
I believe our winner will be our friend, Judith.  
I have been trying to make something rather than just give some fabric or something.  
Will I always have time to do that?  
Likely no, but I am going to try to make a little something each time it's my turn to give. 
 That being said, since I figured that Judith would win I started my plan to make something for her.

When I first met Judith, she had a Cockapoo named Goxie.  
He was mostly black but had a white/silver beard. 
 I found a photo of him to use as my color guide and 
began looking for a drawing I liked to use for the plan I had in mind.  
I found a pretty good drawing and worked to turn it into an applique.  
The problem with this is that the layers of the applique didn't really show up since he is all black. 
 I figured out if I outlined the black with white you would be able to see the outlines of the layers, 
so that's what I did.
Judith does editing for our lab so 
I used black fabric that had white words on it for the main part of the dog.

Ready to see what I'm talking about?  Here is the applique all built and ready to stitch around.


I decided that I was going to turn it into a pillow cover so found some black and white fabrics to use.
I used some that have significance. 
 There are birds, chemistry symbols, cats more words, houses and 
even one that says "Made with love".


Once I had the pillow top sewn together I put batting behind it so that 
when I outlined the dog's face it would "quilt" it at the same time.  
I dropped my feed dogs and used a straight stitch and FMQ 
(what I like to call scribble stitching) around the dog's face.  
Then I outlined his whole head.  You can see it best from the backside here.


This is what it looked like from the front side.


Then I put on my walking foot and did some straight line quilting. 
 I used some tape to mark my stitching line then guided off that line.  
Around the outside I did lines following the outline of the square of the pillow.  
This is the finished pillow cover and it will fit a 20" pillow form. 
 I made an envelope style back following the directions of Amanda Jean over at Crazy Mom Quilts.  So easy!


I get to gift this on Monday.  I am sew excited to give this to Judith.  I hope she loves it!

I am linking up with Crazy Mom Quilts for her Finish it Friday.

Have a great weekend!

~XOP~