A friend of mine showed me how to make this neat little block using
a layer cake square (10" square) and a charm square (5" square).
Apparently there is a whole host of "fold and sew" quilt blocks out there.
Who knew?
I am thinking that Handicrafts by Peg may be the originator of this technique?
If not she certainly had a LOT of cool fold and sew blocks!
Go and check her site out!!
I don't know about you but I am always looking for quick and easy donation quilts to make up.
When my friend showed me this block, BINGO, quick and easy donation quilt!
Then I started thinking about it and it is also an excellent way to make a quick lap quilt.
I have this fish fabric hanging around that both my husband and my daughter would like.
I need a new lap quilt for him and she is always wanting whatever quilts I make.
I have not had much time to work on it but I did get a block or two made.
Once these wedding/grad quilts are finished I hope to have time for some selfish sewing
Let's get started. For each block you will need one 10" square and one 5" square.
Place your 10" square face up and your 5" square also face up on top of your 10" square.
I like to vary the placement of each charm as then I don't have to match up seams
when I sew the blocks together.
Just don't place it too close to the edge.
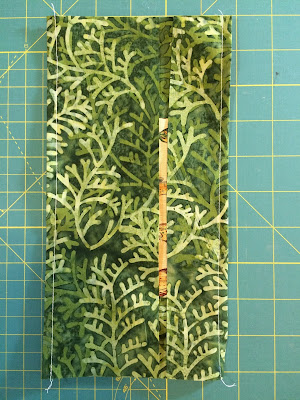
Next you will fold in the two sides.
They will NOT meet in the center.
I used a Hera marker and my ruler to make a crease to fold on.
I placed my ruler on top of the charm and lined up the right edge of my ruler with the right edge of the charm making sure the charm was straight
by checking the ruler markings on the top and bottom edges of the 10" square.
(I forgot to take a photo, but if you need one tell me and
I will take one on another square and edit this).
I ran the Hera marker along the edge of the ruler from the bottom of the 10" square to the top.
This makes a great creased line to fold on!
I used the marker as the fold line needs to be butted up to the 5" square.
Using the marker to make a crease made sure it was exact.
Once you have creased and folded both sides, press the folds.
Take your folded piece to your sewing machine and sew 1/4" from your folded edge.
Press the sewn edges open.
Turn your square and fold in the other two sides the same way you did the first two and
stitch along the folded edge.
Just like you did for the first 2 folds.
You can see all the edges are sewn in this photo.
This is what it will look like on the back of your block when it is all pressed open.
As you can see all your seams are enclosed!
Trim your block to 8.5"
Ta-Da, here is your finished block! How easy was that?
I hope you enjoyed learning this technique. I know that I sure did.
Thanks Pauline for showing me how to do this!!
I can't wait to make some more fishy blocks for my quilts!!
Please let me know if you make some of these blocks and if you have any questions.
Have a wonderful day!
~XOP~


7 comments:
This technique also works well if the small square isn't square but some wonky four-sided shape.
Thanks.It's the first time I see it and sure I'll try it!
How fun!
must try this sounds a great idea,
I've never heard of this technique.... thank you for sharing!
That is a very cool technique. Thanks for sharing.
Today, I went to the beachfront with my children. I found a
sea shell and gave it to my 4 year old daughter and said "You can hear the ocean if you put this to your ear." She placed the shell to her ear and screamed.
There was a hermit crab inside and it pinched her ear.
She never wants to go back! LoL I know this is completely off topic
but I had to tell someone!
Post a Comment
Your comments make my day so much more special. Please, I invite you to share what you think. ~Happy Stitching~