Showing posts with label Spooky and Sweeter. Show all posts

Tuesday, January 17, 2023

Trick-Or-Treaters

 I have finished binding my pattern test quilt from Meags and Me.
It's called Trick-or-Treaters


I just love these little Trick-or-Treaters.
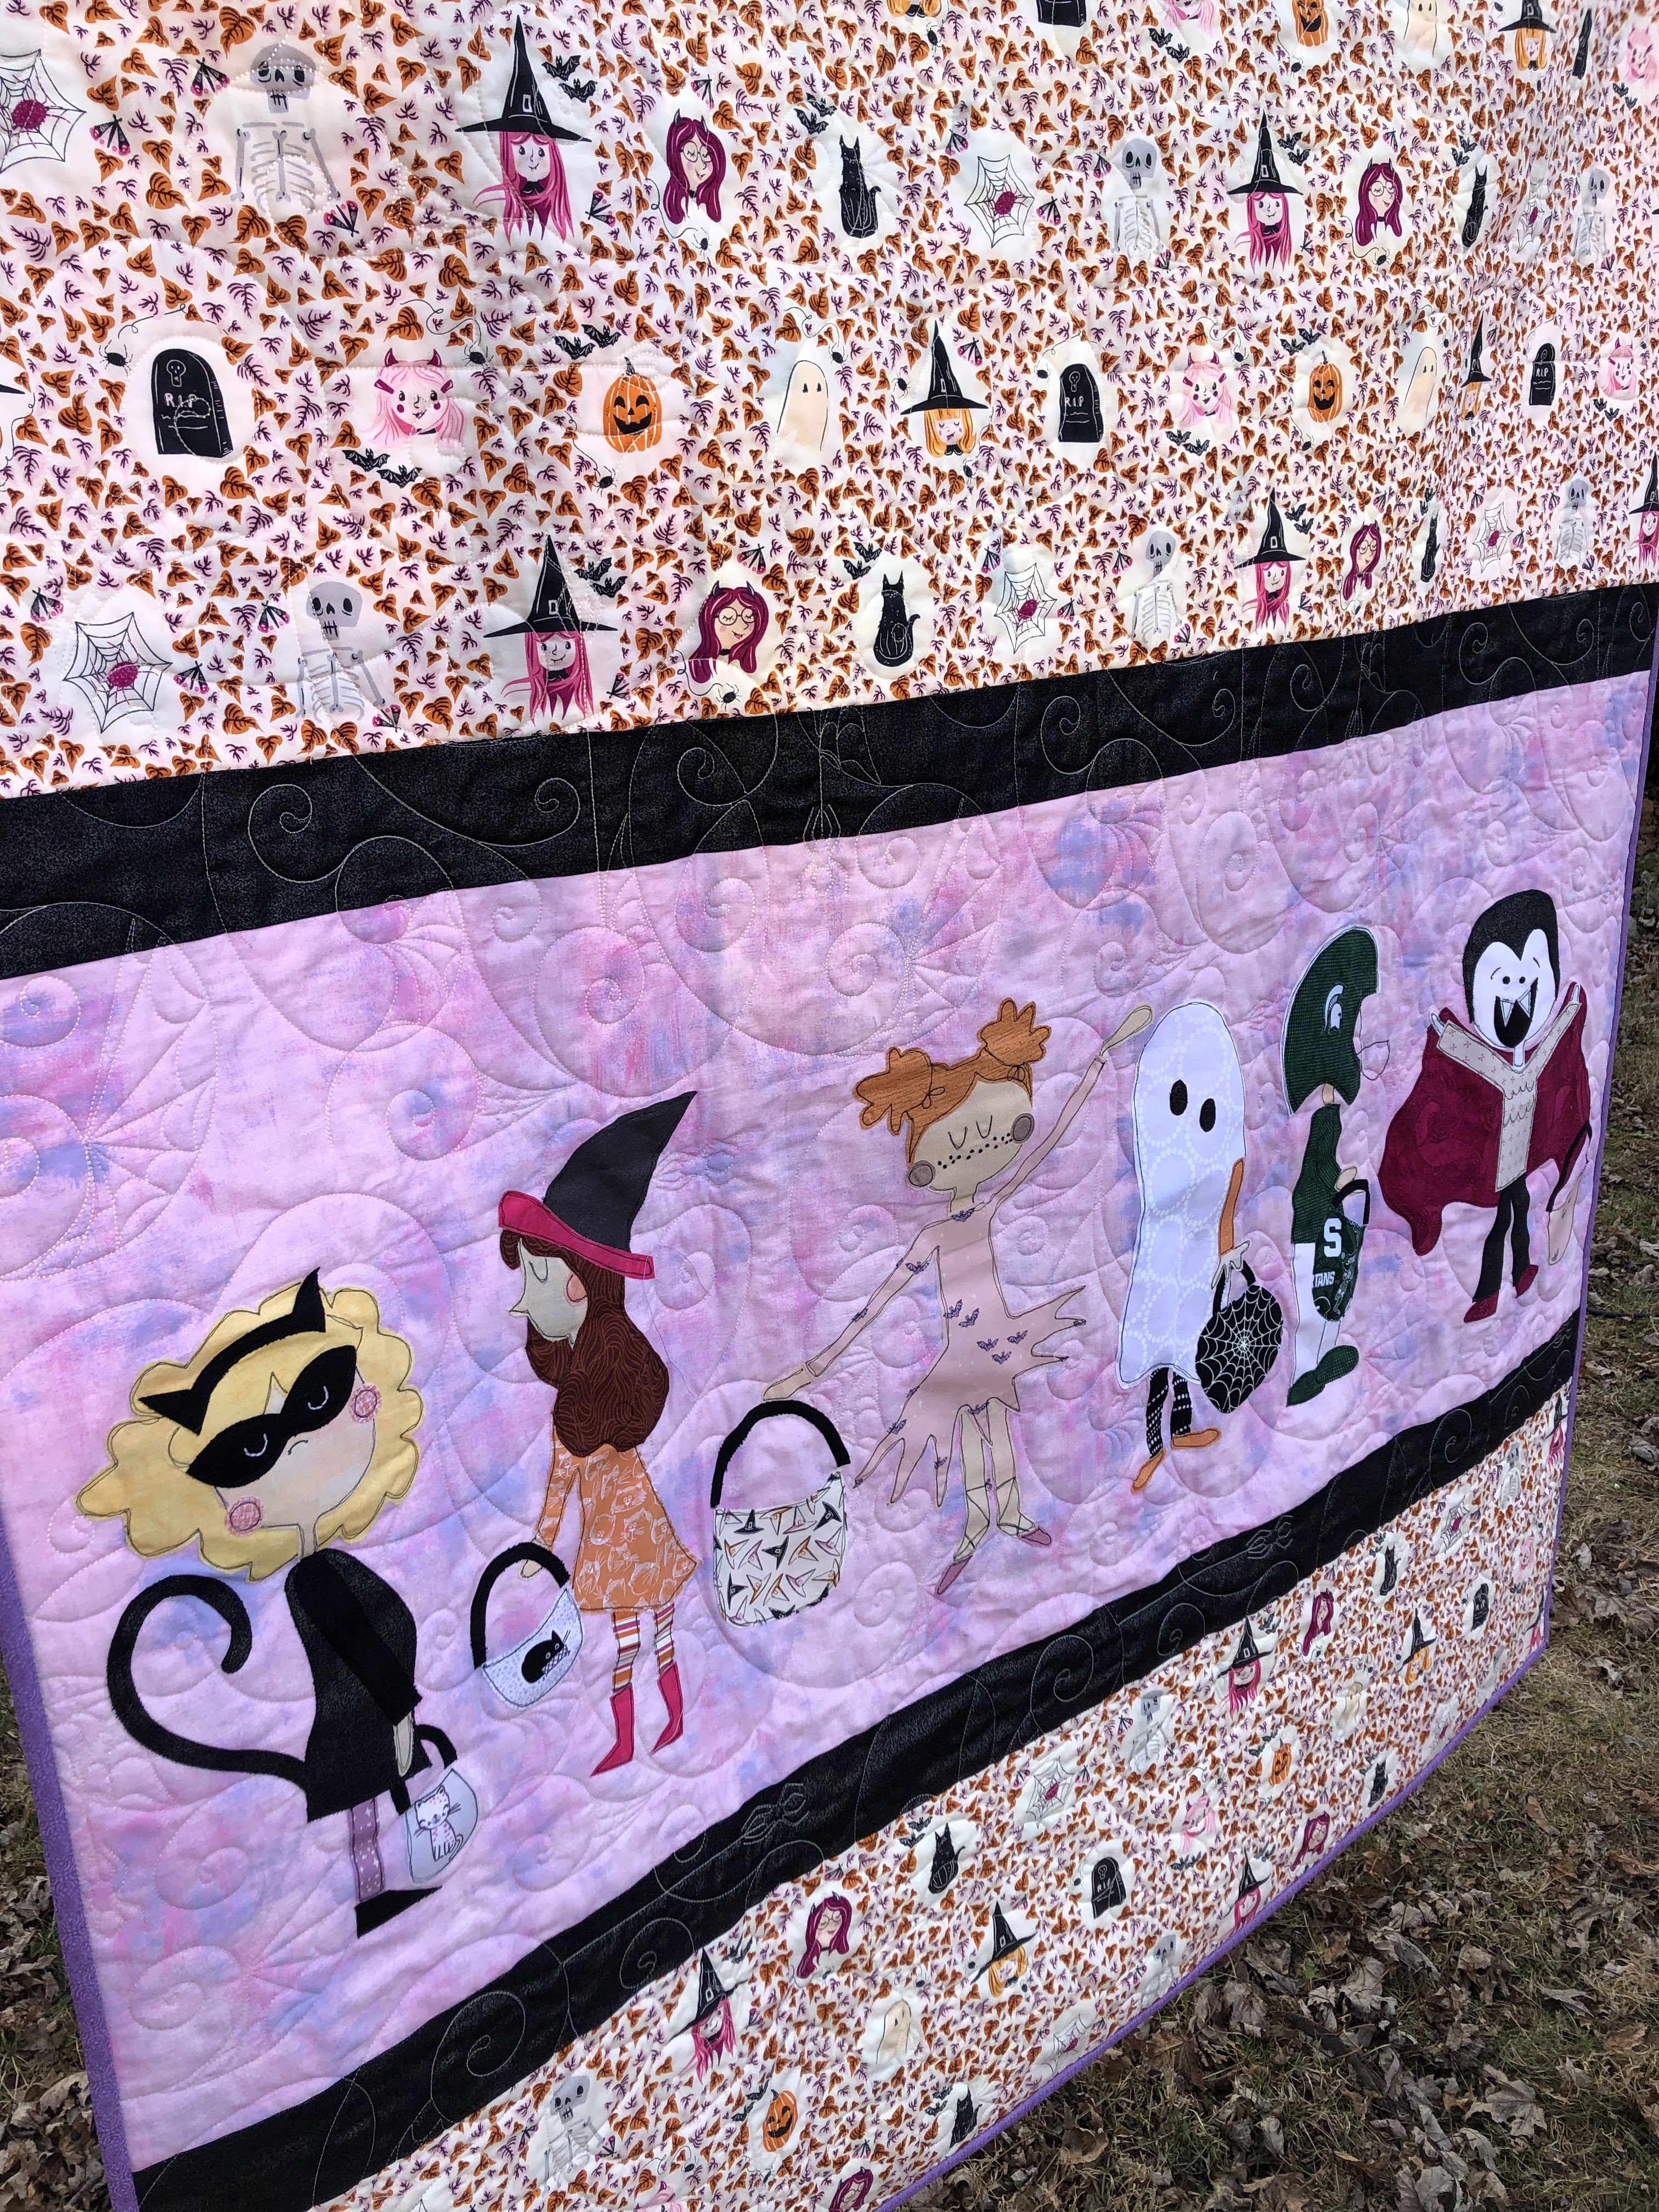

I used fabric from the Art Gallery line, Spooky and Sweeter for the upper and lower part.
I used a Grunge for the applique background.


I had to piece the upper and lower part because the pattern was wider than the fabric.
If you look closely you can see where I pattern matched down the skeleton.
It's a bit tricky but worth the effort, I thought.


I finally figured that if I had shrunk the applique section by 20% I could have used the WOF without having to piece the top and bottom sections.
I would suggest that if you are planning to make this you consider doing that too.
Alternatively, you could use a smaller print that wouldn't matter if it matched.
It is such a large area I thought this print would be too cute to pass up using.


In the end, I really love this pattern.
It was a fun one to make.

Next up I am working on finishing up another Meags and Me pattern test called 
Little Nugget.
It's full of Hedgehog goodness so you will NOT want to miss it.

~XOP~



Saturday, July 23, 2022

Trick-Or-Treat Quilt

 I spoke previously about pattern testing this quilt for Meags & Me.  
I finally finished the top. 
 It is ADORABLE!  
I handed it off to Liz to quilt today. 
 I just thought I would share the top with you all. 
 If I were to make it again, if they didn't make this change,
 I would decrease the applique pattern by ~20%.  
Doing this would allow the rest of the quilt (very top and very bottom) to fit on the width of fabric. 
 I ended up having to piece it (and I am not fond of pattern matching). 
 I do have info on how I do it though that you might find helpful so will share that in a few.


That top fabric, the cameos, are from AGF Spooky and Sweeter line.
I used Lupine Grunge for the applique background.


Here is where I pattern matched on the top.
It was along the skeleton.


My favorite way to pattern match is to fold under one side and using a glue stick stick it in place to match up with the other side.
You do need to make sure you have at least 1/4" though!
I press with the iron, then open it up and using a ruler, draw a line in the crease.
If you have really good eyes, you don't have to draw a line.
I just find that I can sew it better if I have a line to follow.
If light fabric, I use a Frixion pen.
If the fabric is dark, I use a Chaco liner pen.
Then I stitch down on the line, and if the seam allowance happens to be larger than 1/4" I trim it.
MOST of the time it works really well.  
I find the glue stick really helps keep everything in place.
If you give it a try let me know.

Additionally, I don't cut 2 pieces at the same time.
I cut one to the correct size, then see where the second one needs to line up before I cut it to size.
I have been burned by cutting BOTH sides then not being able to line them up and keep my length.

If you have any tips please share in the comments.

~XOP~


Monday, May 16, 2022

Pattern Testing

 I have been working on another pattern test for Meags and Me. 
 It is called Trick-Or-Treat and it is adorable!
It is a group of Trick or treaters.
I decided to "build" the appliques using an applique sheet.
I couldn't find my Godess sheet so I used some small sheets I have to do it.
When the applique was too large I used some of the fusible paper.
You can see in the photo that I taped the original to my light box.
I put the applique sheets over the drawing.
I then placed the fusible pieces where they went.
It was SO nice using this system to get the placement just right.
Several times I had to lift the applique sheet to my ironing board to fuse them put back on the light box.


Here you can see the "built" applique.


These are the other children.
You can see that I have them placed over the original drawings.
They fit exactly.


In the next 2 pics you can see the "built" applique on my ironing board.


The nice thing about building the applique is that I can pick them up and they are intact.
I was able to lay them out on their background and fuse them.
So rather than try to guess about placement,
 I could place the while child and move as necessary.


I have placed them on their background but not stitched them down yet.
I also have not taken any additional pictures, LOL.
I am using this fabric to complete the quilt.


Unfortunately I did not realize my fabric choice means I will need to pattern match.
The width of the design is ~50" so since my fabric runs horizontal I will need to piece it.
I am not a huge fan of pattern matching, so this has been pushed to the back burner for now.
I would change fabrics, except I based all the colors on the vignette fabric.
Oh well, live and learn!

Going in for my third radiation treatment today.
Only 10 more after that!

Peacock painting up next so please stop back!

~XOP~