Thursday, June 16, 2016

Onsie Making At It's Finest

I am helping to throw a baby shower for my niece.  
I decided that decorating Onsies would be a good idea. 
 I did this once before for another niece and it seemed to be a hit so why not?!  
I gathered Onsies (harder to find than I thought) and set to printing up many under the sea 
(and near the sea) creatures for said Onsies.  
I think one of my favorites will be the Narwhal.


What's that you say?  
You want to plan a Onsie decorating party too but you don't know how?  
Then let me walk you though it.

First determine the theme of the Onsies.  
In this case sea life. 
 I did animals previously, you could do farm, or alphabet, or vehicles, whatever you like. 
 Next is to look for coloring pages online in your theme. 
 I Googled sea life coloring pages.  
I found pages that I thought would translate well into doing fusible applique and printed those.  
 I used the copy machine to resize to a size that would fit on the Onsies. 
 I got the Onsies in many sizes, 0-3 months, 6-12 months, 12-18 months and 24 months.  
Get a good range. 
 Some of mine are long sleeved and some short.  
I chose all white but there are plain colored ones too.
  It is a good idea to look for them at the end of the seasons 
(ie short sleeve at end of summer and long sleeved at end of winter) if you have the time. 
 I didn't.  

Once you have your designs you are ready to trace them.  
I flipped my page over (using the back and a light box) and traced it onto fusible breaking the design apart as necessary.  
This means when they are trying to make the applique it will 
exactly match the one on the coloring book page front. 

 Then I figured out which fabrics I wanted to use for which parts 
and fused the design to the back of those fabrics.  
Isn't that stripe perfect for the horn? 
 I rough cut the fabric as you can see in the photo.
  Voila! 

 Bag the fabric parts, original coloring page and one shirt and you are ready to go on to the next one.  I found making these "kits" helped at the actual party.  

At the party, I let people choose which kit they wanted to do.  
They cut out the fabric pieces and placed them on the shirt 
(with supervision, it's tricky when there are pieces that need to go 
under and over other pieces so make sure you are helping).  

I brought a little ironing board and iron.  
They brought me the Onsie and we placed the fabrics on the Onsie, at the board,
 using the coloring page as a guide for placement.  
Then they fused the design in place.  

We hung them up around the room on a clothes line for display.  
I took them all home and stitched around them and gave them back to the mom-to-be. 
 So. Much. FUN!

If you have any questions about any of this, just email me and ask! 
Or leave a comment here but be sure to leave your email address so I can respond!

Of COURSE you know I had help with making these kits right?


Oh Autumn, you are such a good helper!

Thanks to everyone that linked up yesterday.  
I will try it again next week so get your WIP pictures ready!

~XOP~


Wednesday, June 15, 2016

WIPs With Friends

I see that Lee over at Freshly Pieced is no longer doing the WIP Wednesday link up.  
I think I will make a link up here for those of you that might like it.  
I can try it with photos (I think you get some trials for free).  
If it catches on, then I will pay for that service, but you have to play along!

I had an unexpected trip to Grand Rapids to replace my sister's broken tv.  
The good that came of that was I got to stop at Stitched Studio on the way home. 
 I love visiting that shop so much!  I picked up a few additions to my stash while I was there.

This very modern fishing fabric caught my eye.  
I know you are saying "fishing fabric"?  Yes fishing fabric. 
 Hubby fishes and DD2 is a fishery biologist, so I need to make a couple of fish themed quilts.  
Have you seen the fish fabric that's out there?  
Realistic, dark and drab fish.  Loved this 
(and that crosshatch worked perfectly in with these too).


You can never go wrong with some Tiger Lily.  Love, love, love this line.


As fate would have it we also had time to stop at Keens in Mason for a little more retail therapy.  
I need to find yardage of this aqua pronto for another Fox Face quilt!


Some new Tula? Ummm yes please, don't mind if I do!  
Those two flower prints are two of my new favorites!


Remember these silly faces?  Well I'm making some more. 
 I just loved these so much.
I have a story to tell you about these but 
I can't share more than the fact that I am making more of them for the minute. 
 I will share eventually and you will all understand.  
This is one of the things I am currently working hard to finish.


I am slowly making progress on more of these things.  I am also linking up to Let's Bee Social.

~XOP~


Monday, June 13, 2016

Beep Turns One

That's right!  My grand peacock, Beep turned one on Sunday. 
 My daughter texted me to tell me this and my response was "Is there a party?"  
The response?  "Of course there is a party!" 
 LOL  I was in charge of procuring the cake.


My son did the grilling (with Beep's supervision of course)


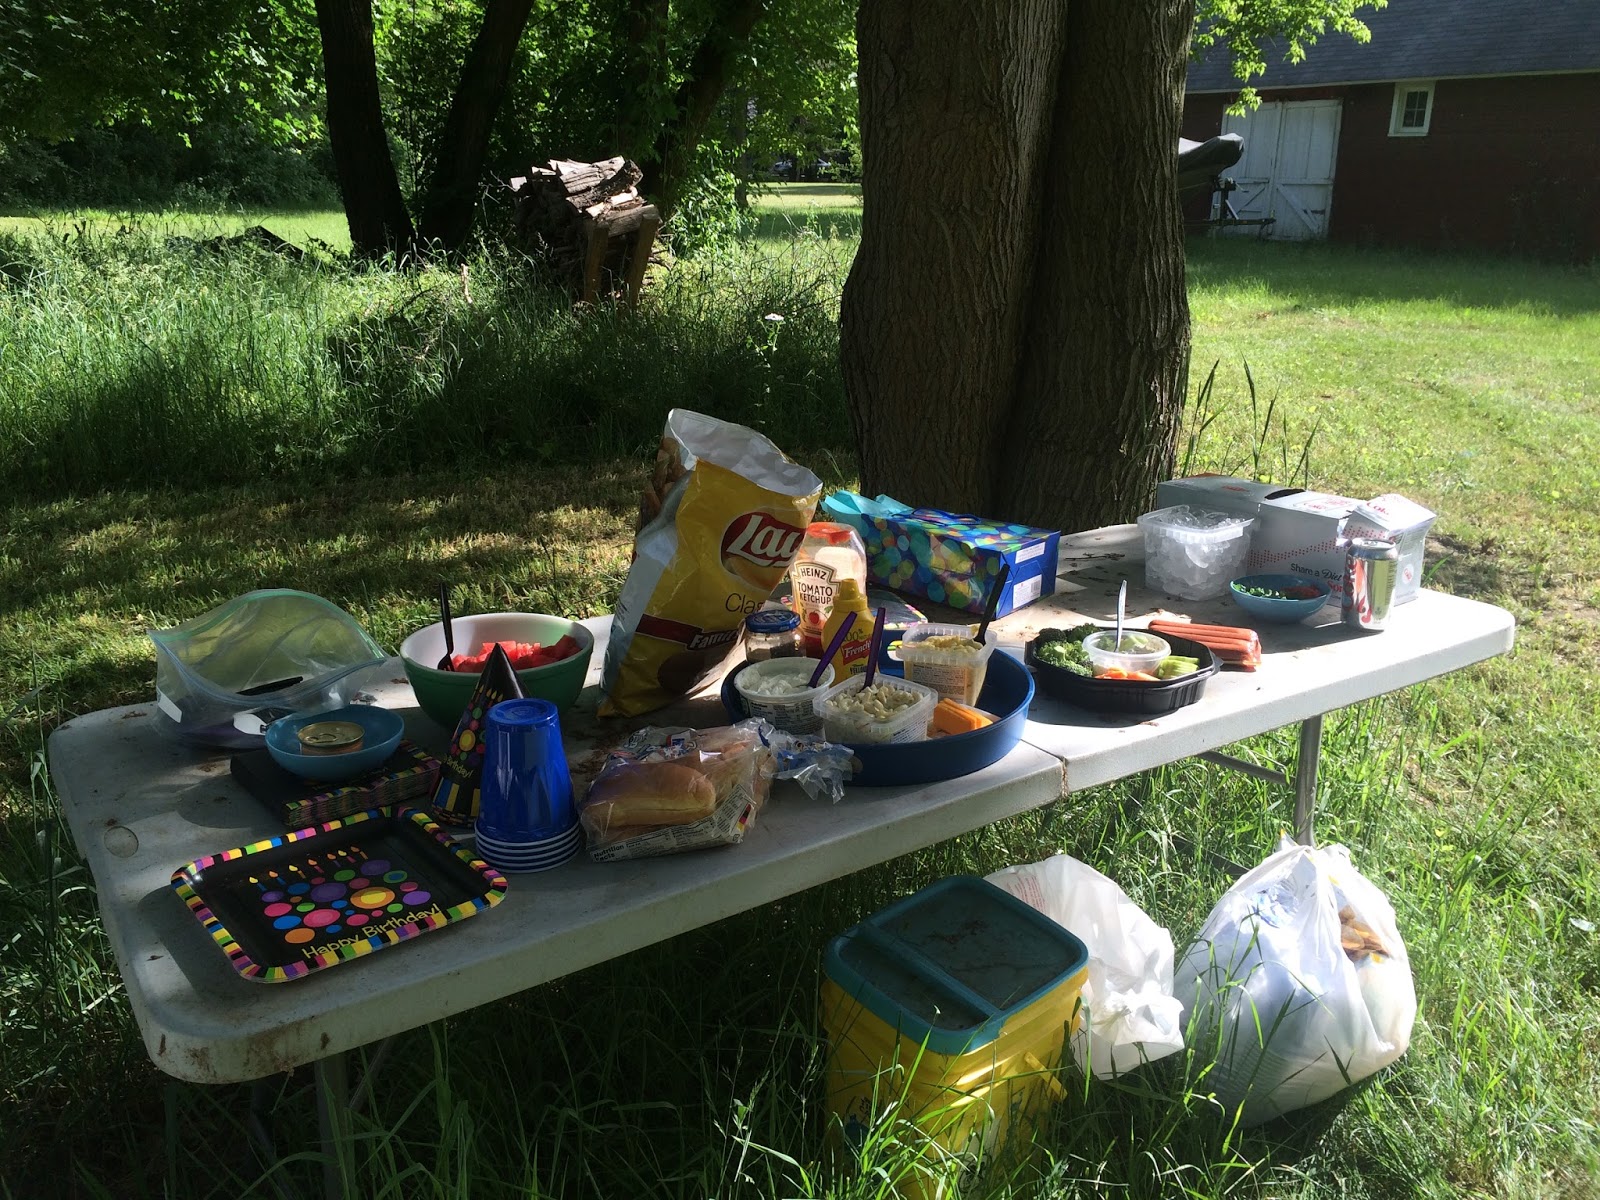
The party table was set.


 Beep was awaiting her birthday feast.


If you will notice, Beep had a bowl on the arm of the chair.  
She instead, helped herself to my daughter's food.  That bird loves her some dip!!


We sang happy birthday but I only thought to turn on the video part way though.


My hubby and the birthday girl.


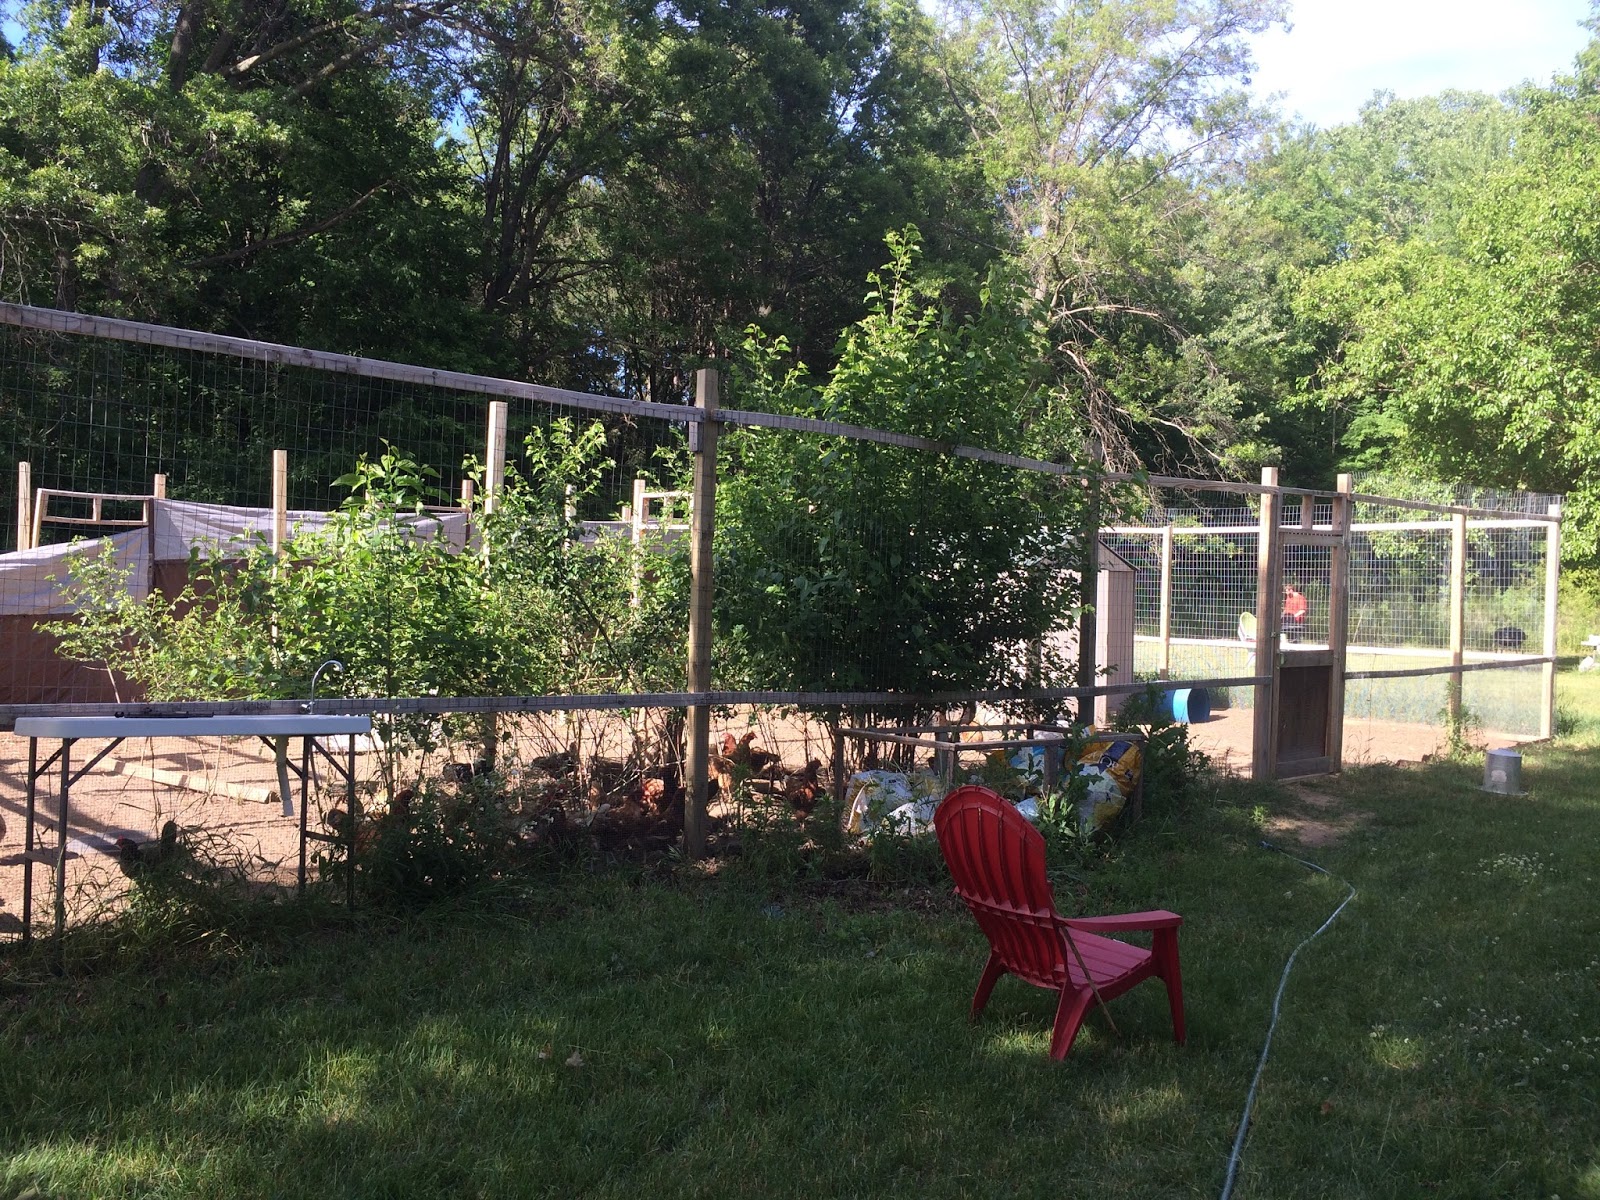
People ask about the farm so here are a few photos of the outside pens.  
This is the main chicken pen.


The pen on the left houses some of the peafowl and the connecting one on the right is just chickens.


You can see how large the chicken pen is. 
 It will eventually be broken into 3 pens so birds can be separated out for specific breeding. 
 FD has some particular peafowl and some very expensive chickens that she would like to breed and know that the eggs are specific to those pairings.


Not the best photo but you can see Blu, her India Blue male resting on the top of that barrel.


All in all the birthday party was GREAT!  

I hope you had time to celebrate with your loved ones this weekend too. 

 After the shooting in Orlando, I feel even more, that it is necessary 
to tell those you love how you feel.  
Spend as much time together as you can and love one another!

~XOP~


Friday, June 10, 2016

A Little IKEA Trip

I headed off to IKEA last night in search of some of the orange cat fabric I have seen online.  
I managed to snag a few yards for myself and for my friend.  
It is kind of a light weight canvas.  
It would be great for bags or for outdoor cushion covers.


These bees were kind of cool too.


As I was walking out I saw everyone's favorite cart and say WHATTTTT???? 
 Look at those magnetic bins attached to the sides!!!  
One more way to increase storage without increasing the footprint in my sewing room!  
I always seem to have little "things" that need a home.


I wasn't keen on the food pics, but they come out and the top is clear.  
This way you can see inside the bin.  
Or I suppose you could make a photo and put it on the cover too.


Another thing I do in my room to maximize the space utilization is put my mini ironing board 
on top of my cart.  
It's handy and it is movable.  I
 even recovered the board with the metalic reflective peel and stick ironing board cover material. (made by Bo Nash and you can find it here
I love using this! 
 Easy to change and multiplies the heat.


Another space saver is a shoe holder that fits over the door.  
I use it on the back side of my door in my sewing room.  
It's a great place for me to keep things like cards, floss, tule, and bits and bobs that are too big for those canisters and not used frequently but I can never seem to find otherwise! 
 LOL.


As I was taking photos in my room, Hallie was "helping".  
You can tell the difference between her and Autumn as Autumn is a little bit of a thing and 
Hal is a chubba wubba.  
HAHA, I love my calicos!


Enjoy your weekend and make time to do something that makes you happy!

~XOP~


Thursday, June 09, 2016

Busy City Follow Up

The Busy City quilt is on it's way to Europe and it's new owner. 
 I can't wait for little Vic to have it. 


 In addition, we all bought cars/vehicles to match the ones on the quilt.  
We even managed to find an ice cream truck!  
Believe it or not the police car was the most difficult one to find.  

We decided that they vehicles needed a bag for housing them. 
 We bought the cutest fabric while we were all in Shipshewana. 
Robin made the bag from the tutorial by Jeni Baker. 
 You can find that right here if you need to make one too. 

There are a few versions on Jeni's blog, In Color Order, under her tutorial page.  
 They are fabulous for putting things in for children.  
Robin made one for her granddaughter and put little jungle animals in it.  
So cute!  


 I made a hand embroidered label for the back of the quilt and Robin sewed it on to the quilt.


I hope Vic loves this as much as we loved making it for him.
He might be a little young for the cars/trucks, but I bet he will love those too!

~XOP~


Friday, June 03, 2016

Busy City Quilt

If you have followed me for any length of time you know that I get together with 2 of my work friends periodically to sew. 
 Last time we made a wedding quilt for a lab mate. 
 This time one of our co-workers is going to visit a woman that used to be in the lab 
but now lives in Belgium.  
This woman had a baby a few months ago and the one going to visit said if we had anything to send along she would take it.  
Well, but of course we do! 
 I immediately thought of the pattern Busy City, that I have had for quite sometime now. 
If you want a copy, and I think you will, it is available here.  

 It is little construction vehicles and they are all paper pieced. 
 This lent itself to each of us making 4 vehicles. 
 So we got together at Robin's house.  
We brought all our solids and I brought the background fabric (Moda Bella Feather).  
Robin set us all up at her dining room table. 
 It's kind of dark but you can see Judith sitting at the table.  
She even had a cutting station set up and we had individual ironing stations next to our seats!!!


Here is Judith with her cement mixer before I appliqued all the wheels on to it.


 This was our progress through out the day.


Judith had to bring hers home to finish but we got all of these finished and 
that is the fabric we were using for the back.  
It was a really cool flannel. 
 I later learned that I could not match up the buildings as the fabric was not really printed straight.  
So I had an idea for the back that you will see further down this post.


I just got it back from the quilter a few days ago and I am in love with how Kathy brought it to life! 
 I found the pattern of the construction vehicles that go around the perimeter of the quilt and we asked for wavy lines like a road for the center. 
 Kathy put wheels in the blue border and in the corners of the white border.  
Such an amazing quilting job, thank  you Kathy!  
She takes quilts by mail if anyone needs a fantastic quilter.  


This tow truck was in the pattern but the hook was not.  Robin added it using some hand embroidery.

You can see the wheels here.  I used Perfect Circles to make these on fusible.  
It made making the wheels go so much more quickly!


Here are a few more vehicles


I made the police car.  If this were for someone here in the US I would have put the city police name on the car.
 There are so many ways you could personalize this quilt with embroidery or fabric markers!


This is how the back turned out.  Isn't it adorable??


Close up of the vehicle quilting.


A few more vehicle close ups.  A back hoe


And a cherry picker


Ready to see the finished quilt front??  It is so cute!!!  
I can see making another one or 2 of these in the future.  


Linking up to Crazy Mom Quilts Blog.

Enjoy your weekend!

~XOP~